From shape layers and adjustment layers through to layer comps, Smart Objects and layer masks, there’s a lot more to Photoshop layers than meets the eye. To really get the most out of Photoshop, you need to know these features inside-out, and that’s where the Photoshop CS3 Layers Bible comes in.
Written by Matt and Simon, ELATED’s in-house Photoshop experts, this book covers everything you need to know about layer techniques in Photoshop.
The book is published by Wiley, and is available online from Amazon.com![]() and Amazon.co.uk
and Amazon.co.uk![]() , as well as from all good book stores worldwide. To whet your appetite, here’s a chapter-by-chapter summary of what you’ll learn when you read the book.
, as well as from all good book stores worldwide. To whet your appetite, here’s a chapter-by-chapter summary of what you’ll learn when you read the book.
Chapter 1: Introducing Layers
In the first chapter you learn about the concept of layers in Photoshop, and why they’re so useful. You study the Layers palette, learn how layer transparency works, and look at the different layer types available in Photoshop. After a brief run-down of new layer features in Photoshop CS3, we walk you through a simple, practical example to help you get your feet wet with layers.
Chapter 2: Managing and Organizing Layers
This chapter covers the nuts and bolts of working with layers. You take a look at creating, selecting, duplicating and deleting layers, as well as moving and transforming the contents of layers with the Move tool and Photoshop’s various auto-alignment options. We also cover changing layer order and locking layers, and you learn how to organize your layers effectively with layer groups, linking layers, and colour-coding layers.
Chapter 3: Resizing and Transforming Layers
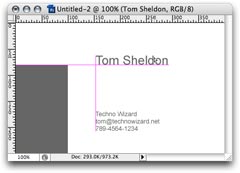
Master Photoshop’s powerful transformation functions in this chapter. You learn how to use the Scale, Rotate, Skew, Distort, Perspective and Warp commands, as well as the fixed-amount rotation and flipping commands. You also explore the versatile Free Transform command, and learn how to hop between commands quickly using various keyboard shortcuts. Finally, in the tutorial at the end of the chapter, you study how to create a flyer, exploring Photoshop’s transform commands in the process.
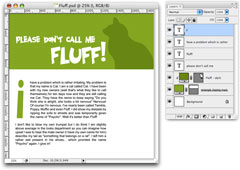
Chapter 4: Creating Text with Type Layers
In this chapter you explore the finer points of Photoshop’s excellent Type tool. You learn how to create type layers, and discover the difference between point type and paragraph type. You take a look at each of the options in the Character and Paragraph palettes; these options give you tons of creative control over your text. You also learn how to get the most from Photoshop’s spellchecker and search/replace features, and master the art of warping type, fitting type along a path, and creating type as bitmaps.
There’s also a great section on type aesthetics — how do you choose the right font for the job? — and the chapter finishes with an in-depth tutorial that shows you how to use type layers to create a page from a children’s book.
Chapter 5: Working with Shape Layers
Shape layers are a great way to produce flexible, editable vector shapes. By the end of this chapter you’ll be a shape layer expert! Learn when to use shape layers, and when to avoid them. Discover how to create and manipulate shapes with the various shape and pen tools, including Rectangle, Ellipse, Line, Custom Shape, Pen, and Freeform Pen. Find out how to change the look of a shape layer by converting it to other types of layer, and learn how to edit shapes with the Path and Direct Selection tools, as well as the Convert Point tool. We also show how you can combine shapes in different ways to produce some interesting effects.
Finally, the detailed tutorial at the end of the chapter shows you how to create a sushi restaurant logo, all through the use of Photoshop’s shape tools and shape layers.
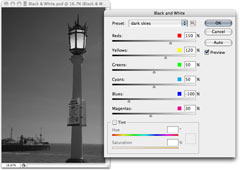
Chapter 6: Exploring Adjustment and Fill Layers
This detailed chapter walks you through every type of adjustment layer in Photoshop CS3. Explore the ins and outs of Levels, Curves, Color Balance, Hue/Saturation, Selective Color, and many more. You also learn how to get the most from Photoshop CS3’s new Black & White and Exposure adjustment layers.
The chapter continues with an in-depth look at Solid Color, Gradient, and Pattern fill layers. Finally, you learn how to mask adjustment and fill layers, and how to create cool effects by using blending modes on these types of layers.
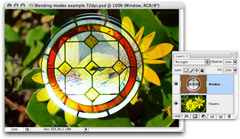
Chapter 7: Combining Layers with Blending Modes
Layer blending modes are a wonderful invention; you can use them to produce all sorts of wonderful effects using layers. Once you’ve read this chapter, you’ll have a thorough grounding in each of Photoshop’s 27 blending modes. Each mode is described in detail, along with a helpful example image.
The second half of the chapter explores advanced blending techniques, such as punching shapes through an image with knockouts; controlling the blend of interior effects; tweaking the way clipping masks blend; working with transparency masks; customizing how effects interact with masks; and blending layers by colour range. You also learn how to change the blend modes of layer effects for even more control.
Chapter 8: Exploring Smart Objects
Starting with Photoshop CS2, you can encapsulate other content, such as layers, Photoshop documents and Illustrator artwork, in a special layer type called a Smart Object. The beauty of Smart Objects is that you can transform them as many times you like without losing quality, even if the encapsulated content is in bitmap form.
In this chapter, you learn how to create Smart Objects from layers, Illustrator artwork, and external image files. You then look at editing the contents of Smart Objects, as well as duplicating, nesting, converting, and deleting Smart Objects. You also explore Smart Filters — a new, powerful feature of Photoshop CS3 that lets you apply live, reeditable filters to your Smart Objects.
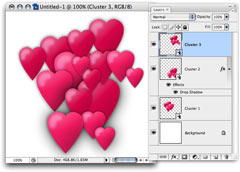
The chapter then takes a look at exporting Smart Objects to new documents, as well as replacing the contents of a Smart Object with another file. Finally, in the tutorial at the end of the chapter, you create a dense, reeditable cluster of hearts using the power and flexibility of Smart Objects.
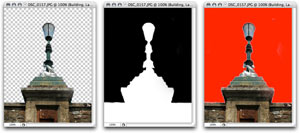
Chapter 9: Working with Masks
In this chapter you explore masking layers and images in Photoshop. You look at the differences between bitmap- and vector-based masks, then go on to master concepts such as selection masks, the Quick Mask mode, alpha channels, layer masks, and vector masks. You also learn how to manage your layer and vector masks, how to combine layer and vector masks in a single layer, and how to use clipping masks to create masks and shapes with layers.
Finally, you get to use layer masks and vector masks to combine images and create a website header with the tutorial at the end of the chapter.
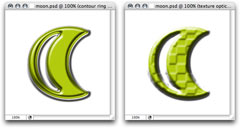
Chapter 10: Discovering Layer Styles
Layer styles and effects really add to the power of layers in Photoshop. This chapter shows you how to create layer effects such as drop shadows, glows, bevels, and overlays. Each effect and its myriad options are explained in detail, along with examples. You also learn how to create and manage layer styles, which let you group effects together and store them in presets. In the end-of-chapter tutorial, you bring together all these techniques to create an impressive logo.
Chapter 11: Using Layer Comps
Using layer comps, you can assemble different versions of your layered images, then showcase those versions to your clients quickly and easily.
Chapter 11 shows you how to get the most out of layer comps. You look at the advantages and limitations of comps, and learn how to create, manipulate, and delete comps. The chapter also explains the concepts of flipping between comps and updating comps, as well as the somewhat involved topic of layer comp warnings. Finally, you learn how to export layer comps as flat image files, PDFs, and Web galleries.

Chapter 12: Understanding Strategies for Working with Layers
This chapter deals with using Photoshop layers in the real world. Learn how to create highly organized Photoshop files with layers, and how to use layer comps, Version Cue, or your own ad-hoc versioning system to store different versions of your files. You also get some great tips on how to organize and name your layered Photoshop files for ease of tracking.
Discover how to make the most of the nondestructive nature of adjustment layers, Smart Objects, Smart Filters, layer masks, and clipping masks when working on layer-based projects. You also learn some winning layer strategies for working smoothly in a team.
The chapter explores three common workflow scenarios — photography, Web design, and print design — and shows how best to use layers and organize files in each scenario. Finally, the “Choosing a Strategy” section shows that Photoshop gives you more than one way to get the job done, and illustrates this point with an example of adding a frame to a photo.

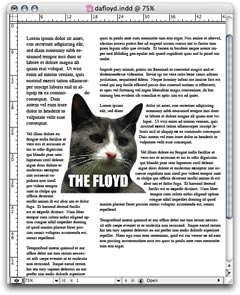
Chapter 13: Using Layers in Other Applications
Layered Photoshop files can work with many other applications apart from Photoshop. In this chapter, you learn about the PSD and PSB file formats, and how to tweak the way Photoshop opens and saves these files. You also look at other layered file formats, such as TIFF and Photoshop PDF. Finally, the bulk of the book takes you through a range of other applications — from the Creative Suite (Illustrator, InDesign, Fireworks, Flash, and Dreamweaver) through to photo editing tools such as Paint Shop Pro Photo, Lightroom and Aperture, as well as the mighty QuarkXPress 7.
It’s not a very glamorous chapter, but as we say in the chapter’s intro: “at 2AM one day, when you’re trying to work out how to
save a layered TIFF file to send to your printers, this chapter might just save you!”
Chapter 14: Designing with Layers
The last three chapters of the book contain practical examples of using Photoshop in the real world.
Chapter 14 covers various scenarios that you might confront as a designer. Each example uses layers extensively to achieve the result. You look at:
- tweaking photos from a design perspective
- creating a website layout, including shape layers, slicing and exporting
- creating a montage from several images, and
- combining hand-drawn elements with Photoshop artwork to create a unique mixed-media piece.
For each example, you’re taken through the process of creating the work step by step. By the end of this chapter, you’ll be an expert at layers-based design!
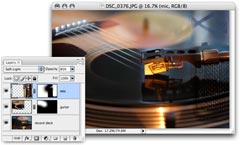
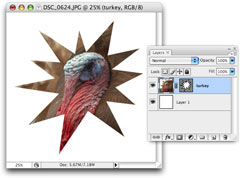
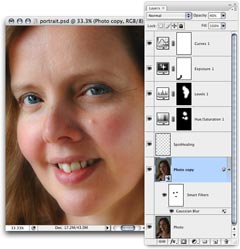
Chapter 15: Manipulating Photos by Using Layers
This chapter is all about using Photoshop as a photographer. You learn how to retouch a landscape and correct colour casts using adjustment layers. The chapter also includes an in-depth example of retouching a portrait: discover how to improve exposure, use the Spot Healing Brush, tame blotchiness with Hue/Saturation, enhance eye colour, and even paint new skin, all using the power of layers!
You also explore three different techniques for black & white conversion: the Hue/Saturation, Channel Mixer, and Black & White adjustment layers. Finally, the last example uses the power of CS3’s new Auto-Align Layers command to align and merge two handheld photos. Great stuff!
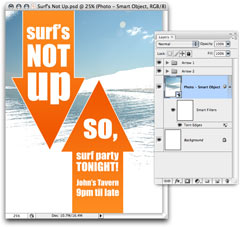
Chapter 16: Creating Personal Projects with Layers
The final chapter in the book walks you through three useful real-world projects. Each project uses Photoshop’s various layer features to produce great results quickly and easily.
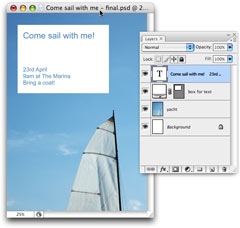
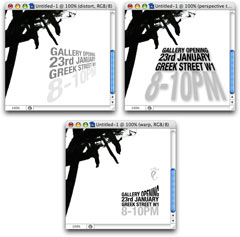
First off, you create and print an invitation, using guides, type layers, shape layers, the Move tool, and snapping. After that, we walk you through the process of designing a trendy poster for a party, harnessing the power of shape layers, type layers, Smart Objects, Smart Filters, layer styles, and the transform commands.
Finally, you learn how to use type layers, shape layers and some clever tricks to produce a month-view calendar in Photoshop, complete with a different photo for each month.
Other goodies
As well as these sixteen chapters, you’ll also find a long list of keyboard and mouse shortcuts for layer-based operations in the appendix. If all that still isn’t enough for you, the book comes with a CD-ROM that includes a searchable electronic version of the book, as well as images and source Photoshop files for practically every example in the book. We’ve even thrown in nearly 100 stock photos for you to practice on. It’s everything you need to improve your Photoshop layer skills!
Happy photoshopping,
Matt & Simon
Leave a Reply