[This article was updated on 7 June 2018 to cover Wordfence 7.1.]
Hundreds of WordPress sites get hacked each day. How can you make sure yours isn’t one of them?
Let’s face it: WordPress security is a big topic. It can also seem a little scary at first glance. There are so many different ways that hackers can break into sites. How can you begin to protect your site against all these attacks?
Well, you can stop worrying! In this tutorial, I’ll show you how to install and configure a WordPress plugin that will dramatically beef up your site’s security, with very little effort on your part. The whole caboodle takes about 20 minutes to set up.
By the time you’re done, you’ll be able to relax, safe in the knowledge that your WordPress site is well-protected against those pesky hackers!
But first, let’s take a look at exactly how hackers do what they do — and why they do it.
Why — and how — websites get hacked

So why do hackers want to hack your little old WordPress site anyway? There are a couple of reasons:
- To get hold of secret information on your site. This might include your passwords, details of your users, customers or subscribers, and so on.
- To install malware on your site. Malware is nasty software, hidden inside the files on your site. Once they’ve managed to install their malware, hackers can do anything from sending viruses to your visitors’ computers through to inserting spammy links in your site’s pages. (This will really hurt your SEO, by the way!)
Hackers break into WordPress sites in various ways:
- Guessing your WordPress admin password. Hackers run programs that try to log into your site hundreds of times a minute, using different admin usernames and passwords (this is known as a brute force attack). If they get the right combination, they can log in and get full access to your WordPress admin.
- Using a security hole in your code. This can include WordPress itself (known as WordPress core), as well as any plugins and themes that you have installed.
- Using security holes in your web hosting. For example, there may be a bug in the web server software that runs on your site that lets hackers get into the site. Or they might be able to break into your hosting control panel or FTP accounts to upload malware.
How Wordfence protects your site from hackers
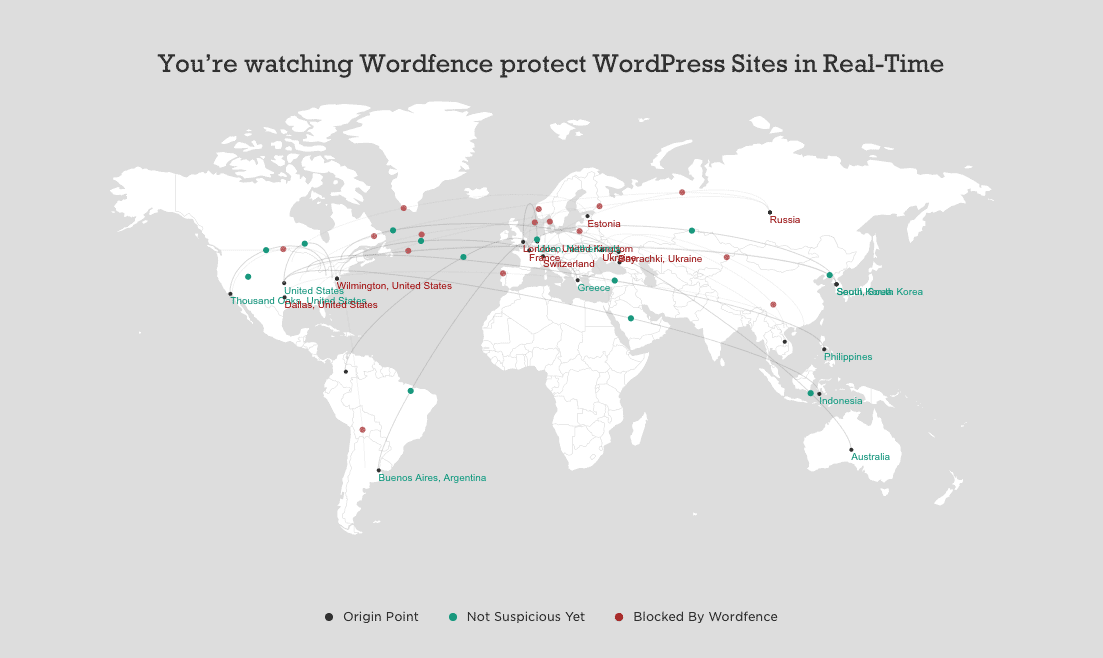
Wordfence is a free WordPress plugin that protects your WordPress site from hacking attempts. What’s more, if your site does get hacked and the hacker manages to install malware, then Wordfence helps you to remove the malware from your site and get it working normally again.
Wordfence protects your site in the following ways:
- Its Web Application Firewall analyses all visitor traffic just before it reaches your WordPress site. If it detects a hacker in amongst the traffic, it blocks them before they can reach your site and do any damage.
- Its Malware Scanner regularly scans the files on your site — including WordPress, plugins and themes — to see if any of them might contain malware. It also scans your posts and pages, looking for dodgy URLs and code that might have been added by hackers.
- Its File Repair feature helps you remove malware from your site. It shows you how the file has been altered by the hacker, and lets you replace the hacked file with the original, clean version at the click of a button.
Wordfence free vs. premium: what’s the difference?
The Wordfence plugin itself is free, but you can opt to pay $99 per year for a premium Wordfence subscription with more advanced features.
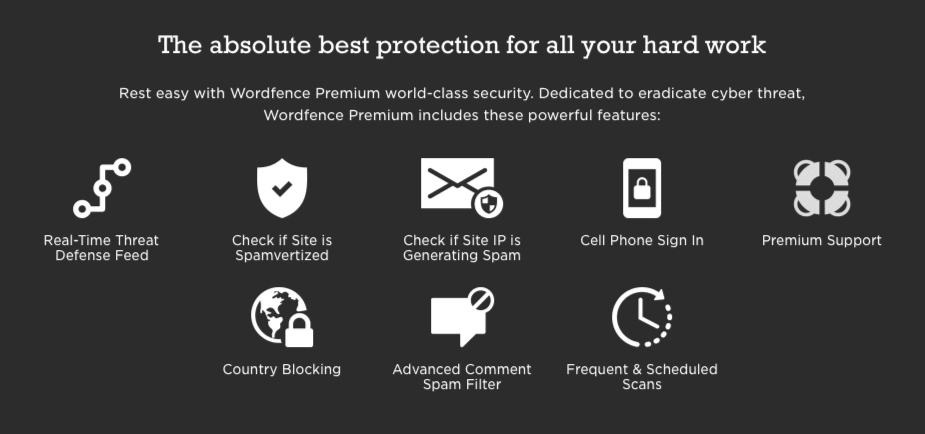
Wordfence’s homepage has a detailed list of the differences between the free and premium options. Briefly, here’s what you get if you sign up for premium:
- Real-time updates to counter the latest threats as they’re discovered. (Free users have to wait 30 days for the updates.)
- A real-time IP blacklist of known malicious IP addresses. This blocks hackers’ computers instantly before they can even touch your WordPress site.
- Country blocking lets you block off entire countries from your site — useful if users in a particular country are mainly trying to hack your site.
- Spam checking to see if your server or site is sending spam emails or “spamvertizing” (serving up spammy content in your pages).
- Remote scanning, which uses Wordfence’s servers to scan your server remotely. This lets Wordfence scan your site more thoroughly than the free plugin does.
- Schedule your scans to run when you like, as often as you like. Free users only get one automatic scan per day, and Wordfence decides what time of day to run the scan. (However, you can run manual scans whenever you like, even as a free user.)
- Improved login security. Premium users can sign into their site using their phone for improved security.
- Better comment spam filtering. Comment spam is where hackers and spammers post comments on your blog that contain spammy or dangerous URLs. The free version of Wordfence filters out the worst of these, but the premium version does a more thorough job.
So is the premium version worth it? If you want the best possible protection and peace of mind, then yes. However, the free version still offers really good protection from hackers, and is infinitely better than having no security plugin at all. Of course, you can start with the free plugin and upgrade to the paid subscription at any time.
How to install Wordfence
As with most WordPress plugins, installing Wordfence is super-easy. Just follow these steps:
-
- Log into your WordPress admin.
- In the left-hand menu, choose Plugins > Add New.
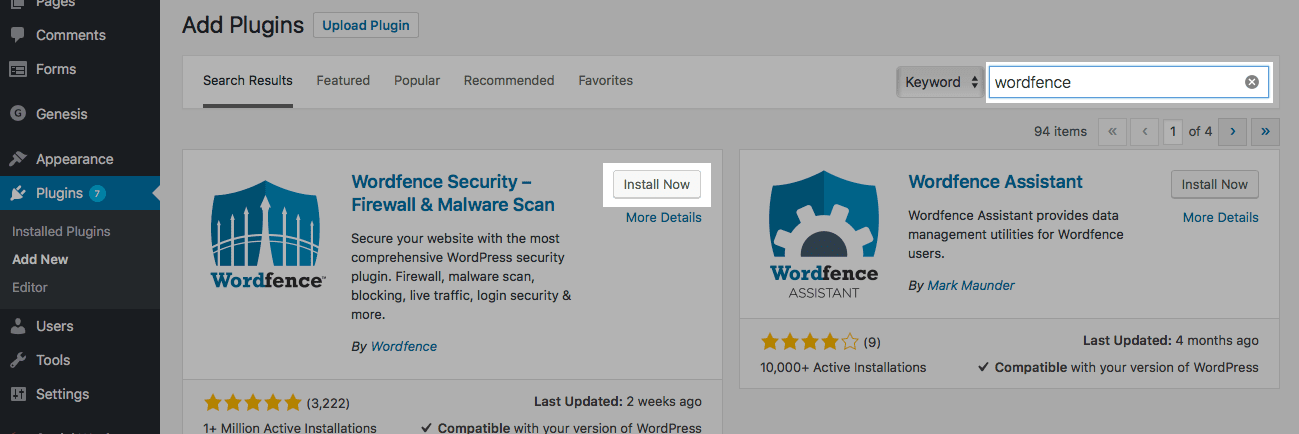
- Type wordfence into the top-right Search Plugins box and press Return.
- Find Wordfence Security – Firewall & Malware Scan in the search results, and click its Install Now button:

Search for the Wordfence plugin, then install it by clicking its Install Now button. - Wait for a few seconds while WordPress installs the plugin. When it’s done, the Install Now button changes to an Activate button. Click the button to activate the plugin.
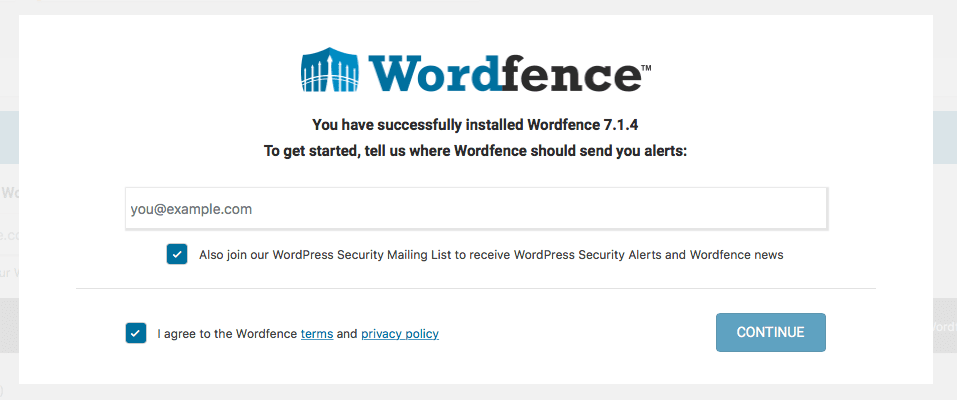
- You’ll see a popup appear asking for your email address. This is the email address that Wordfence will send warnings and status updates to. Enter your email address, decide if you want to join the mailing list, then click the CONTINUE button:

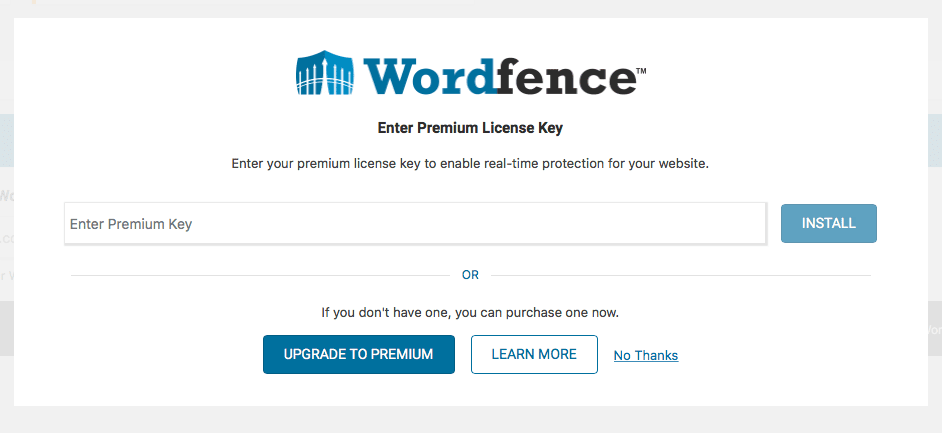
Enter the email address where Wordfence should send you warnings and status messages, then click CONTINUE. - Finally, you’ll see another popup asking for your premium licence key. If you’ve purchased a premium licence, you can enter the key here, or click UPGRADE TO PREMIUM to purchase a licence. Or, assuming you’re happy to use the free version for now, click the No Thanks link:

Enter your premium key if you have one, or click the No Thanks link to continue using the free version of Wordfence.
That’s it! Wordfence is now installed and protecting your site.
Setting Wordfence options
Once you’ve installed and activated Wordfence, head on over to the Options page by choosing Wordfence > All Options from the left-hand menu in the WordPress admin.
Most of the options are set to pretty good defaults, so you don’t need to touch them. However, there are a few options in this page that you’ll definitely want to make sure you’ve set:
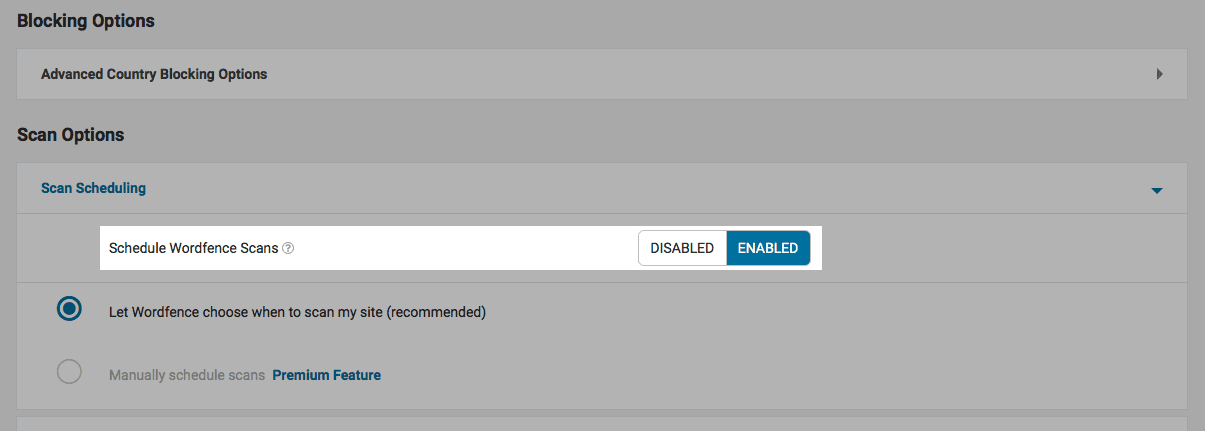
- Scan Options > Scan Scheduling > Schedule Wordfence Scans: This should be set by default (with the ENABLED button highlighted). It makes Wordfence scan your site for hacks and malware once per day:

Make sure Schedule Wordfence Scans is enabled so that your site is scanned once a day. - Wordfence Global Options > General Wordfence Options > Update Wordfence automatically when a new version is released?: This setting automatically updates the Wordfence plugin every time a new version becomes available. It’s a good idea to check this checkbox to keep your site as secure as possible. If it causes any problems, uncheck it again and remember to update your Wordfence regularly!

Select this checkbox so that Wordfence stays up to date automatically. - Wordfence Global Options > General Wordfence Options > Where to email alerts: Make sure you enter your email address here, so that Wordfence can email you if it finds that your site’s been hacked:

Enter your email address in this box so Wordfence can send you status and warning emails.
Once you’ve checked through these options, click the SAVE CHANGES button at the top of the page to save your settings:

Running your first scan
The next thing you’ll want to do is run a Wordfence scan to check if your site’s been hacked. To do this:
- Choose Wordfence > Scan from the left-hand menu in the WordPress admin.
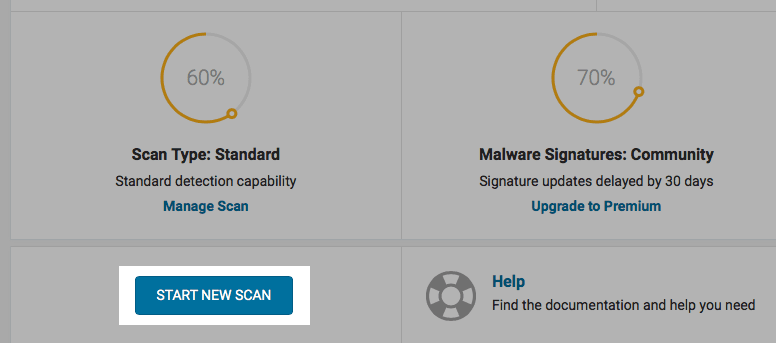
- Click the START NEW SCAN button on the left side of the page:
Depending on the size of your site, the scan takes anywhere from a few seconds to several minutes to complete. While it’s scanning, you’ll see a progress bar appear, along with a status message showing you what Wordfence is currently scanning:
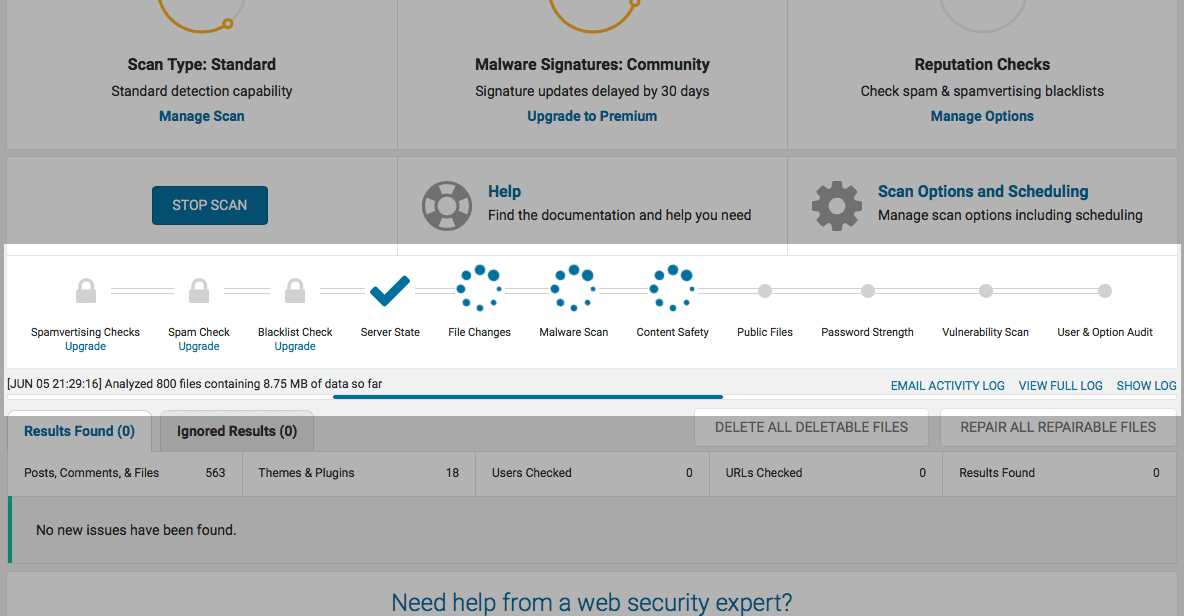
Eventually you’ll see the text Scan Complete appear in the status line. Now scroll down the page until you see the Results Found tab:
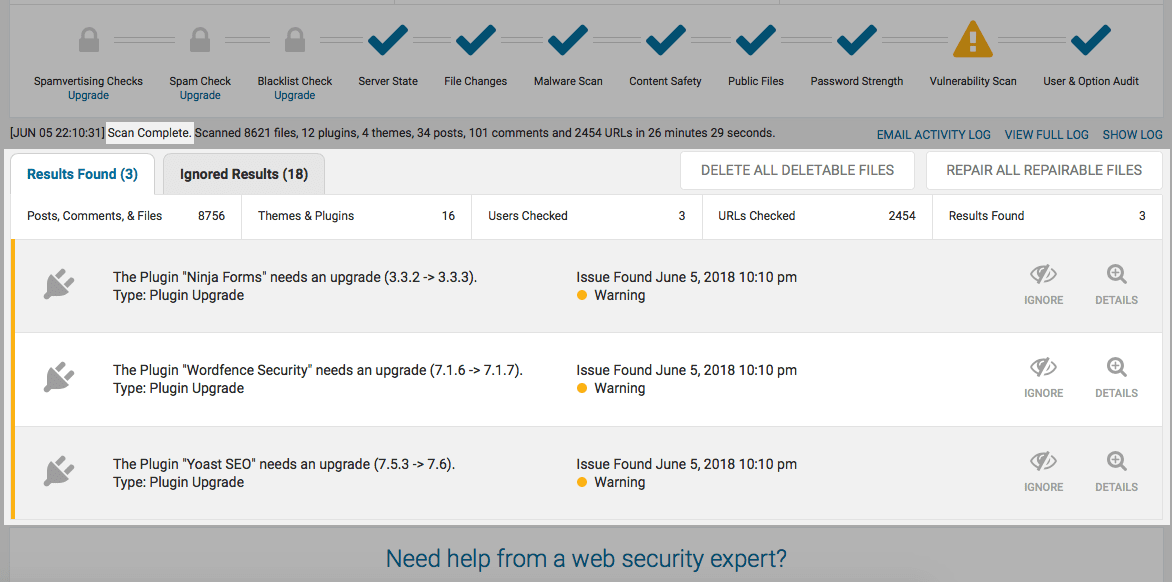
This lists any problems that Wordfence uncovered. Hopefully this tab is empty, but you might see some minor issues such as plugins and themes that need updating. For each issue, you can click the DETAILS button on the right-hand side of the issue to get more info on the problem. If a plugin or theme needs updating, you can click the Click here to update now link to update it immediately:
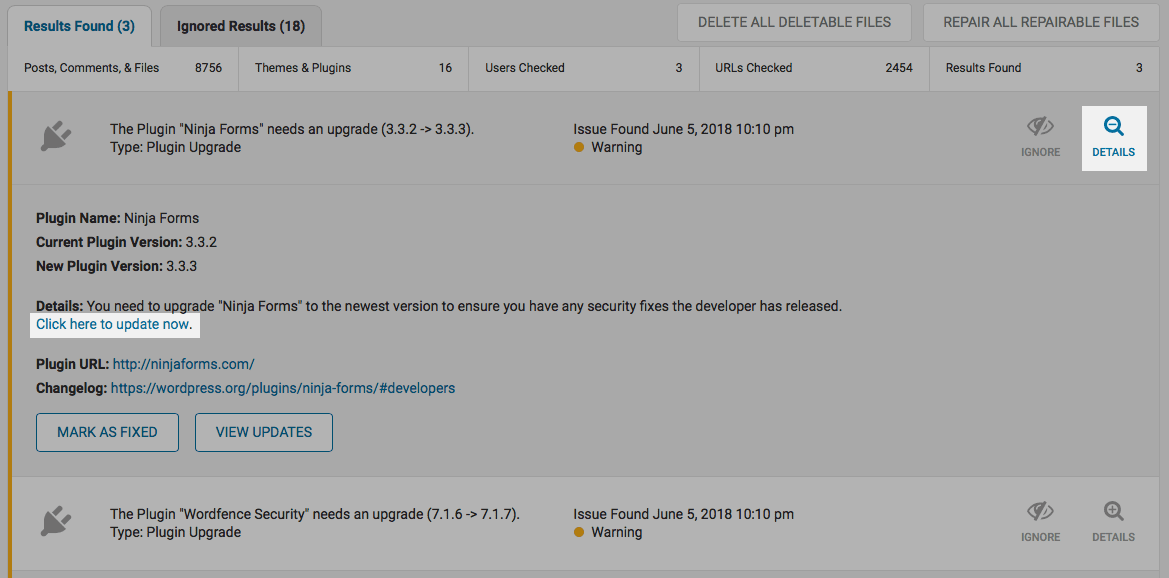
If you see any critical messages (with a red dot) — particularly messages like “File appears to be malicious” — then your site may have been hacked already. If that’s the case, follow these steps:
- Don’t panic!
- Take a look at this Wordfence help page, which explains how to interpret the scan results, as well as how to fix any issues.
- If it really does look like your site has been hacked and contains malware, then the next step is to clean up your site, either by following the instructions on Wordfence’s site, or hiring the Wordfence team to do it for you.
Setting up the Wordfence firewall
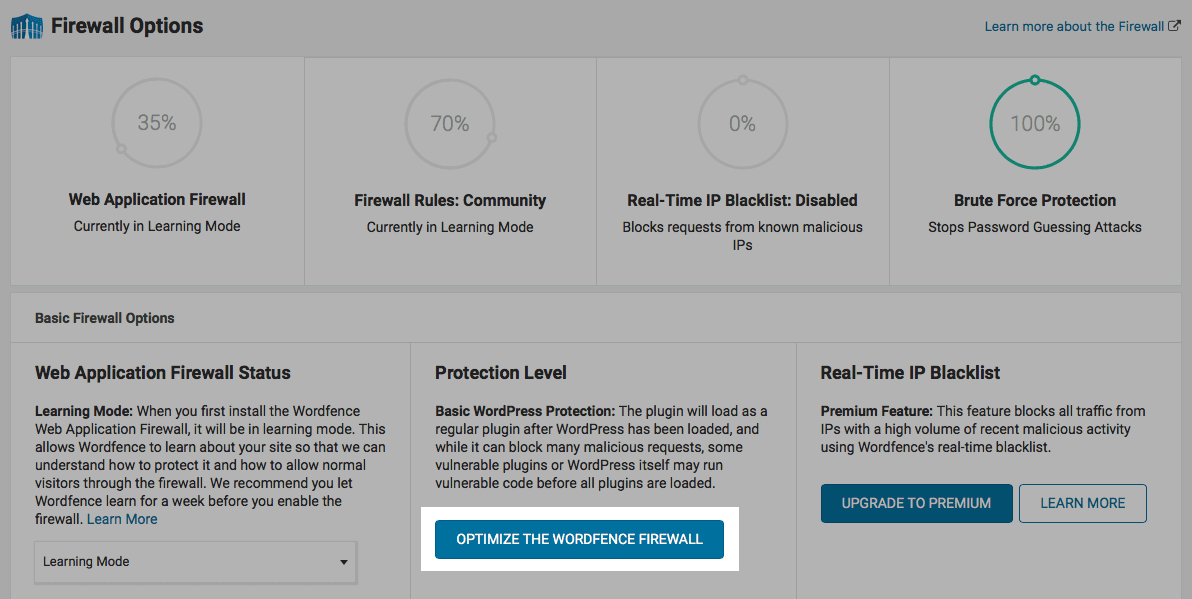
Wordfence’s Web Application Firewall blocks hackers before they can do damage to your WordPress site. It’s turned on automatically when you install Wordfence, but to start with it only runs as a WordPress plugin, which doesn’t offer the best level of protection. Wordfence calls this Basic WordPress Protection.
To make the firewall more secure, you want to set it so it runs before WordPress — or any other PHP files — have had a chance to run. That way, it can block hack attempts at the earliest possible point. Wordfence calls this Extended Protection.
To turn on Extended Protection, follow these steps:
- Choose Wordfence > Firewall from the left-hand menu in the WordPress admin.
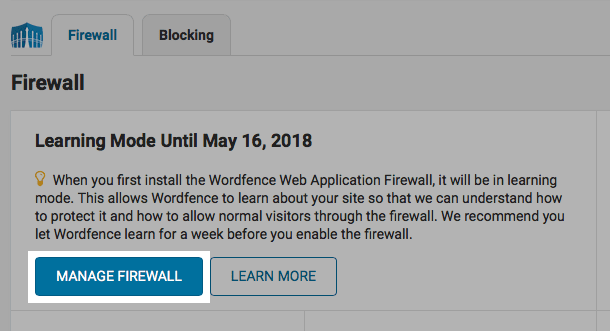
- Click the MANAGE FIREWALL button near the top of the page:

Click the Manage Firewall button to access the Firewall Options page. - On the Firewall Options page that appears, click the OPTIMIZE THE WORDFENCE FIREWALL button:

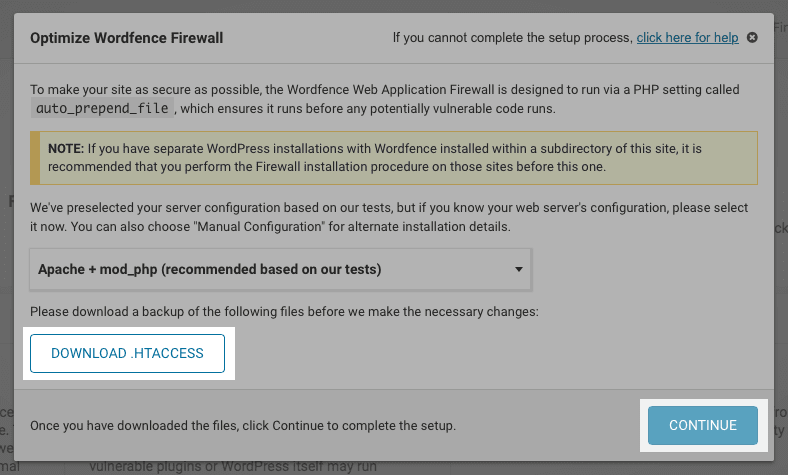
Click OPTIMIZE THE WORDFENCE FIREWALL to begin setting up the firewall. - An “Optimize Wordfence Firewall” popup appears. There’s a lot of techie text here, but don’t worry about it unless you have more than one WordPress running on your site, or you know your server configuration is different to the one shown. Just click the DOWNLOAD .HTACCESS button — this downloads a backup file containing your current
.htaccessserver configuration file, in case anything goes wrong when Wordfence changes it. Then click the CONTINUE button to optimize the firewall:
Click DOWNLOAD .HTACCESS, then click CONTINUE to go with the preselected server configuration, unless you know it’s wrong.
If all goes well, you should see an alert appear with the message “Nice work! The firewall is now optimized.” Click the CLOSE button to continue:

The Protection Level on the Firewall Options page should now show Extended Protection:
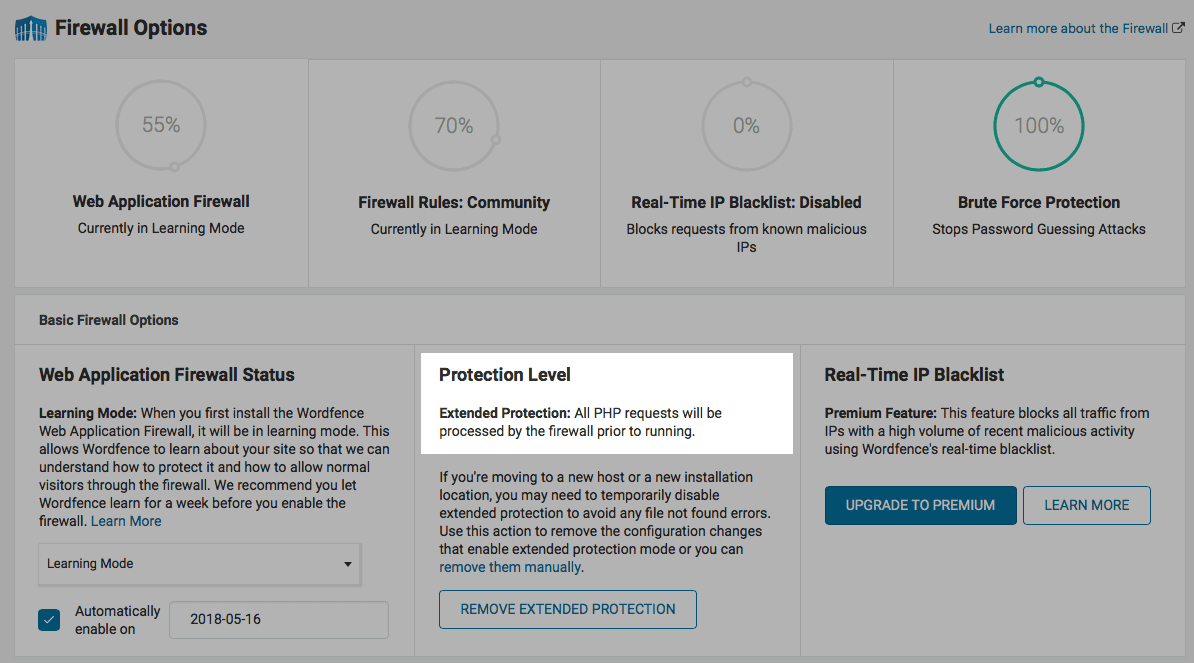
If you run into problems then Wordfence probably can’t create the necessary files on your servers to due to file permissions. Take a look at this Firewall Optimization Troubleshooting page for help.
You’ll also see that the firewall starts in Learning Mode. In this mode, the firewall analyses your site traffic for a while so that it can tell the difference between normal traffic and a hack attempt. After a week, the firewall automatically switches to Live Mode and starts protecting your site.
While the firewall is in Learning Mode, it’s a good idea to do all the things you would normally do: publish pages and posts; moderate comments; tweak themes and plugin settings; and tweak widgets. This gives the firewall a chance to see what “normal” activity on your site looks like.
Nice job! Here’s what to do next.
Now that you’ve installed and set up Wordfence, your WordPress site has a much better chance of keeping hackers at bay. Great work!
It’s important to keep on top of your WordPress security. Wordfence will email you whenever it discovers any issues with your site, and you should investigate these and fix them if necessary. It’s also worth checking out the Wordfence Dashboard (choose Wordfence > Dashboard in your WordPress admin), which gives you a good summary of your site’s current security status.
Good luck!
Do you have any questions on Wordfence, or on keeping your WordPress site secure? Feel free to ask in the comments below!
[This article was originally published 25 August 2016. It was updated on 15 Feb 2017 to cover the new user interface in Wordfence 6.3; on 20 Mar 2017 to include the new IP Blacklist premium feature; and on 7 June 2018 to reflect the changes in Wordfence 7.1. Image credits: Computer and padlock by TheDigitalWay (CC0), cropped, edited // Fence by jarmoluk (CC0), cropped, edited]



Thanks for this! The guide was very easy to follow and very accurate! I’m all set up and ready to go!
Fantastic Steven, that’s great to hear!
I checked out your excellent blog – it looks really useful for people wanting to sort out their finances. We do the ’emergency fund’ idea ourselves – it’s great to have that safety net there if you need it!
Your website is not scrollable.
https://www.elated.com/wordfence-tutorial/
It is for me (on iPhone Safari at least). What browser are you using?
Why, thank you for putting this all out. I’ve recently purchased a premium license, so this might come helpful. I’ve also signed up to your newsletter, maybe I missed something out.
You’re welcome, Cammy! Thanks for your comment and I hope you enjoy the newsletter. 🙂
Hi Matt, really a nice attempt and good tutorial. As a blogger myself i wrote a bit more on other features of Wordfence which could be helpful to your readers.
Here is my attempt 🙂 http://learningcms.com/wordfence-tutorial-wordpress/
And in general, backup everything. Have a cloud or a physical copy of all your data.
Absolutely! I always like to keep at least 2 separate site backups.
How does Wordfence compare to Acunetix or Sucuri?