
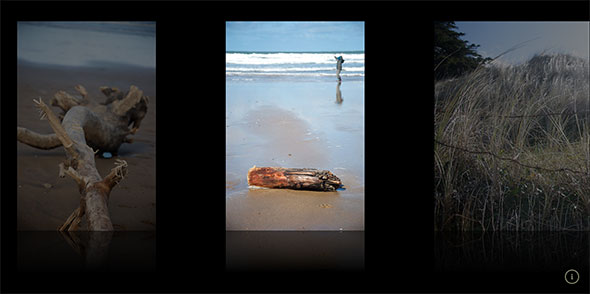
There are a lot of jQuery image galleries out there, some of which are quite lovely (Galleria springs to mind). However, I’ve yet to discover a really nice-looking, full-window sliding image gallery that is simple and elegant, and that also shows off the photos to good effect. So I decided to write one!
To see what it looks like, click the View Demo button above. It looks best on WebKit browsers such as Safari and Chrome, but other modern browsers should work well too.
For best results, make your browser full-screen. Google Chrome gives the most immersive experience here — view the demo, then choose View > Enter Full Screen.
The gallery is simple to use. Click the left or right edge of the window to move around the pictures (or use the left and right arrow keys on your keyboard). Hover over the main image to view its caption.
I’ve also made the gallery work reasonably well on touch devices such as iPhones and iPads by adding touch and swipe events. (I haven’t yet tested these on the Android browser so your mileage may vary there. Watch this space!)
So how do you make this gallery? In this tutorial I’ll walk you through the process step-by-step, from creating the markup and CSS through to writing the JavaScript code to make the gallery function. If you’d rather just grab the code and get going, click the Download Code button above.
If you like this gallery, please feel free to use the code in your own websites and projects. It’s Creative Commons licensed.
Ready? Let’s get started!
Step 1: Create the markup
First we need to create a webpage to hold our gallery’s images, CSS and JavaScript. Here’s the HTML for our gallery page’s body element:
<body>
<button id="leftButton" onclick='moveLeft()'><</button>
<button id="rightButton" onclick='moveRight()'>></button>
<div id="galleryContainer">
<div id="gallery">
<img src="slides/BarbedWire.jpg" alt="Barbed Wire" />
<img src="slides/Feather.jpg" alt="Feather" />
<img src="slides/DriftStuff.jpg" alt="Drift Stuff" />
<img src="slides/Driftwood.jpg" alt="Driftwood" />
<img src="slides/DriftwoodGuy.jpg" alt="Driftwood and Guy" />
<img src="slides/GrassLight.jpg" alt="Grass and Light" />
<img src="slides/PebbleAndShells.jpg" alt="Pebble and Shells" />
<img src="slides/StickSea.jpg" alt="Stick and Sea" />
<img src="slides/SeaweedGasmask.jpg" alt="Seaweed Gasmask" />
<img src="slides/Surfers.jpg" alt="Surfers" />
</div>
<div id="caption">Photo Caption</div>
<div id="loading">Please wait...</div>
</div>
</body>
The markup contains:
- 2
buttonelements for the left & right buttons (leftButtonandrightButton).
We bind each button’sclickevent to a function that slides the gallery 1 image to the left or right (moveLeft()andmoveRight()respectively). Each button has an arrow (< or >) for a label. We’ll use CSS later to style these buttons as large, transparent buttons that sit on the left and right sides of the gallery. - A container for the gallery (
galleryContainer).
The sliding gallery sits inside thisdiv. - The gallery itself (
gallery).
This is thedivthat contains the slide images. We will slide thisdivleft and right to show each photo. - The slide images inside the
gallerydiv.
Each slide is simply animgtag containing the photo’s URL, and somealttext which we’ll display as a caption when the user hovers over the image. - The photo caption container (
caption).
We’ll position this just below the current gallery image. It will hold the caption text to display for the current image. - The loading message (
loading).
Thisdivcontains the “Please wait..” text that will appear if the gallery images are taking a while to preload.
Step 2: Add the CSS
Now we’ll add the CSS to our page to style the gallery. Here’s the complete CSS:
<style>

body {
  margin: 0;
  padding: 0;
  background: #000;
  font-family: "Georgia", serif;
}


/*
  Container for the gallery:

  Absolutely positioned
  Stretch to fill the whole window width
  Fixed height
  Hide the overflow to prevent horizontal scrollbars

  Vertically centred in the viewport: http://css-discuss.incutio.com/wiki/Centering_Block_Element#Centering_an_absolutely_positioned_element
*/

#galleryContainer {
  width: 100%;
  height: 800px;        /* Image height + 200px */
  overflow: hidden;
  position: absolute;
  top: 0;
  bottom: 0;
  margin-top: auto;
  margin-bottom: auto;
  z-index: 1;
}


/*
  The gallery div that contains all the images

  We'll set the width dynamically in the JavaScript as the images load
*/

#gallery {
  width: 100px;
  height: 700px;        /* Image height + 100px */
  padding: 50px 0 50px 0;
  position: absolute;
  z-index: 1;
}


/*
  Individual slides within the gallery:

  Float them left so that they're all side by side
  Fixed height (the width will vary as required)
  Add some horizontal margin between the slides
  Add a bottom fading reflection for WebKit browsers
*/

#gallery img {
  float: left;
  height: 600px;
  margin: 0 100px;      /* Adjust the left/right margin to show greater or fewer slides at once */
  -webkit-box-reflect:
    below
    0
    -webkit-gradient(
      linear,
      left top,
      left bottom,
      color-stop(1, rgba(255, 255, 255, .5)),
      color-stop(.8, rgba(255, 255, 255, 0))
    );
}


/*
  Left and right buttons:

  Position them on the left and right sides of the gallery
  Stretch them to the height of the gallery
  Hide them by default
*/

#leftButton, #rightButton {
  position: absolute;
  z-index: 2;
  top: -100px;
  bottom: 0;
  padding: 0;
  margin: auto 0;
  width: 15%;
  height: 600px;        /* Image height */
  border: none;
  outline: none;
  color: #fff;
  background: transparent url(images/blank.gif);
  font-size: 100px;
  font-family: "Courier New", courier, fixed;
  opacity: 0;
  filter: alpha(opacity=0);
  -webkit-transition: opacity .5s;
  -moz-transition: opacity .5s;
  -o-transition: opacity .5s;
  transition: opacity .5s;
}

#leftButton {
  left: 0;
}

#rightButton {
  right: 0;
}

/* (Turn off dotted black outline on FF3) */

#leftButton::-moz-focus-inner, #rightButton::-moz-focus-inner {
  border: none;
}

/*
  Left and right button hover states:
  Fade them in to 50% opacity
*/

#leftButton:hover, #rightButton:hover {
  opacity: .5;
  filter: alpha(opacity=50);
  outline: none;
}


/*
  Image caption:

  Position just under the centre image
  Hide by default
*/

#caption {
  position: absolute;
  z-index: 2;
  bottom: 90px;
  width: 100%;
  color: #ffc;
  text-align: center;
  font-family: "Georgia", serif;
  font-size: 24px;
  letter-spacing: .1em;
  display: none;
}


/*
  Loading text:

  Position in the centre of the gallery container
  Hide by default
*/

#loading {
  position: absolute;
  z-index: 1;
  bottom: 50%;
  width: 100%;
  color: #ffc;
  text-align: center;
  font-family: "Georgia", serif;
  font-size: 36px;
  letter-spacing: .1em;
  opacity: 0;
  filter: alpha(opacity=0);
}

</style>


<!-- IE7 positions the buttons incorrectly; compensate -->

<!--[if lt IE 8]>
<style>
#leftButton, #rightButton {
  top: 50px;
}
</style>
<![endif]-->
Let’s look at each rule in the CSS:
- The page body
We remove all margin and padding on thebodyelement so that our gallery goes right to the edge of the window. We also give the body a black background and use Georgia for the font. - The gallery container
#galleryContaineris thedivthat contains our sliding gallery. We stretch it across the width of the browser window and give it a height of 800 pixels — this should be 200 pixels more than the height of our image slides. We setoverflowtohiddenso that the slides outside the browser window don’t create a horizontal scrollbar, and position the container in the vertical centre of the page. - The gallery
#galleryis the sliding gallery itself. We give it an initial width of 100px (we’ll adjust this later in the JavaScript), and a height of 700px — that is, 100px more than the height of the slide images. We also add some vertical padding to the gallery to position it nicely in the page. - The slide images
#gallery imgselects the individual slide photos in the gallery. We float the images left so that they all sit side by side in a row; set the image height (600px); and add 100px of left and right margin to separate each slide. We also add a reflection effect below each image using the-webkit-box-reflectproperty (as you’d imagine, this only works in WebKit browsers such as Safari, Mobile Safari, and Chrome). We apply a semitransparent gradient mask to the reflection to fade the reflection towards the bottom.You can adjust the
marginproperty to suit. For example, change this value to0 50pxto put the images closer together. Or you could change it to0 1000pxto ensure that only 1 image is ever displayed onscreen at once. - The left and right buttons
#leftButton&#rightButtonare the buttons on either side of the gallery. The user can click these buttons to slide left and right between the images.We restyle these
buttonelements quite drastically. We position them on the left and right sides of the page; give them az-indexof 2 so they sit above the gallery; centre them vertically in the page (moving them up 100 pixels to allow for the reflections below the images); and give them the same height as the images (600px).We also turn off all borders and outlines that are usually applied to buttons, and give the buttons a white foreground colour and a transparent background. We set a large Courier font on the buttons so that the arrows (< and >) are large and nice-looking.
Finally, we make the buttons invisible by setting their opacity to zero, and add a :hover state to the buttons to bring up the opacity when the user moves the mouse over them. We use the transition property to fade the buttons in and out slowly over half a second.
The
::-moz-focus-innerrules ensure that the outlines are properly turned off in Firefox 3. (Firefox 4 only requiresoutline: none.) - The image caption
#captionis thedivcontaining the text caption that appears below the current slide image when the user hovers over the image. We position it 90px from the bottom of the gallery container, give it a tan colour, and centre it horizontally. We adjust the font size and letter spacing to make the text attractive, and hide the caption initially usingdisplay: none. - The loading text
#loadingis the “Please wait…” text that appears if the slide images are taking a few seconds to preload. We position it in the centre of the window, and style and colour the text in a similar way to the image caption. We set its opacity to zero initially to hide it.
Internet Explorer 7 has a problem with vertically positioning the left and right buttons. We compensate for this by adding a conditional comment for IE7 to adjust the top property on the buttons.
I’ve also added CSS to style the “info” button and box in the bottom right-hand corner. Since this isn’t part of the gallery we won’t talk about it here.
Step 3: Include the JavaScript libraries
<script type="text/javascript" src="http://ajax.googleapis.com/ajax/libs/jquery/1.5.1/jquery.min.js"></script>
<script type="text/javascript" src="jquery.jswipe-0.1.2.js"></script>
I’ve used 2 JavaScript libraries for this gallery:
- jQuery (hosted on Google’s CDN)
- jQuery Swipe, a jQuery plugin that we can use to detect swipe gestures on mobile devices. We’ll use this to let users swipe left and right to move between the gallery images.
jQuery Swipe isn’t available on a CDN, so you’ll need to download it, then put the jquery.jswipe-0.1.2.js file in the same folder as your gallery page.
Step 4: Set up the configuration options
Our first chunk of JavaScript code creates some configuration settings, making it easy for us to adjust the look and feel of the gallery:
//  --- Begin Config ---
var preloadSlides = 3;                // Number of slides to preload before showing gallery
var loadingMessageDelay = 2000;       // How long to wait before showing loading message (in ms)
var loadingMessageSpeed = 1200;       // Duration of each pulse in/out of the loading message (in ms)
var loadingMessageMinOpacity = 0.4;   // Minimum opacity of the loading message
var loadingMessageMaxOpacity = 1;     // Maximum opacity of the loading message
var captionSpeed = 1200;              // Duration of the caption fade in/out (in ms)
var captionOpacity = 0.5;             // Maximum opacity of the caption when faded in
var swipeXThreshold = 30;             // X-axis minimum threshold for swipe action (in px)
var swipeYThreshold = 90;             // Y-axis maximum threshold for swipe action (in px)
var leftKeyCode = 37;                 // Character code for "move left" key (default: left arrow)
var rightKeyCode = 39;                // Character code for "move right" key (default: right arrow)
var currentSlideOpacity = 1.0;        // Opacity of the current (centre) slide
var backgroundSlideOpacity = 0.5;     // Opacity of the slides either side of the current slide
//  --- End Config ---
The comments to the right of the settings should be fairly self-explanatory. These settings control things like the number of slide images that need to load before we first start displaying the gallery; delays and animation speeds for the loading message and captions; various opacity settings; which keys should be used for moving left and right; and so on.
You probably won’t see the “Please wait…” loading message if you’re on a fairly fast connection. To see it, try setting preloadSlides to 10 and reducing loadingMessageDelay to 0. Then upload everything to your server.
Step 5: Set up some global variables
We use a few global variables to track the state of the gallery:
var slideHorizMargin = 0;             // Number of pixels either side of each slide
var buttonHeight = 0;                 // Temporary store for the button heights
var currentSlide = 0;                 // The slide that the user is currently viewing
var totalSlides = 0;                  // Total number of slides in the gallery
var slides = new Array();             // Holds jQuery objects representing each slide image
var slideWidths = new Array();        // Holds the widths (in pixels) of each slide
var slideLoaded = new Array();        // True if the given slide image has loaded
var loading = true;                   // True if we're still preloading images prior to displaying the gallery
Again, the comments should be fairly self-explanatory. We set up various variables to track things like the margin between the slides (so we can calculate the gallery offset correctly), the currently-displayed slide, and the total number of slides in the gallery. We also use 3 arrays to hold the slide objects themselves, along with information about each slide image’s width and loaded state.
Step 6: Create the init() function
The init() function is called when the DOM is ready:
$( init );
init() sets up the gallery so that it’s ready to use. Here’s the function in full:
// Set up the gallery once the document is ready

function init() {

  // Grab the horizontal margin between slides for later calculations
  slideHorizMargin = parseInt( $('#gallery img').css('margin-left') );

  // Hide the gallery and left/right buttons
  $('#gallery').fadeTo( 0, 0 );
  $('#gallery').css('top','-999em');
  buttonHeight = $('#leftButton').css('height');
  $('#leftButton').css('height',0);
  $('#rightButton').css('height',0);

  // If the requried number of slides haven’t loaded after ’loadingMessageDelay’ ms,
  // start fading in the loading message

  $('#loading').delay( loadingMessageDelay );
  fadeInLoadingMessage();

  // Bind the handleSlideLoad() handler function to each slide’s load event
  $('#gallery img').load( handleSlideLoad );

  // For each of the slide images:
  // 1. Hide the slide
  // 2. Record its serial number (0 = the first slide)
  // 3. Store it in the slides array
  // 4. Trigger the load event if the image is already cached (for IE and Opera)

  $('#gallery img').each( function() {
    $(this).hide();
    $(this).data( 'slideNum', totalSlides );
    slides[totalSlides++] = $(this);
    if ( this.complete ) $(this).trigger("load");
    $(this).attr( 'src', $(this).attr('src') );
  } );

  // Re-centre the current slide whenever the user resizes the browser
  $(window).resize( centreCurrentSlide );

  // Set the initial show/hide states of the left and right buttons
  setButtonStates();

  // Set the caption text to the alt text of the first slide
  $('#caption').html( slides[currentSlide].attr('alt') );

  // Bind the moveRight() and moveLeft() functions to
  // the swipeLeft and swipeRight events respectively.
  // (IE chokes on the swipe plugin, so skip this code on IE)

  if ( !$.browser.msie ) {

    $('#gallery').swipe( {
         swipeLeft: moveRight,
         swipeRight: moveLeft,
         threshold: { x:swipeXThreshold, y:swipeYThreshold }
    } );
  }

  // Bind the moveleft() and moveRight() functions to the
  // "move left" and "move right" keys on the keyboard

  $(document).keydown( function(event) {
    if ( event.which == leftKeyCode ) moveLeft();
    if ( event.which == rightKeyCode ) moveRight();
  } );

  // Show/hide the tutorial info message when touched (for touch devices)
  $('#info').bind( 'touchstart', function() { $(this).toggleClass('hover'); } );
}
Let’s look at each chunk of code in this function:
- Grab the horizontal margin between slides for later calculations.
We grab themargin-leftCSS property of the gallery images and store this value inslideHorizMargin. We’ll use this value later when calculating the image offsets relative to the left hand edge of the gallery. - Hide the gallery and left/right buttons
We want the gallery and buttons to be hidden while the first few images preload. Once enough images have loaded, we’ll fade in the gallery and buttons. So we use the jQueryfadeTo()method to reduce the gallery’s opacity to zero, and also move it way above the top of the browser viewport (this stops IE stuttering with the loading message). We also reduce the height of the buttons to zero, since simply hiding them doesn’t prevent them from appearing when hovered over. (We store the button heights in thebuttonHeightvariable so we can restore them later.)I’ve used
fadeTo( 0, 0 )rather thancss('opacity', 0)because the latter doesn’t hide the gallery in IE. - Fade in the loading message.
We call thefadeInLoadingMessage()function to set up a pulsing animation for the “Please wait…” loading message. (We’ll explain this function later.) We use the jQuerydelay()method to add a delay to the loading message animation (2 seconds by default). This gives a chance for the images to preload. If they haven’t preloaded after this time then the animation will start. - Bind the
handleSlideLoad()handler function to each slide’sloadevent.
Next we use the jQueryload()method to bind a function calledhandleSlideLoad()to each slide image’sloadevent. This means that, when an image has fully loaded,handleSlideLoad()is called for that image. We’ll explainhandleSlideLoad()in a moment. - Process the slide images.
The next chunk of code uses the jQueryeach()method to loop through each image in the gallery. For each image, it first hides it so that it can be faded in nicely once it’s loaded. Then it uses jQuery’sdata()method to attach the slide’s serial number to the slide, storing it in theslideNumkey. This makes it easier for us to track the slides later. We also add the slide’s jQuery object to theslidesarray so we can quickly access it later.Then, we trigger the slide’s
loadevent if itscompleteproperty istrue. This ensures that each slide’sloadevent is fired, even if the slide image was previously cached. (Some browsers, such as IE, don’t fireloadevents for cached images.)Update 18 March: I added the last line in this code block —
$(this).attr( 'src', $(this).attr('src') );— because IE9 seems to have additional problems firingloadevents on images. (Not sure if this is a known bug, since IE9’s only just launched.) This hack, which sets the image’ssrcproperty to itself, seems to work around this problem. - Re-centre the current slide whenever the user resizes the browser.
When the user moves from one slide to the next, our JavaScript code centres the current slide horizontally in the browser window. But what if the user resizes their browser window? When that happens, we need to reposition our gallery so that the current slide is still centred horizontally. To do this, we attach thecentreCurrentSlide()function to the window’sresizeevent. (We’ll get tocentreCurrentSlide()later in the tutorial.) - Set the initial show/hide states of the left and right buttons.
Next we callsetButtonStates(), which shows or hides the left and right buttons based on the image currently being viewed. In this case, it will hide the left button since we’re showing the first slide. We’ll cover this function later. - Set the caption text to the
alttext of the first slide.
This line of code retrieves thealttext of the current slide, and puts the text inside the#captiondiv, ready for displaying when the user hovers over the image. - Bind
moveRight()andmoveLeft()to theswipeLeftandswipeRightevents.
Here we use the jQuery Swipe plugin to let the user swipe left and right on a touch device to move between the slides. If the user swipes right-to-left then we callmoveRight()to move to the next slide, and vice-versa.IE generates JavaScript errors with this plugin, so we use the
browser.msieproperty of the jQuery object to detect if the browser is IE. If it is, then we skip this chunk of code. It’s a bit of a hack but it works! - Bind
moveleft()andmoveRight()to the “move left” and “move right” keys.
Finally, we create an anonymous event handler function for the document’skeydownevent. In this function, we detect if either the “move left” or “move right” key was pressed. If it was then we callmoveLeft()ormoveRight()as required.
Step 7: Create the handleSlideLoad() function
handleSlideLoad() is called whenever a slide image has finished loading. If there are 10 slides in your gallery, it will be called 10 times.
This function does a few different jobs. It records the newly-loaded slide’s width, and expands the gallery div‘s width to accommodate the width of the slide. It also tracks how many slides have now preloaded. If enough slides have loaded then it fades in and activates the gallery.
Here’s the code for the handleSlideLoad() function:
// Process each slide once it's finished loading

function handleSlideLoad() {

  // Record the slide's width in the slideWidths array
  slideWidths[$(this).data('slideNum')] = $(this).width();

  // Increase the gallery div’s width to encompass this newly-loaded slide
  $('#gallery').width( $('#gallery').width() + $(this).width() + slideHorizMargin*2 );

  // Record the fact that this slide has loaded in the slideLoaded array
  slideLoaded[$(this).data('slideNum')] = true;

  // Are we still preloading the slides?

  if ( loading ) {

    // Yes: Calculate how many slides we’ve now preloaded

    var preloaded = 0;

    for ( var i=0; i < preloadSlides; i++ ) {
      if ( slideLoaded[i] ) preloaded++;
    }

    // If we’ve preloaded enough slides, fade in the gallery and enable the left/right buttons

    if ( preloaded == preloadSlides || preloaded == totalSlides ) {
      $('#loading').clearQueue().stop().fadeTo('slow', 0 );
      $('#gallery').css('top',0);
      $('#gallery').fadeTo('slow', 1 );
      $('#leftButton').css('height',buttonHeight);
      $('#rightButton').css('height',buttonHeight);
      $('#rightButton').show();
      addSlideHover();
      loading = false;
    }
  }

  // If this newly-loaded slide is the first slide in the gallery,
  // centre it in the browser viewport and set its opacity to currentSlideOpacity.
  // Otherwise, set its opacity to backgroundSlideOpacity.

  if ( $(this).data('slideNum') == 0 ) {
    centreCurrentSlide();
    $(this).fadeTo( 'slow', currentSlideOpacity );
  } else {
    $(this).fadeTo( 'slow', backgroundSlideOpacity );
  }

}
Let’s step through this function:
- Record the slide’s width in the
slideWidthsarray.
Since the image has now loaded, we can find out its width in pixels by calling the jQuerywidth()method on it. We store this value in theslideWidthsarray, keyed by the slide’s index number, for later use. - Increase the gallery
div‘s width to encompass this newly-loaded slide.
Our gallerydivneeds to be at least as wide as the total of all the slide widths (plus margins), otherwise the images will wrap. This line of code increases the width of the gallery to allow for the slide’s width, plus the horizontal margin either side of the slide. - Record the fact that this slide has loaded in the
slideLoadedarray.
We set theslideLoadedarray value for this slide totrue. We’ll use this array next to determine if enough slides have been preloaded to display the gallery. - Display the gallery if enough slides have preloaded.
The code in theif ( loading ) { ... }block loops through the first few slides (determined by thepreloadSlidessetting). If all those slides have now preloaded, we enable the gallery.To enable the gallery, we first cancel the loading message animation and fade it out slowly. Then we reset the gallery’s
topCSS property to bring it back into the viewport, and fade it in slowly. We also reset the left and right button heights to enable them, and display the right button. We calladdSlideHover(), which adds hover event handlers to the current slide so that the caption will display when the mouse hovers over the slide. Finally, we set theloadingglobal variable tofalseto indicate that preloading has finished and the gallery is running. - Centre the slide if necessary, and set the slide’s opacity.
The last chunk of code in the function checks to see if we’re working with the first slide in the gallery. If we are then we centre it by callingcentreCurrentSlide(), and set its opacity tocurrentSlideOpacity, which is 1 (fully opaque) by default. If we’re working with a different slide then we set its opacity tobackgroundSlideOpacity(0.5 by default).
Step 8: Create the moveLeft() and moveRight() functions
Our next 2 functions do the actual sliding of the gallery to move from one image to the next. Let’s look at moveLeft() first:
// Move one slide to the left by sliding the gallery left-to-right

function moveLeft() {

  // Don't move if this is the first slide, or if we don't yet have a width for the previous slide
  if ( currentSlide == 0 ) return;
  if ( slideWidths[currentSlide-1] == undefined ) return;

  // Cancel all event handlers on the current slide
  slides[currentSlide].unbind('mouseenter').unbind('mouseleave').unbind('touchstart');

  // Stop any fades on the caption and hide it
  $('#caption').stop().clearQueue().hide();

  // Slide the whole gallery right so that the previous slide is now centred
  var offset = slideWidths[currentSlide]/2 + slideHorizMargin*2 + slideWidths[currentSlide-1]/2;
  $('#gallery').animate( { left: '+=' + offset } );

  // Fade the old slide to backgroundSlideOpacity, and the new slide to currentSlideOpacity
  slides[currentSlide].animate( { opacity: backgroundSlideOpacity } );
  slides[currentSlide-1].animate( { opacity: currentSlideOpacity } );

  // Update the current slide index
  currentSlide--;

  // Update the shown/hidden states of left/right buttons as appropriate
  setButtonStates();

  // Set the caption to the new current slide’s alt text,
  // and attach the hover events to the new slide
  $('#caption').html( slides[currentSlide].attr('alt') );
  addSlideHover();
}
Here’s how the function works:
- Exit if we can’t move anything.
If we’re currently viewing the first slide in the gallery, or if we don’t yet have a width for the previous slide (because it hasn’t yet preloaded), then we can’t move to the previous slide. In these cases, we simply usereturnto exit the function. - Cancel all event handlers on the current slide.
Before moving to the next slide, we remove anymouseenter,mouseleave, andtouchstartevent handlers from the current slide. These handlers display the slide’s caption if the user hovers over the image (or touches it on a touch device). Since we’re about to move to another slide, we no longer want these handlers on the current slide. - Stop any fades on the caption and hide it.
We call the jQuerystop()method on the caption to stop any currently-running fade animation on the caption text. We then callclearQueue()to cancel any queued fade in/out animations, and hide the caption by callinghide(). - Slide the whole gallery right so that the previous slide is now centred.
We’re now ready to slide our gallery to the previous image. First we calculate the amount we have to slide it; this value is half the width of the current slide, plus the left margin on the current slide, plus the right margin on the previous slide, plus half the width of the previous slide. We store this value inoffset, then use the jQueryanimate()method to slide the whole#gallerydivright by theoffsetvalue. - Fade the old slide out, and the new slide in.
We callanimate()on both the “current” slide (which is now the previous slide), and the slide to the left of the current slide (which is the new current slide). These calls toanimate()fade the opacities of the 2 slides tobackgroundSlideOpacityandcurrentSlideOpacityrespectively. - Update the current slide index.
Next we decrement the value of thecurrentSlideglobal variable to reflect the fact that we’ve moved to the previous slide. - Update the shown/hidden states of left/right buttons as appropriate.
We also call oursetButtonStates()function to update the states of the left and right buttons if necessary. For example, if we’ve now moved to the first slide in the gallery then we need to disable the left button. - Set up the caption for the new slide.
Finally, we replace the caption’s text with the new slide’salttext, and reattach themouseenter,mouseleave, and/ortouchstartevents to the new slide by calling ouraddSlideHover()function.
Our moveRight() function is, as you’d imagine, pretty much the mirror image of moveLeft():
// Move one slide to the right by sliding the gallery right-to-left

function moveRight() {

  // Don't move if this is the final slide, or if we don't yet have a width for the next slide
  if ( currentSlide == totalSlides - 1 ) return;
  if ( slideWidths[currentSlide+1] == undefined ) return;

  // Cancel all event handlers on the current slide
  slides[currentSlide].unbind('mouseenter').unbind('mouseleave').unbind('touchstart');

  // Stop any fades on the caption and hide it
  $('#caption').stop().clearQueue().hide();

  // Slide the whole gallery left so that the next slide is now centred
  var offset = slideWidths[currentSlide]/2 + slideHorizMargin*2 + slideWidths[currentSlide+1]/2;
  $('#gallery').animate( { left: '-=' + offset } );

  // Fade the old slide to backgroundSlideOpacity, and the new slide to currentSlideOpacity
  slides[currentSlide].animate( { opacity: backgroundSlideOpacity } );
  slides[currentSlide+1].animate( { opacity: currentSlideOpacity } );

  // Update the current slide index
  currentSlide++

  // Update the shown/hidden states of left/right buttons as appropriate
  setButtonStates();

  // Set the caption to the new current slide’s alt text,
  // and attach the hover events to the new slide
  $('#caption').html( slides[currentSlide].attr('alt') );
  addSlideHover();
}
This function slides the whole gallery left to move the next slide to the centre of the window.
Step 9: Create the centreCurrentSlide() function
The centreCurrentSlide() function centres the current slide horizontally in the browser viewport. We call it in 2 ways:
- From the
handleSlideLoad()function, to centre the first slide in the viewport once it’s loaded. - As an event handler for the browser window’s
resizeevent, so we can re-centre the slide whenever the user resizes their browser.
Here’s the code for the function:
// Centre the current slide horizontally in the viewport

function centreCurrentSlide() {

  // Work out how far the left edge of the slide is from the
  // left hand edge of the gallery div

  var offsetFromGalleryStart = 0;

  for ( var i=0; i<currentSlide; i++ ) {
    offsetFromGalleryStart += slideWidths[i] + slideHorizMargin*2;
  }

  // Find the horizontal centre of the browser window
  var windowCentre = $(window).width() / 2;

  // Compute the left position of the slide based on the window centre and slide width
  var slideLeftPos = windowCentre - ( slideWidths[currentSlide] / 2 );

  // Compute the offset for the gallery div based on the slide position and
  // the slide offset from the gallery start. Also allow for the
  // horizontal margin on the left side of the slide.
  var offset = slideLeftPos - offsetFromGalleryStart - slideHorizMargin;

  // Move the gallery div to the new offset
  $('#gallery').css( 'left', offset );
}
Most of this function is simple maths to work out the position of the current slide relative to both the window centre and the start of the #gallery div. Once we know this, we can simply readjust the position of the #gallery div to re-centre the slide.
Here’s how it works:
- Work out how far the slide is from the left hand edge of the gallery
div.
First we need to calculate the position of the left edge of the slide, relative to the left edge of the gallery. To do this, we use a loop to add up all the widths of the slides before the current slides, plus each slide’s left and right margins. We store the result inoffsetFromGalleryStart. - Find the horizontal centre of the browser window.
This is easy enough — it’s the window’s width divided by 2. We store the result inwindowCentre. - Compute the left position of the slide.
Now we work out the desired position of the slide’s left edge, relative to the browser window. This is the window centre minus half the slide width. We store this inslideLeftPos. - Compute the offset for the gallery
div.
We’re now ready to work out the x-position that we need to move the gallerydivto. This is the value ofslideLeftPosminus the value ofoffsetFromGalleryStart. We also need to subtractslideHorizMarginto compensate for the left hand margin on the slide. - Move the gallery
divto the new offset.
Now that the maths is out of the way, we just need to move our gallerydivto the new position. We do this by setting the gallery’sleftCSS property to the new offset value.
Step 10: Create the setButtonStates() function

setButtonStates() is very simple. Its sole job is to show or hide the left and right buttons based on the currently-displayed slide:
// Show or hide the left and right buttons depending on the current slide:
// 1. If we're showing the first slide, hide the left button
// 2. If we're showing the last slide, hide the right button

function setButtonStates() {

  if ( currentSlide == 0 ) {
    $('#leftButton').hide();
  } else {
    $('#leftButton').show();
  }

  if ( currentSlide == totalSlides - 1 ) {
    $('#rightButton').hide();
  } else {
    $('#rightButton').show();
  }

}
This should be self-explanatory. We use the jQuery hide() and show() methods to hide and show each button as appropriate.
Step 11: Create the addSlideHover() function
This function adds various event handlers to the current slide, allowing the user to view the caption by hovering over the slide with their mouse — or, in the case of touch devices, by tapping the slide:
// Attach mouseenter and mouseleave event handlers to the current slide to fade the caption in and out
// However, if the device supports touch events then fade the caption in/out when the slide is touched

function addSlideHover() {

  if ( 'ontouchstart' in document.documentElement ) {
    slides[currentSlide].bind( 'touchstart', function() {
      if ( $('#caption').is(':visible') ) {
        $('#caption').stop().clearQueue().fadeOut( captionSpeed );
      } else {
        $('#caption').stop().clearQueue().fadeTo( captionSpeed, captionOpacity );
      }
    } );
  } else {
    slides[currentSlide].hover(
      function() { $('#caption').stop().fadeTo( captionSpeed, captionOpacity ) },
      function() { $('#caption').stop().fadeTo( captionSpeed, 0 ) }
    );
  }
}
The function first checks if the browser supports the touchstart event. If it does then it creates a touchstart event handler that toggles the caption by fading it out if it’s already visible, or fading it in if it’s not.
There is a jQuery method, fadeToggle(), that can do this toggling action for you. However, fadeToggle() doesn’t let you fade in to a specific opacity value. It only fades right out (opacity=0) or right in (opacity=1).
If the browser doesn’t support touchstart then we instead call the jQuery hover() method to set up 2 event handler functions: one for the mouseenter event, and one for the mouseleave event. These functions fade the caption in and out as the mouse moves over and out of the image.
Step 12: Create the fadeInLoadingMessage() and fadeOutLoadingMessage() functions
The last couple of functions in our script set up the pulsing animation for the “Please wait…” loading message:
// Functions to pulse the loading message

function fadeInLoadingMessage() {
  $('#loading').animate( { opacity: loadingMessageMaxOpacity }, loadingMessageSpeed, 'swing', fadeOutLoadingMessage );
}

function fadeOutLoadingMessage(){
  $('#loading').animate( { opacity: loadingMessageMinOpacity }, loadingMessageSpeed, 'swing', fadeInLoadingMessage );
}
fadeInLoadingMessage() uses animate() to set up a jQuery animation that fades the loading message up to its maximum opacity. Once the fade-in is complete, it triggers the fadeOutLoadingMessage() function.
fadeOutLoadingMessage() does the reverse: it fades out the message, then calls fadeInLoadingMessage().
In this way, we set up an animation loop that pulses the loading message continuously in and out, until it is stopped by the calls to clearQueue() and stop() inside the handleSlideLoad() function.
All done!
We’ve now built our lovely sliding image gallery! Here’s the demo again:
I hope you’ve found this tutorial useful, and you enjoy using the gallery. If you have any comments or questions on the tutorial, feel free to post a response below. Have fun!
This is fabulous! Just what I was looking for! I am creating a site for a photographer friend and she is gonna love this!
@dlass727: Thanks for your comment – glad you like it! 🙂
Thanks, this is the answer to my prayers. I was wondering how I can get the slider to slide continuously, and to have the middle slider start on the second image?
@ccubmed:
“how I can get the slider to slide continuously”
Create a timer function using setInterval() that calls moveRight():
http://www.elated.com/articles/javascript-timers-with-settimeout-and-setinterval/
“have the middle slider start on the second image”
You mean, start the gallery with the second image in the centre instead of the first?
The most reliable way (without hacking a lot of code) is probably to add a delayed call to moveRight() once enough slides have been preloaded:
if ( preloaded == preloadSlides || preloaded == totalSlides ) { $('#loading').clearQueue().stop().fadeTo('slow', 0 ); $('#gallery').css('top',0); $('#gallery').fadeTo('slow', 1 ); $('#leftButton').css('height',buttonHeight); $('#rightButton').css('height',buttonHeight); $('#rightButton').show(); addSlideHover(); loading = false; setTimeout( moveRight, 500 ); }This is really good/super. The only thing I dislike (just a litle) is that you have to have the link to elated in the info window. Is there a possibility to use this without it?
[Edited by Andor on 11-Jul-11 23:56]
@Andor: Of course! That info window is only there so people can get back to the tutorial. Feel free to remove it in the markup. The code is CC attribution licensed so you just need to include credit/link to http://www.elated.com somewhere.
Is it ok to have the link in the javascript code? Was going to put it there for my own sake (always good to have a ref. where you got the code).
@Andor: Fine by me!
Hi i am working on a project it is on dress models to buy. The image gallery should show front and back side of the dresses. I want to put 2 dots just below the image, if you press one dot it should show front side of the dress image and if you press the other dot it should show back side of the dress image. how can i do that ? can you please help? thank you.
I don´t know how to thank you… This is really great!
One thing i wanna change.. How can i make captions to show always.. In that center picture..
Thanks.
@jkwebdesign: Take out:
from the #caption ruleset in the CSS. Then remove these lines:
  // Stop any fades on the caption and hide it
  $('#caption').stop().clearQueue().hide();
from the moveLeft() and moveRight() functions. Then remove all calls to addSlideHover() from the code.
Thanks a lot.. now it is just what i want it to be..:) COOL..
I just figure out that it is also possible to show videos from tube or vimeo with this..
@jkwebdesign: Videos would be awesome! I guess it should work using HTML5 video elements instead of img elements? Let us know if you manage to get it working 🙂
This is great! I have one issue. I have 9 images and the slider seems to stop at the 5th image and no longer moves. I’ve looked through the code, but am at a loss. Do I have to change the div margin? Please help.
My bad, I figured it out, miss spelling 🙂
@micketong: No problem – glad you got it working 🙂
I love this but having some problems in latest IE versions. The images load ok but
a) I don’t see the arrows (so therefore it’s not obvious to a casual user what to do) and the horizontal scroll bar appears.
b) On this link http://www.alanmatthewsphotography.com/music you can see the image where the bald tattooed guy with his hands up had little white dots all over. That’s not how it’s supposed to be.
All this looks great in Safari!
Your tutorials kick ass. So well written. You should write a book. Thanks for sharing this.
@AlanMatthews: It’s because you’re using an ancient DOCTYPE that is triggering IE’s Quirks mode. Make sure you use the HTML5 DOCTYPE used in the tutorial demo and you should be fine.
@waterworks: Thanks 🙂
@Matt – thanks IE now looks much better. Still have some tweaks but I’m still having trouble with how some images are displaying in IE only. If you have IE, look at http://www.alanmatthewsphotography.com/music/index.shtml and see the 7th picture (the guy with his hands raised and eyes closed) and do you see the tiny white dots everywhere? If you open that image alone in a new tab those dots are not there. So it has to be some implementation of the CSS.
@AlanMatthews: I don’t see any white dots in IE7, 8 or 9. It might be an issue with your browser or OS. Can you post a screenshot somewhere?
Great-looking site BTW – really nice use of the gallery script!
Thanks! It really solves some issues I had when using straight HTML and CSS. I had a user not know what to do when the page loaded so I made the initial opacity on the right arrow higher so it was obvious what to do.
Still have issues with some images in the latest IE on Windows 7 at least that’s what I have seen and still see.
@AlanMatthews: Can you post a screenshot somewhere? eg Flickr or MediaFire?
Is it possible to make thumbs on the bottom. I’m fresh in jquery.. any help for me ? 🙂
@iwek: Certainly possible, yes, although it will require a little bit of coding. You can either just scale down the slide images to thumbnails using CSS (easy, but takes up a lot of bandwidth), or produce thumbnail versions of the slides using something like Photoshop (more time-consuming, but saves bandwidth if the user isn’t going to view all the slides).
You can create the thumbnails as explicit <img> tags in your markup. Put them in a separate div with a class of, say, “thumbs”. Then style the div and the images using CSS (for example, absolutely position the div along the bottom of the window, and scale the images to max-width: 100px and max-height: 100px). You can then link each image using something like:
…replacing ‘3’ with the index position of each thumbnail.
Then write a simple moveToSlide() JavaScript function that takes the slide index to move to, works out how many positions left or right it needs to move, then calls moveLeft() or moveRight() the appropriate number of times.
Cheers,
Matt
Huh.. i made it..
Maby this is not a beautyful code but it works.
function moveToSlide(gotoSlide) {

  var num = 0;
  skipSlide = gotoSlide-currentSlide;

  if(skipSlide>0)
  skipUpDown = false;
  else
  skipUpDown = true;

  numberSkip = (Math.abs(skipSlide))-1;

  if(skipUpDown)
  {
    for(num=0;num<=numberSkip;num++)
    {
      slides[currentSlide].unbind('mouseenter').unbind('mouseleave').unbind('touchstart');
      $('#caption').stop().clearQueue().hide();

      var offset = 0;
        for(num=0;num<=numberSkip;num++)
        {
          offset += slideWidths[currentSlide]/2 + slideHorizMargin*2 + slideWidths[currentSlide-1]/2;
          if(num==numberSkip) $('#gallery').animate( { left: '+=' + offset },400 );
          if(num==0) slides[currentSlide].animate( { opacity: backgroundSlideOpacity } );
          if(num==numberSkip) slides[currentSlide-1].animate( { opacity: currentSlideOpacity } );
          currentSlide--;
        }

      setButtonStates();
      $('#caption').html( slides[currentSlide].attr('alt') );
      addSlideHover();
    }
  }
  else
  {

      slides[currentSlide].unbind('mouseenter').unbind('mouseleave').unbind('touchstart');
      $('#caption').stop().clearQueue().hide();

      var offset = 0;
        for(num=0;num<=numberSkip;num++)
        {
          offset += slideWidths[currentSlide]/2 + slideHorizMargin*2 + slideWidths[currentSlide+1]/2;
          if(num==numberSkip) $('#gallery').animate( { left: '-=' + offset },400 );
          if(num==0) slides[currentSlide].animate( { opacity: backgroundSlideOpacity } );
          if(num==numberSkip) slides[currentSlide+1].animate( { opacity: currentSlideOpacity } );
          currentSlide++;
        }

      setButtonStates();
      $('#caption').html( slides[currentSlide].attr('alt') );
      addSlideHover();
  }

}
Now.. I opacity thumbs (0.5)
I found something like this..
$(function(){
    $("#thumbs a img").fadeTo("fast", 0.5);

    $("#thumbs a").bind({
        mouseenter:function(){
            $('img', this).fadeTo("slow", 1);
        },mouseleave: function(){
            $('img', this).fadeTo("slow", 0.5);
        }
    });
});
Also works.. But how to set opacity(1.0) for current Slide thumb?
[Edited by iwek on 02-Dec-11 07:37]
Great work, matt !
Two questions:
1. Is there a way to have the pictures enlarged by clicking on them?
2. Is there any problem with using a database for the storing of pictures and legends (with php and mysql)?
@iwek: You have the currently-displayed slide index in currentSlide, right? So you could find and manipulate the corresponding thumb image using something like:
var image = $("#thumbs a:eq(" + currentSlide + ") img");
image.fadeTo("slow", 1);
Just guessing – should work in theory!
http://api.jquery.com/eq-selector/
Cheers,
Matt
@etelka: Thanks 🙂
1. Yes, you should be able to add in a lightbox such as http://fancybox.net/ or http://jacklmoore.com/colorbox/ fairly easily. Just call fancybox() or colorbox() on each img. If you need to wrap each img element in a link (not sure if this is a requirement of fancybox/colorbox) then you’ll need to hack the image gallery script to work with the images inside links.
2. No problem at all. Just write a PHP script to grab the image URLs and captions for the database, then output the gallery page containing the appropriate img tags.
Thank you, matt. I’ll give it a try and let you know in a few days if it worked out.
Hi there! I love your slider, but it seems I have a problem when using it in my webpage. I set the webpage’s header fixed so it can be shown on my page when I scroll. But the problem is that, when I scroll, the slider wouldn’t go underneath the header, but above.
I analyzed the script and the css, but I couldn’t find the problem. It’s like the slider is set on ‘Always on top’ or something.
The other divs in my webpage are scrolling just fine, the slider is the only one that is having this problem.
Please help!
Thanks!
@teodora: Without seeing your page it’s hard to give you an exact answer. But you might try setting the header’s ‘z-index’ CSS property to a high value, such as 999.
This is awesome! Thanks a bunch for making it!
Just finished learning basics of html/php/css.Now I am building my first web app. I have created a php file that sends back a random image from a database of thousands of images. Let’s call this php file some_file.php
Current sliding image gallery code uses fixed set of local images for slideshow. Now i want to modify sliding image gallery code such that it pulls images from some_file.php and create a never ending slideshow. Any hints/suggestions/sample code on how to proceed.
Thank you in advance!
@aspire: Please post your question in a new topic:
http://www.elated.com/forums/authoring-and-programming/topic/new/
yes, it worked with a ‘z-index’ higher value. I figured this out by myself just before i read your answer :).
Thank you very much!
@teodora: Great stuff 🙂
@Matt
how do I show the captions?
function addSlideHover() {

  if ( 'ontouchstart' in document.documentElement ) {
    slides[currentSlide].bind( 'touchstart', function() {
      if ( $('#caption').is(':visible') ) {
        $('#caption').stop().clearQueue().fadeOut( captionSpeed );
      } else {
        $('#caption').stop().clearQueue().fadeTo( captionSpeed, captionOpacity );
      }
    } );
  } else {
    slides[currentSlide].hover(
      function() { $('#caption').stop().fadeTo( captionSpeed, captionOpacity ) },
      function() { $('#caption').stop().fadeTo( captionSpeed, 0 ) }
    );
  }
}
[Edited by ugotnukd on 30-Jan-12 12:52]
If you mean “how can I always show the captions”, see my answer earlier in the topic:
http://www.elated.com/forums/topic/5158/#post21591
Hi Matt,
is it possible to replace <img> with <div>, so I can display html tags in each slide?
Thanks!
@catseven: I don’t see why not. Just replace the img elements in the #gallery div with divs, and change the relevant CSS and jQuery selectors from ‘#gallery img’ to ‘#gallery div’.
Never tried it but it should work – in theory 😉
Hello Matt,
I like it very much this slide. I tried to change the start position og the slide but can make it. I want it to start from the left, do you have any suggestion, please?
@xJoSyMaRx: To start the gallery on the second slide, set currentSlide to 1 instead of 0:
You’ll also need to change:
  if ( $(this).data('slideNum') == 0 ) {
    centreCurrentSlide();
    $(this).fadeTo( 'slow', currentSlideOpacity );
  } else {
    $(this).fadeTo( 'slow', backgroundSlideOpacity );
  }
to:
if ( $(this).data('slideNum') == 1 ) { centreCurrentSlide(); $(this).fadeTo( 'slow', currentSlideOpacity ); } else { $(this).fadeTo( 'slow', backgroundSlideOpacity ); }Hi Matt,
First, thanks for creating this slider! It’s very cool and exactly what I’ve been looking to include in my site. I’m having a few small issues that I’m hoping you can help me with.
1) I have the “galleryContainer” div sitting inside my own “wrapper” div, which is centered in the browser. The slider is set so only one image is shown on screen at once but the image isn’t centered in the browser. It’s showing more towards the right of the screen in Safari. In Firefox, part of the right side of the image is cut off, at the edge of the wrapper div. How can I control the positioning of the image?
2) I also wanted the captions to be always showing but I can’t figure out a way to fade them in with each image. Is there a way to fade in the caption with each slide?
3) Finally, is there anyway to put html in the captions? I’d like to put a link in there but since it’s pulling from the <alt> tag, I can’t…
Thanks again!
[Edited by azukizero on 16-Mar-12 14:41]
@azukizero: If you post the URL of your gallery page then I can take a look. You’ll probably need to at least change this line:
so that it uses your div’s width instead of $(window).width().
Matt, thanks for your reply. I was able to center the gallery images in the browser by taking it out of the “wrapper” div and I fixed the captions to always ‘on’ by playing around a bit.
I’ve tried several approaches to changing the caption info from the ‘alt’ tag to regular <p> info so I can put a link in there but I haven’t had any success.
Any ideas on how I can change the source of the caption info from the ‘alt’ tag to something else so I can do this?
Thanks again for your help!
@azukizero: I guess you could put a <p> after each <img> that contains the caption. Then you could create a slideCaptions array and populate it in the same way as the slides array:
  $('#gallery p').each( function() {
    $(this).hide();
    $(this).data( 'slideNum', totalCaptions );
    slideCaptions[totalCaptions++] = $(this);
  } );
Then you could set the current caption throughout the code like this:
$('#caption').html( slideCaptions[currentSlide].html() );Haven’t tested it but you get the idea!
Great writeup and easy to understand. Thanks a lot!!
I have two questions though.
1) For each image I want on hover to add elements like facebook like, tweet/share etc and comments. How will that be possible?
2) I don’t see any button where I can exit from the gallery. My intention is to click from a list of images and get to this gallery and then click close and go back to the list.
Can you please advise?
@akdwivedi:
1) To like or share an image it will need its own unique URL. You could maybe do this by hacking the gallery code to accept a hash value in the URL and display the corresponding image when it loads. Or you could let the user click an image to open it in its own unique page, where it could then be liked/shared.
2) Just create a link back to your image list. (Or create a button, and add an onclick that returns the user to the image list.)
@matt thanks for the reply! I will give it a try, not sure if I will achieve it 🙂
-Abhi
thanks for this it’s amazing…
i just have 1 question, how can i make it slide automatically??
🙂
Read the fifth post in the thread.
Firstly, I love this Slider! Thank you for taking the time and energy to create and share it.
I am brand new to jquery and javascript so pardon if these questions have commonly known answers.
I am currently auto-playing the slideshow using “var timer = setInterval( moveRight, 4500 );” I am not sure if this is the best way to go about it. Is it? If it is, then how can I get the right and left buttons to override the setInterval timing? Currently, even when I press the buttons, it still wants to pull the next slide in from right to left, every 4500 ms, no matter which direction I’m going in, and regardless of when I just pressed the right/left arrow button. I am okay with the auto-play feature being turned off once the user hits the left/right arrows. I just don’t know how to do it.
It would also be nice if the user could pause the playback and resume it again with the space-bar. How can I do that?
Also, I would like the slideshow to infinitely loop back to the first image as if there was no break in the loop. I have found a way to rig it but simply listing the images again, but this will only “loop” until the images are done being shown, not infinitely.
Last but not least, how can I set the time it takes to switch out each slide to be 1000 or 1500 ms?
Thank you so much for your help!
[Edited by LittleMama1980 on 28-Dec-12 22:09]
@LittleMama1980: To turn off your auto-play feature, just call clearInterval( timer ) .
See: http://www.elated.com/articles/javascript-timers-with-settimeout-and-setinterval/
i knw how for css we make a different file with .css extension.. but m unaware of jquery ,ajax.. i need help to let me knw wer to put jquery and ajax codes
Hi , i cant use it with reflection on ie8 can anybody help me ?
Hi Mark,
Thanks so much, this is exactly what I was looking for.
Just a quick question, would it possible to make the images fully responsive and perhaps move the scrolling vertically for mobile device?
Thanks Matt,
I want to know how to move text on the slide to slide?
I do well
and
  if ( $(this).data('slideNum') == 4) {
    centreCurrentSlide();
    $(this).fadeTo( 'slow', currentSlideOpacity );
  } else {
    $(this).fadeTo( 'slow', backgroundSlideOpacity );
  }
and it does not work, I can not boot from a specific slide (here the 4)
Do u have any solution ?
Heya! It’s me again, a couple years later. My slider is suddenly not centering in regular browsers, but still looking great in mobile browsers. Any idea what’s going on with the code to make this new off-center issue? I haven’t changed the slider code since before the new issue started. The website is http://www.claytontimbrell.com
Maybe it’s time for a rethink.
http://webmaster-talk.eu/forum/website-design/3583-no-argument-from-me-on-these-things-disappearing-for-ever
Next and previous button is not working also loading only one picture.
Can you give some hint where look for error.
Thanks
“Can you give some hint where look for error.”
Sure! No problem.
Somewhere in your code, ’cause it works in the original.
chrishirst, your comments are not helpful. Please stop replying to people and let the original poster address these things if he wants to.
Matt, do you think you can chime in and help us out? I know this an old post but it is still very useful to a lot of people! 🙂 haven’t seen a reply from you in awhile. Thanks in advance!
My post was precisely as helpful as YOUR QUESTION IS.
How exactly is ANYONE supposed to diagnose what you have done wrong by looking at the original code THAT WORKS????
Read THIS:
http://www.elated.com/forums/topic/5711/
Currently there are only two people answering topics here and NEITHER of us are mindreaders, HOW can we know why YOUR code does not work??????
The original works, your’s doesn’t, can YOU guess where the problem is???
[the following is for anyone and everyone reading]
IF you are going to ask a question that you want a really useful answer to THEN:
Either show us YOUR CODE or provide a URI that we can maybe use to diagnose what is wrong and where it is going wrong.
And no, codepen, jsfiddle and other such ‘tools’ are of no use, in this situation. Neither is showing us a picture. We need YOUR CODE and YOUR images to be able to test the problem.
If you do not have hosting, sign up for a free account at Hostinger (http://api.hostinger.co.uk/redir/8602986) or 2freehosting (http://api.2freehosting.com/redir/11782759)
Yes they are referral links, mine.
Or if you want serious hosting, tell me and I’ll send you a proforma invoice for a http://tinf.co.uk account (Yep that’s me as well)
Thank you for your attention and participation at Elated.
[Edited by chrishirst on 30-Aug-15 06:18]
Hi,
I am really new to web developer (and also js, css, and html).
What I am about to do is to make auto-scroll image gallery using this tutorial.
Could anyone tell me how to
1. auto-scroll this image gallery to right and
2. when it reached the end of image it will return to first image and
3. then redo the scroll (unlimited loop)
What I have been doing is this:
//new function to loop the scroll (well, it didnt work out)

function doLoop()
{
	location.reload();
}
function moveLoop()
{
	//console.log("moveLoop currentSlide:"+currentSlide);
	//console.log("moveLoop preloadSlides:"+preloadSlides);
	var ts = 4000;
	var mult = 1;
	var finish = false;
	for (i=0; i<= preloadSlides; i++)
	{
		console.log("NOT Finnish");
		setTimeout(moveRight, ts*mult);
		mult++;
		finish = true
	}
	if(finish)
	{
		console.log("Finnish");
		setTimeout(doLoop, ts*(mult-2));
		//init();
		finish = false;
	}
}

//and on handleSlideLoad()
...
...
if ( preloaded == preloadSlides || preloaded == totalSlides )
	{
	  $('#loading').clearQueue().stop().fadeTo('slow', 0 );
	  $('#gallery').css('top',0);
	  $('#gallery').fadeTo('slow', 1 );
	  $('#leftButton').css('height',buttonHeight);
	  $('#rightButton').css('height',buttonHeight);
	  $('#rightButton').show();
	  addSlideHover();
	  loading = false;
	  moveLoop(); //<----added this
    }
...
...
It is not a loop, because when it reached the end of index (last image) I reload the page using doLoop() function.
But this far it’s acceptable because I put it on the iFrame, so users won’t notice it’s reloaded :).
Can anyone point me to more proper way to do it?
[Edited by noobsee on 01-Sep-15 04:50]