Photoshop’s “zoom” facility is very versatile and allows you to zoom in and out of an image in many different ways. You can even have different views of the same document open at once, with different zoom levels!
The Zoom tool
 The most obvious method is the Zoom tool. Click on the magnifying glass icon in the toolbar and the mouse pointer will change to a magnifying glass with a “+” sign in it.
To zoom into an image, just click on the image. The view will zoom into the area you clicked on. To zoom out, Alt+click (Windows) or Option+click (Mac) in the window.
To zoom into a specific area of the image, click and drag a rectangle round the area with the zoom tool.
Zooming with the keyboard
A much quicker way to zoom is with the Ctrl (Cmd on a Mac) and Alt (Option) keys, and the + and – keys, either on the numeric keypad or on the main keyboard. This is great because you don’t have to switch to the zoom tool.
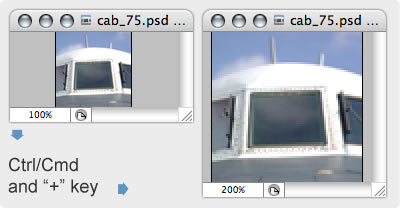
Hit the Ctrl and +/- keys to zoom in and out. The whole window will resize to fit the new zoomed image, if it can.
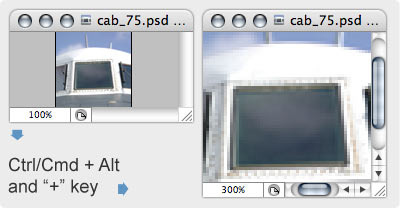
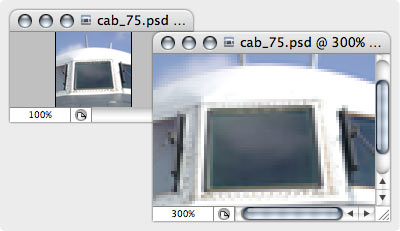
Hit the Ctrl and Alt (Option) keys together with the +/- keys, and the window will stay the same size as the image inside zooms in or out – great if you have limited screen space:
Zooming by exact amounts
If you want to zoom in or out by an exact numeric amount, e.g. 123%, you can, using the little white box at the bottom left of the Photoshop window:

Just double-click it and type a new value in the box, then hit Enter. The view will zoom to that exact amount!
Multiple zooms
This facility is really useful when you want to do close-up pixel work on an image, but still see what the overall image looks like. This is very handy for making small images such as icons.
Set your image to normal size, then select View > New View. Zoom this image in using one of the above techniques. As you paint in this zoomed window, you can see the results in your original, non-zoomed window!
Leave a Reply