Photoshop’s Quick Mask mode is a really versatile way to select things. Instead of creating marquees as you do with the other tools, you can “paint” the selection using any of Photoshop’s painting tools. You can even use the other selection tools on the Quick Mask, as if it was a regular image. This makes the Quick Mask mode a very powerful feature of Photoshop.
To activate Quick Mask mode, click the Edit in Quick Mask mode button in the Tools palette, or press the Q key:

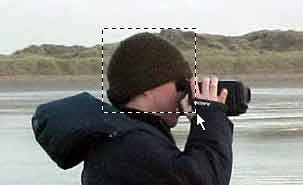
You may want to select something with a regular selection tool (e.g. the Marquee tool) before entering Quick Mask mode, so that you can clearly see what’s selected and what isn’t:


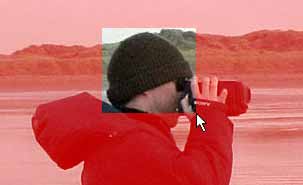
You can see that the un-selected areas of the image are covered with a red mask when in Quick Mask mode.
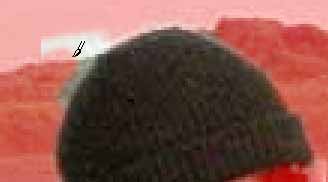
You can now “paint” on the mask using any of the painting tools (Pencil, Paintbrush, Airbrush, etc), and use the Eraser tool to erase areas of the mask (in other words, to select more pixels). You can even use other tools such as the Fill and Smudge tools.

When you’re ready, you can click the Quick Mask button again to switch back to the regular marquee selection (or press the Q key again):


Changing the appearance of the Quick Mask
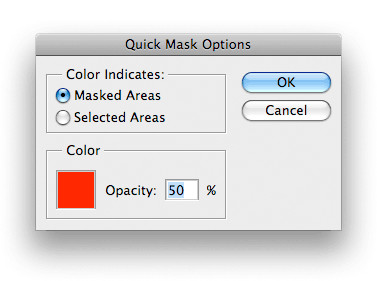
By default, the Quick Mask appears as a 50% transparent red overlay, with the red showing the unselected, or masked off, areas of the image. However, you can change all of these properties with the Quick Mask Options dialog. To display this, double-click the Edit in Quick Mask mode button in the Tools palette.

The options in the dialog work as follows:
- Masked Areas
- Select this option, and the mask colour represents the unselected, or masked off, areas of your image. This is the default setting.
- Selected Areas
- If you select this option, the meaning of the mask colour is reversed; now it shows the selected, or un-masked, areas of the image.
- Color box
- Click this box to choose a different colour from the default red. This is useful if, for example, you image contains a lot of red.
- Opacity
- Use this option to set the opacity of the mask colour. The default is 50%. A value of 100% makes the mask colour completely opaque — this lets you see the mask easily, but completely hides the image under the mask.
Further reading
As well as using Quick Masks, there are many other ways you can select pixels in Photoshop. Take a look at:
It looks like you are suggesting painting outside or around the image.
Why not first, click on edit mask mode and then, with the pencil tool, paint inside of the the knit hat with the red paint.
Then switch back over to Standard Mode, which will put dotted lines around the image and around the knit hat.
From there, go to the Select menu on the toolbar, click on Inverse, which will isolate only the knit hat with dotted lines.
Change over to the Move tool.
Click and grab the knit hat inside the dotted lines.
Viola! Move the hat to wherever you want-into another image or into a new place in the same image
-This averts the need to “select something with the selection tool,” as in picture 1 above.
-And while you have to stay in the tool’s 100% opacity when you are painting with the red paint, you can always switch back and forth between Edit and Standard Modes while painting to make sure the dotted lines that show in Standard Mode are fully covering the knit hat.
@mikebelieve: Great tips – thanks for posting! You’re quite right that there is no need to select something first. I think I was pre-selecting an area to help explain the relationship between Quick Masks and selections (although it’s a long time since I wrote the tutorial, so I can’t really remember!).
Cheers,
Matt