Introduction
You’ve probably seen the standard Apache 404 error page many times, when you’ve visited a Web page that no longer exists:
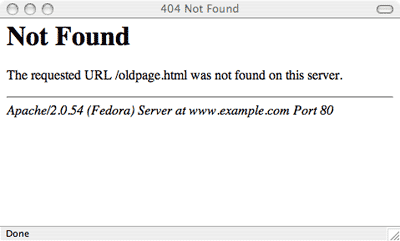
Not very pretty, is it? It doesn’t help much either. Something like the following would be much more useful:
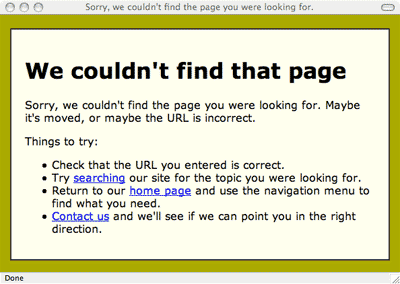
The second error page looks better, is more friendly, and gives the visitor some more options to try (as opposed to just going to another website!).
In this tutorial we’ll show you how to set up your website to serve your own error page rather than the default Apache one.
Apache’s ErrorDocument directive
It’s really pretty easy to get Apache to serve up a custom error page. It’s all controlled through Apache’s ErrorDocument directive. This is a simple one-liner that tells Apache what to do when a particular HTTP error is triggered:
ErrorDocument error-code document
error-code is the HTTP error code. Here are some common error codes that you might like to create custom pages for:
| Code | Error | What It Means |
|---|---|---|
| 404 | Not Found | The page or file couldn’t be found on the site |
| 401 | Unauthorized | The page or file can’t be viewed without the correct username/password (see our Password protecting your pages with htaccess tutorial) |
| 403 | Forbidden | The page or file is not allowed to be viewed at all |
| 500 | Internal Server Error | Something on the server broke (often a CGI script) |
document is the custom page or message that you’d like Apache to serve up instead. So if for example we’d created a nice pretty 404 page called nice404.html, stored in the root folder of our website, then we could get Apache to serve it as follows:
ErrorDocument 404 /nice404.html
We could also create a nice page for a 500 error (perhaps asking the visitor to contact us so we can look into the problem). We might call it nice500.html and put it in the root folder, and add another ErrorDocument directive as follows:
ErrorDocument 500 /nice500.html
You get the idea.
Use relative URLs
Note that it’s best to use an error document on your own site, and reference it with a relative URL as we’ve done above. For example, although you could put your error document on another site and then reference it with an absolute URL:
ErrorDocument 404 http://www.example.com/nice404.html
it will cause Apache to issue a redirect to the browser rather than a hard 404 error. This is generally a bad thing, because Web robots (e.g. search engine spiders) won’t be able to find broken links easily. So it’s not recommended.
Custom error messages
If you don’t have time to design a nice pretty custom error page (or you simply can’t be bothered!), you can at least get Apache to display a slightly more friendly error message. Simply put the message after the error code instead of the error page URL:
ErrorDocument 403 "You really shouldn't be looking at that, you naughty thing!"
(Note that for the older Apache 1.3 server you should miss off the last double quote.)
Creating the .htaccess file
So where do you put the ErrorDocument directive? Usually you put it in your Web server’s config file, or in a .htaccess file in your website root. As you probably won’t have access to your Web server’s config (unless you’re the server administrator), we’ll describe the .htaccess method.
Open your favourite text editor on your PC, and create a new file. Save the file with the name .htaccess (note the period (.) at the start of the file name).
Now add your ErrorDocument lines to your .htaccess file – for example:
ErrorDocument 404 /nice404.html
ErrorDocument 500 /nice500.html
Then save the file and upload it to your website, placing it in the root (top level) folder of your website. Don’t forget to upload your custom error page(s) too!
Testing the custom error page
The last thing to do is test your custom error page or pages. For example, to test a custom 404 page, visit a URL on your site that you know doesn’t exist:
http://www.example.com/abcdef.html
If all goes well you should see your nice friendly error page appear!
If it doesn’t work, check that you’ve uploaded both your custom error page and your .htaccess file to your website, and that the contents of the .htaccess file is correct. You can test that you’ve uploaded your error page to the right place by entering its URL in your browser – for example:
http://www.example.com/nice404.html
(If you don’t see your nice error page then you probably haven’t uploaded it correctly.)
Also check that your Web server supports .htaccess custom error documents (it needs to be an Apache server, and your server admin needs to have enabled the FileInfo override for your site).
An Internet Explorer gotcha
Internet Explorer (bless it) will often ignore your carefully crafted pretty error page completely, and instead display its own “friendly” message. To prevent this happening, make sure that the size of your error page file is at least 512 bytes (add some filler text in HTML comments if you have to). IE will now display your error page rather than its own.
Further info
For full information on Apache’s ErrorDocument directive, see the Apache Core Features documentation.
Leave a Reply