Videos are a super-effective way to get your point across.
Whether it’s an explainer video for your business, a video course that teaches your expert skills, or a promo video for your latest product, videos really help to deliver your message.
But how should your video begin? You can just launch straight into the meat of the video, but often it’s nice to lead your viewers in gently with a short intro. The intro can explain what the video is about, and might include your logo and other info too.
Getting a professionally-made video intro can cost an arm and a leg, but there is a way to do it yourself on a budget — and you can get great results too! In this tutorial, I’ll show you how. All you need is a Mac, the Keynote & iMovie apps, and some free fonts, graphics, and music.
Here’s the intro you’re going to make:
Once you’ve made your intro, you can take the skills you’ve learned to produce awesome, unique-looking custom intros for all of your business videos.
Ready to make a gorgeous, knock-em-dead intro? Let’s go!
Grab the Files!
Save time and download the finished Keynote file, fonts, background image, intro movie and other resources used in this tutorial! Click the button below:
Set everything up
Right, to make your intro, you’ll need to get a few things in place first:
- Grab Keynote & iMovie.
If you don’t already have them for your Mac, you’ll need to pony up and buy them from the App Store. Keynote is about 20 bucks and iMovie is about 15 (US dollars). - Download & install fonts.
It’s best to use the fonts for your business branding, if you have any. If not, you’ll want a couple of nice fun fonts that go well together to use in your intro. If you don’t have any installed that you like, you can buy some from a site like MyFonts or find free ones from Google Fonts. Download them, unzip them, and open them all in Font Book on your Mac. Then click the Install Font button in Font Book to add the fonts to your Mac. (You’ll need to restart Keynote for the fonts to show up.) - Download a background image.
There are tons of great places to get free images that you can use for your intro. For this tutorial, I used this leaves image from Pixabay. Download the highest-resolution image you can and save it somewhere on your Mac. Again, you’ll find this file in the tutorial download. - Download a music file.
For more impact, you’ll want to set your intro to some music. There’s plenty of royalty-free music out there — some free, some paid. For this tutorial I used Jazzy Frenchy from Bensound. Another great place is Music for Makers, which sends you one free music track each week (you don’t even need to include a credit!). Download your track and save it to your Mac.
Create a new Keynote document
Now you’ve got all the tools you need to make your intro, so let’s start making! Follow these steps to set up your new Keynote document:
- Open Keynote.
Fire up the Keynote app on your Mac. - Create a new Keynote presentation.
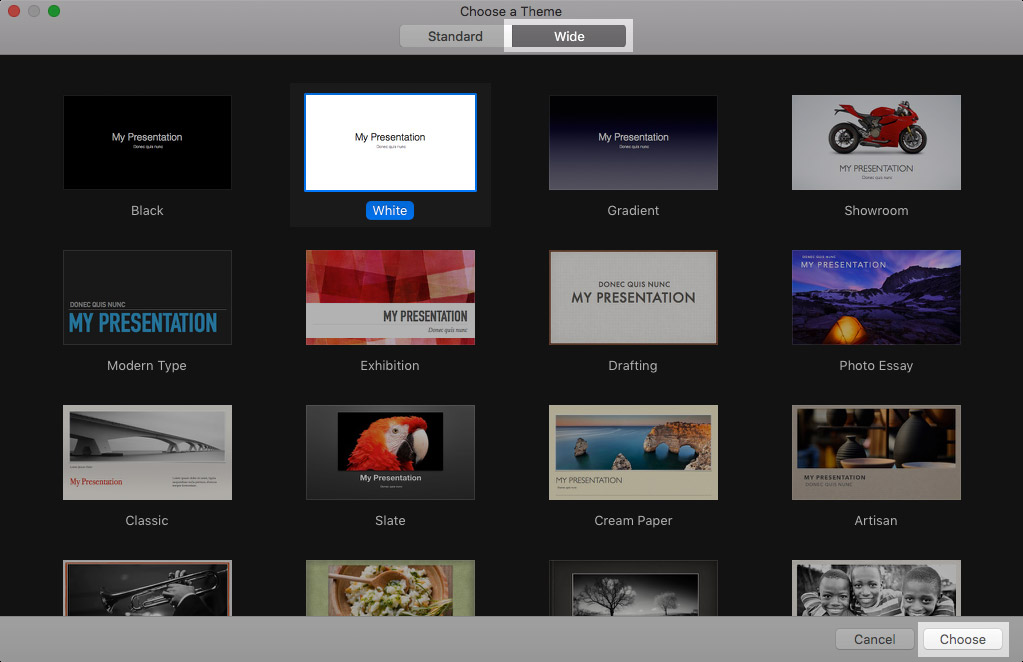
Choose File > New. Click the Wide button at the top of the “Choose a Theme” window, then click the White theme. Click the Choose button to create your new presentation:
When creating your intro presentation in Keynote, choose the Wide White theme. - Delete the default text.
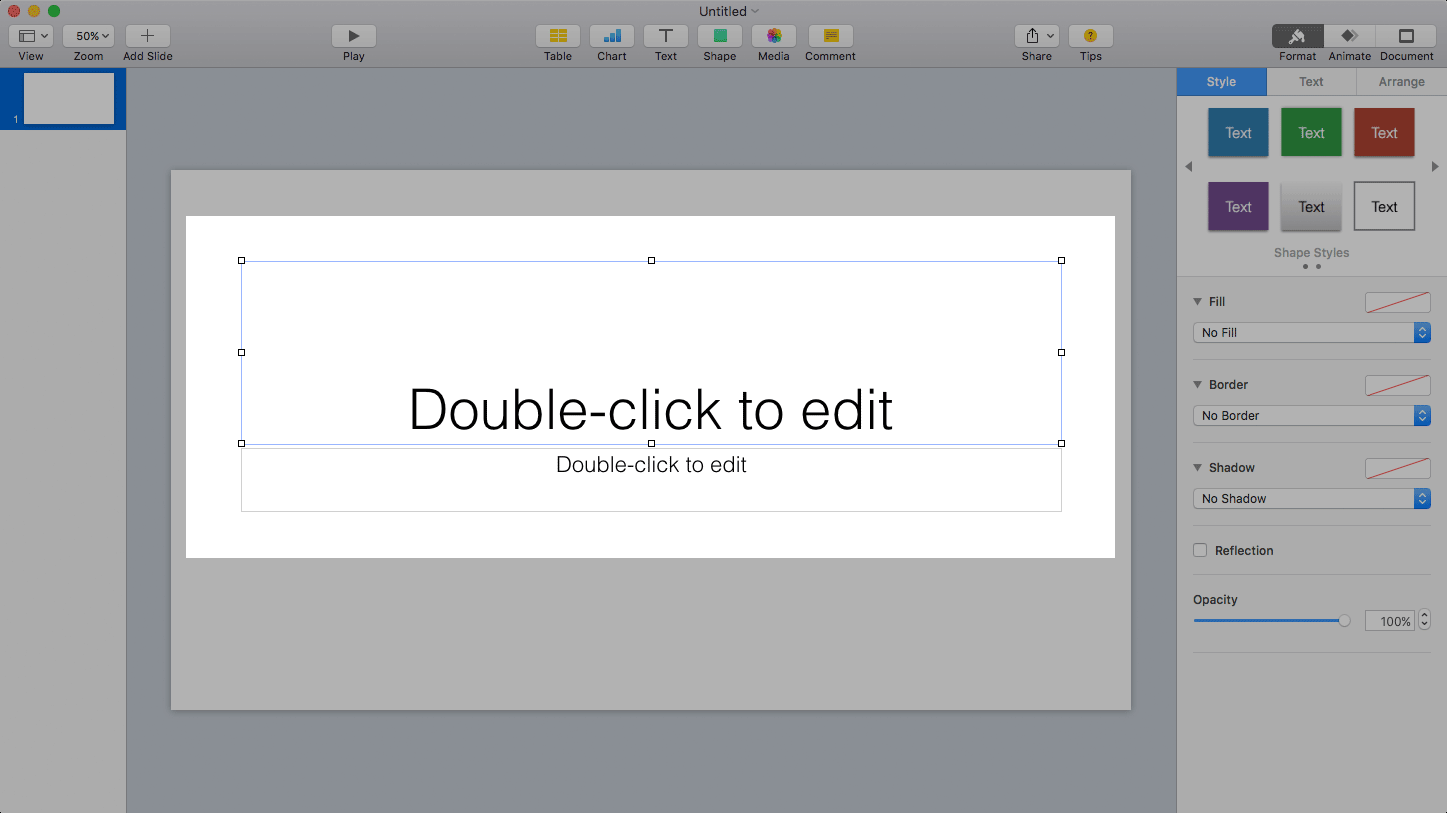
Click the top “Double-click to edit” text box once to select it, then press the Delete key on your keyboard to delete the text box. Repeat for the bottom text box:
Delete the two default text boxes by clicking them and pressing Delete. - Save the Keynote presentation.
Looking good! Now save your new Keynote file by choosing File > Save. Give the file a name, such as “Video Intro”, and click Save.
Add the background image
Now you have a shiny new Keynote document, it’s time to add some stuff to it!
First we’ll add the background image to the slide. Follow these steps:
- Add the image.
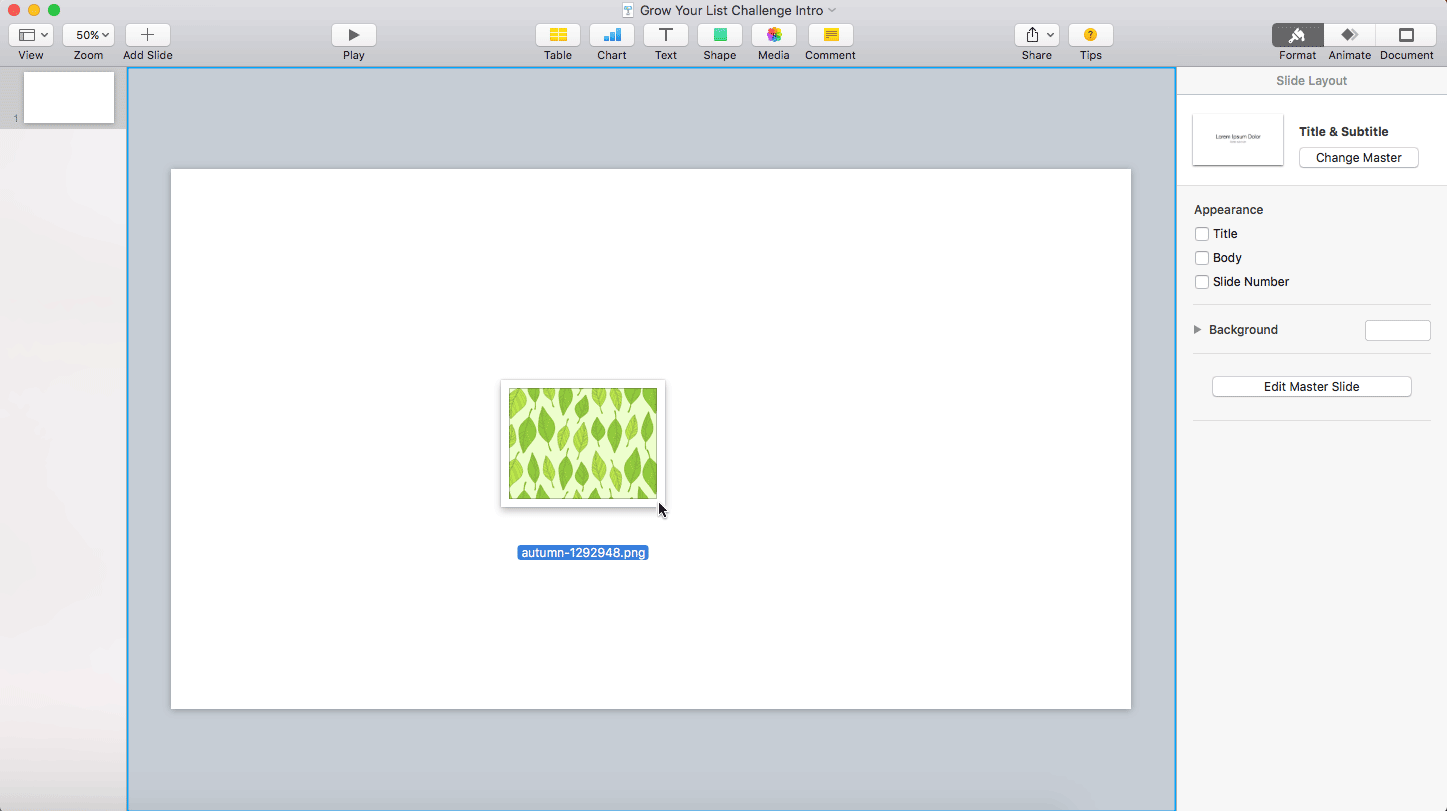
Find your downloaded image file in the Finder. Click it, then drag it into Keynote. It’ll appear on top of the white background:
To add the background image to your presentation, drag it from the Finder into the Keynote window. - Resize the image to fill the whole frame.
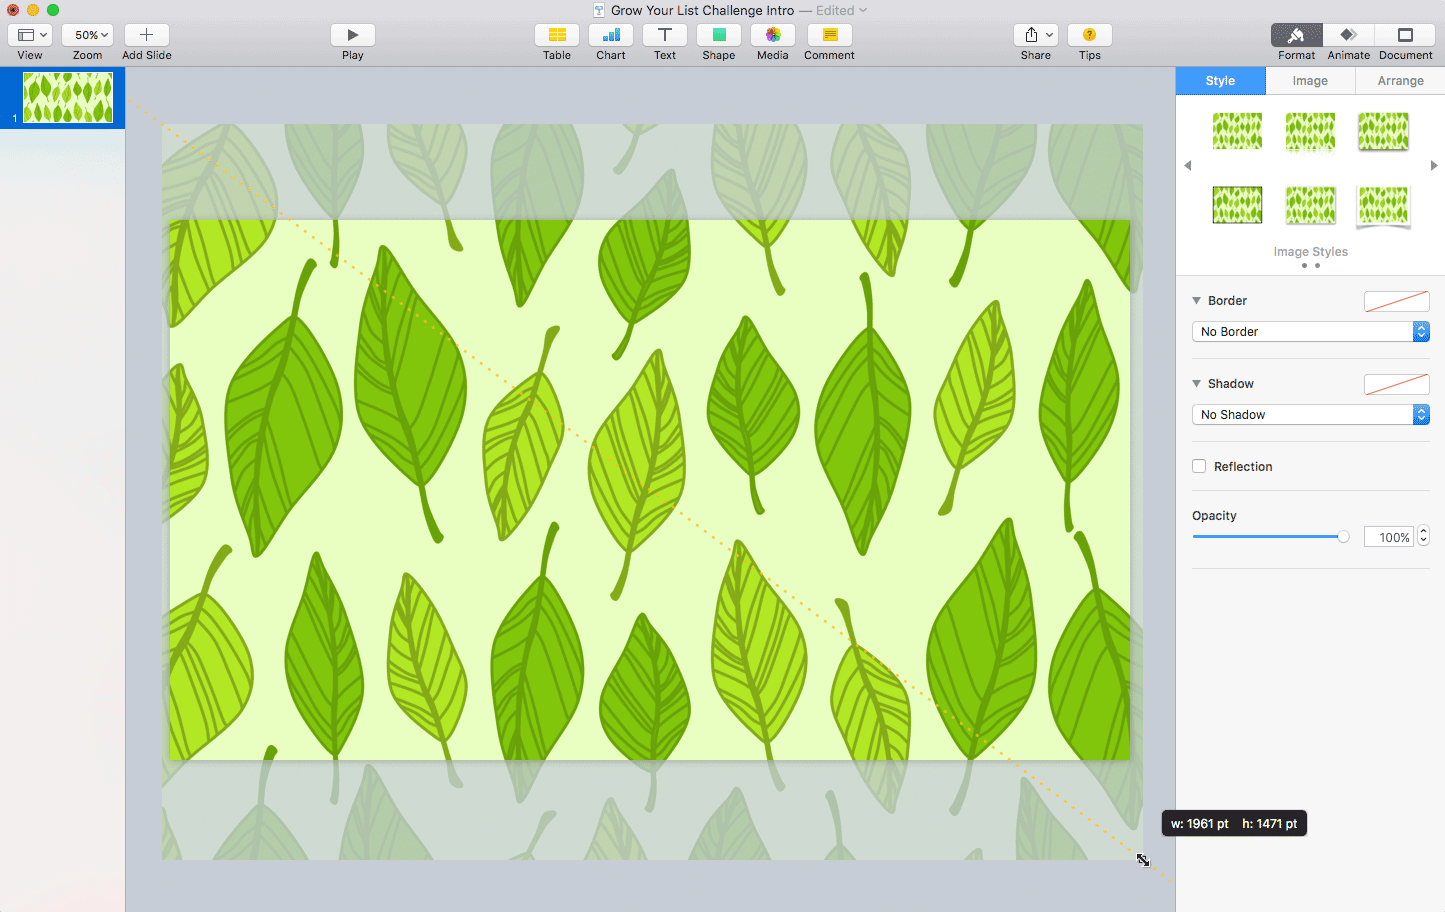
Drag the image until its top-left corner is outside the top-left corner of the white frame. Then drag the tiny square in the image’s bottom-right corner to stretch the image until it fills the whole frame. (The image will overlap the frame a bit. Don’t worry about it!)
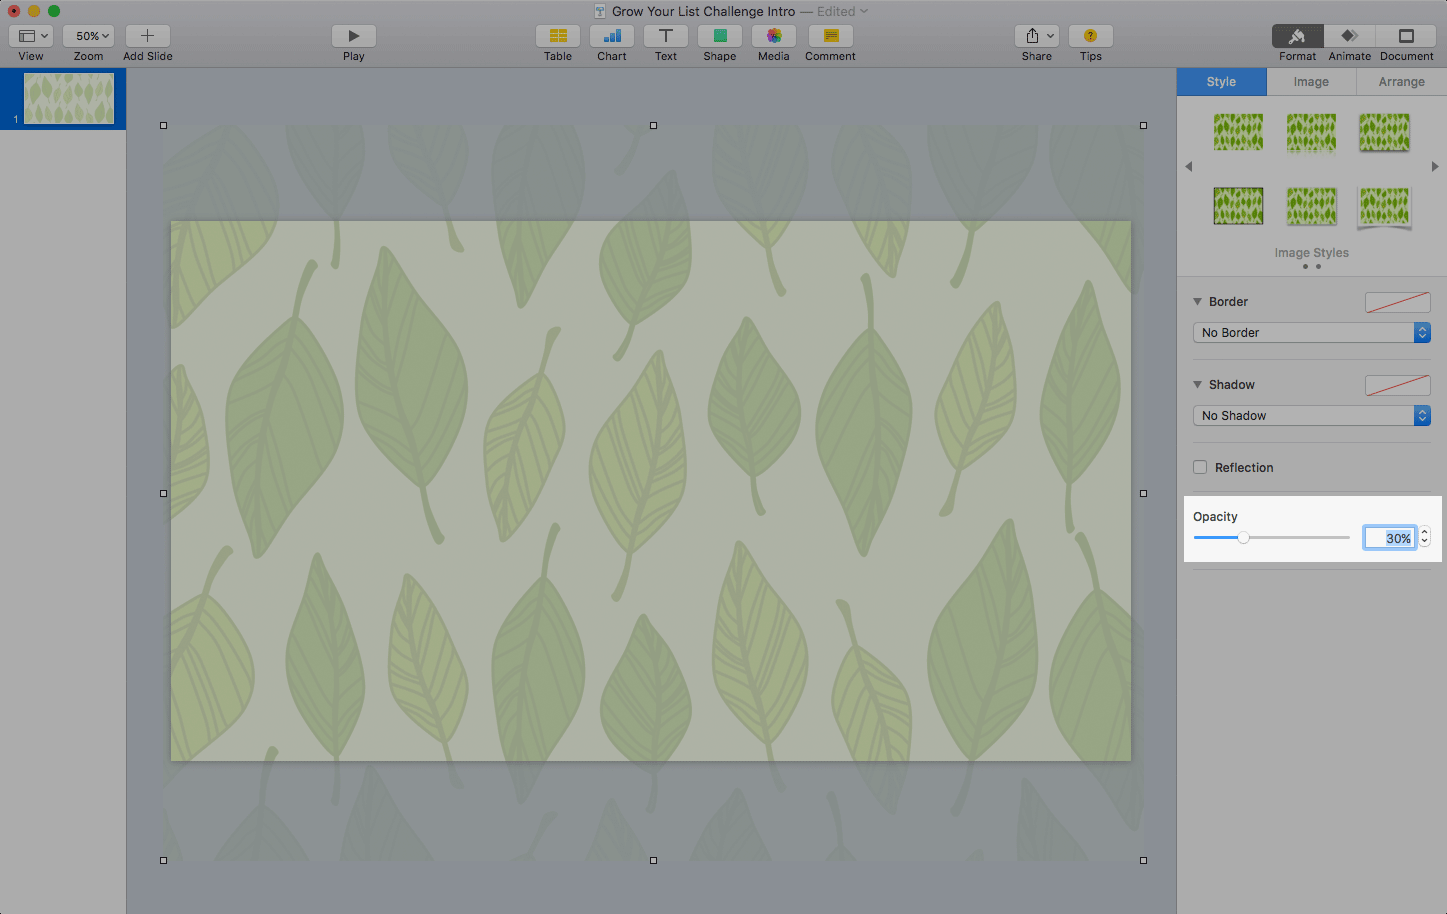
Position and resize the background image so it fills the whole slide. - Fade the image out.
Our background image is vibrant and super-fun. But if we put our text on top of it at the moment, we’d hardly be able to read it! So let’s fade the image out a bit. First, click the Format button in the top-right corner of the app (if it’s not already selected), then click the Style tab below the Format button. Now, double-click the 100% number box next to Opacity at the bottom of the Format panel. Type 30 and press Return. This gives the image a 30% opacity, which fades it out nicely:
Add the “GROW” text
Now let’s add the big “GROW” text at the top of the video. We’ll also add that see-through purple rectangle for the text to sit on.
Follow these steps to add the text:
- Create a new text box.
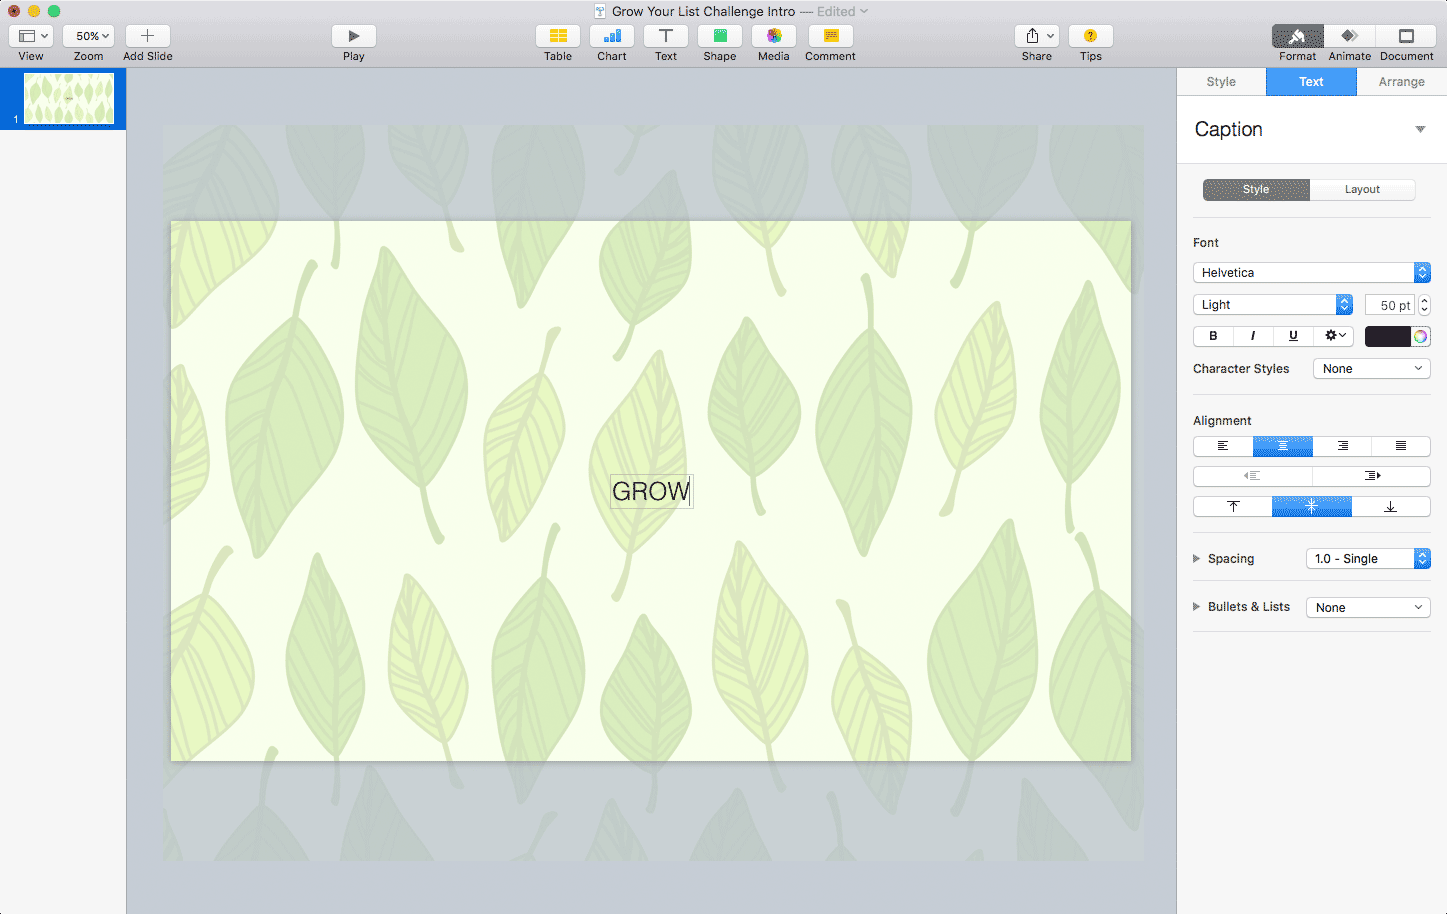
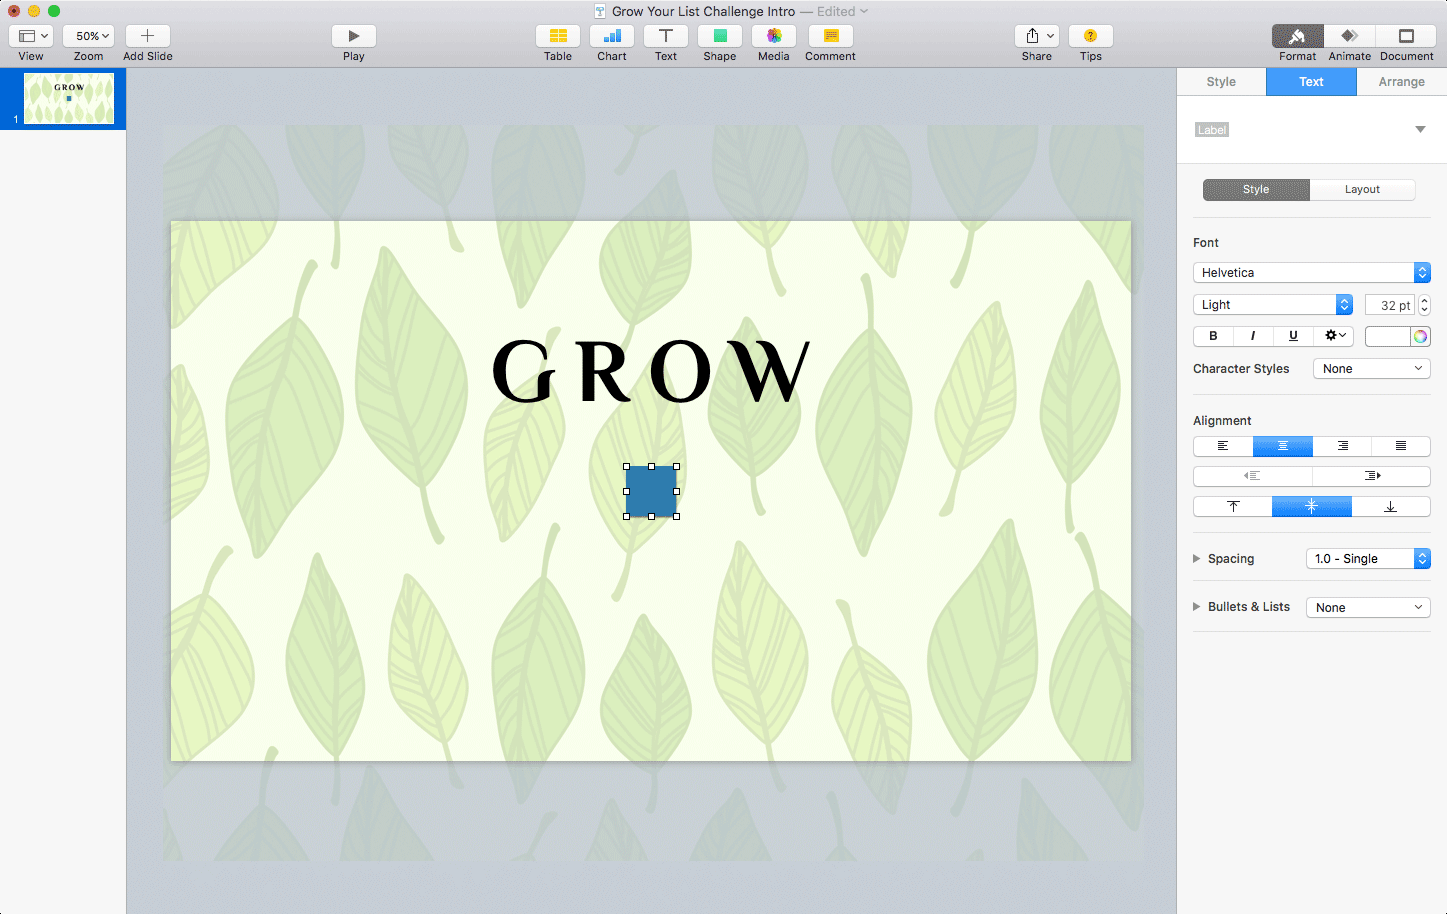
Choose Insert > Text Box to add a text box to the slide. Type the text that you want to use (GROW). Press Command-Return on your keyboard to finish editing the text: - Style the text.
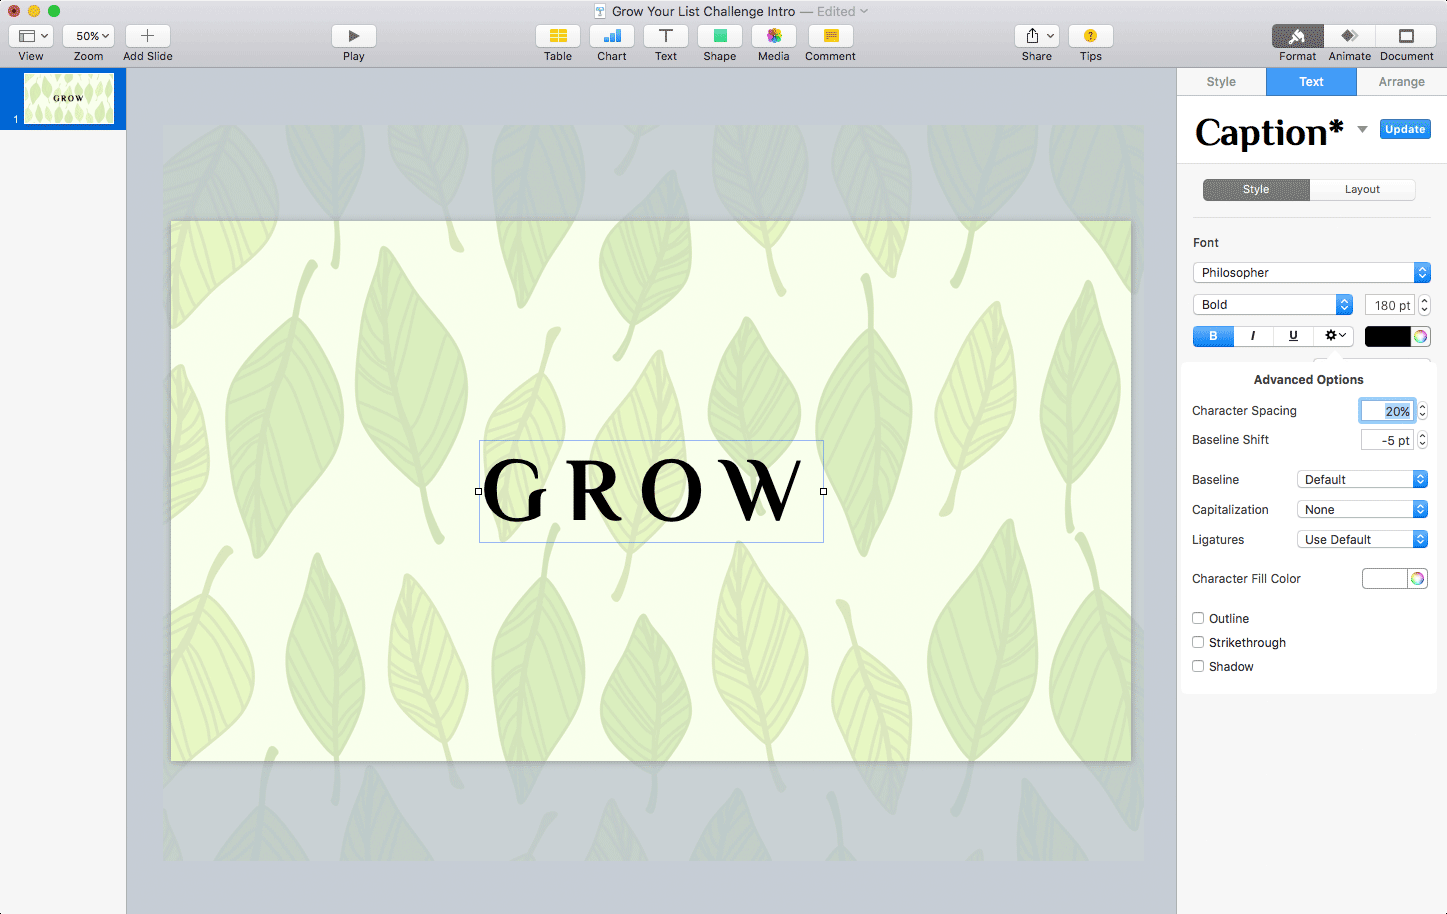
In the right-hand Format panel, click the Text tab to bring up the text options panel. In the Font section of the panel, choose the Philosopher font, click the B button to make it bold, and type 180 into the font size box to set the size to 180 pt. Finally, click the little “gear” icon to the right of the B/I/U icons; in the pop-up that appears, change the Character Spacing setting from 0% to 20% to stretch the text out a bit, and set Baseline Shift to -5 to centre the text vertically in the box:
Use the Text tab in the Format panel to style your “GROW” text. - Position the text box.
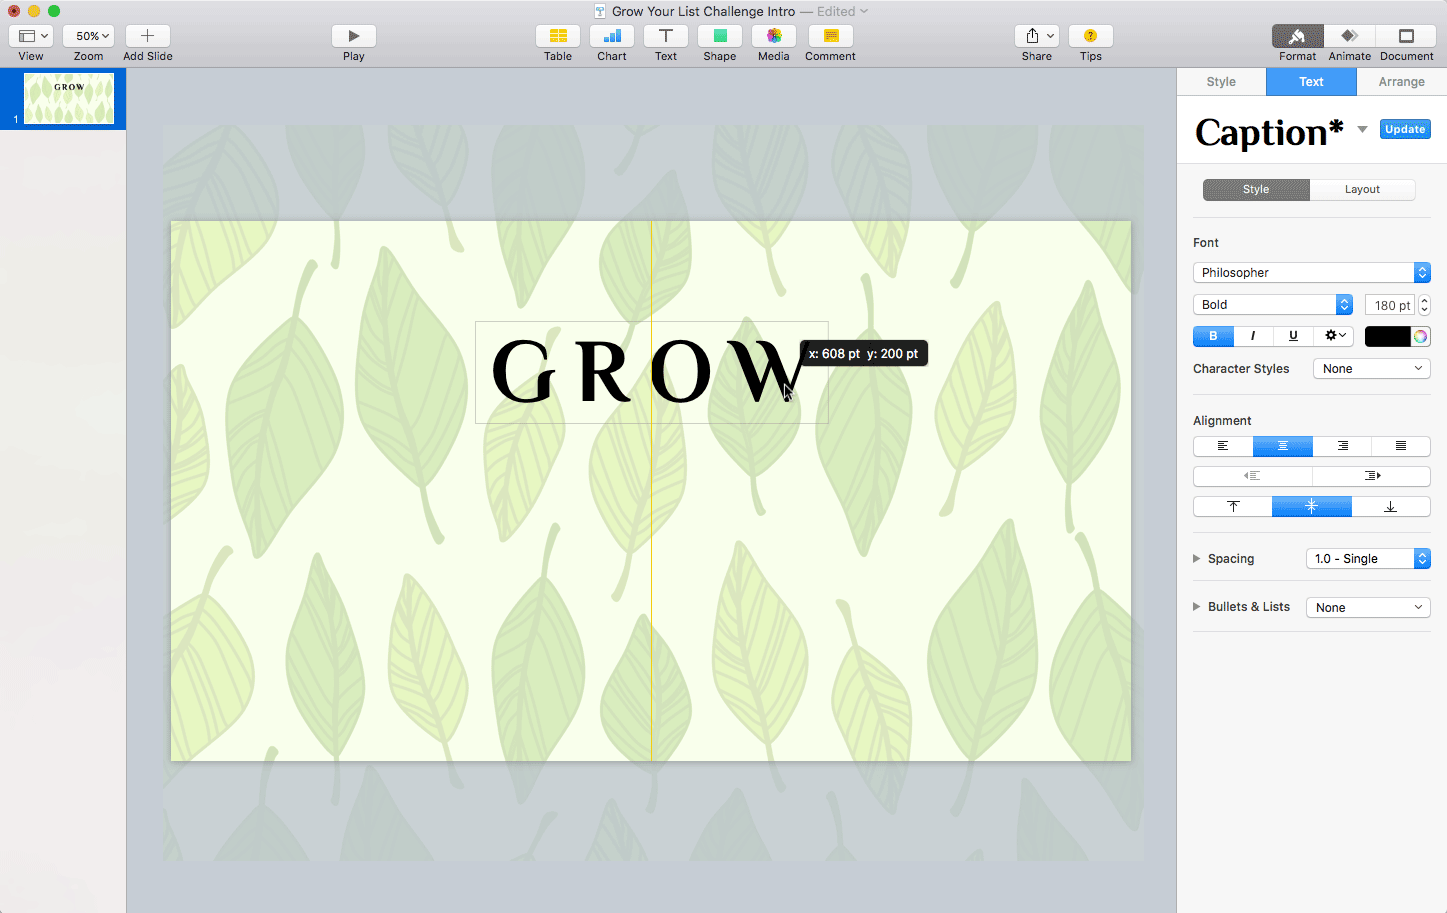
Now drag the text box up until it’s about a third of the way down from the top of the frame:
Positioning the “GROW” text box. Use the yellow guide to centre the box horizontally.
Now follow these steps to add the background rectangle:
- Add the rectangle.
Choose Insert > Shape > Rectangle. Choose Arrange > Send Backward to make it sit behind the “GROW” text:
Add a rectangle to the slide and choose Arrange > Send Backward to move it back a layer. - Position and resize the rectangle.
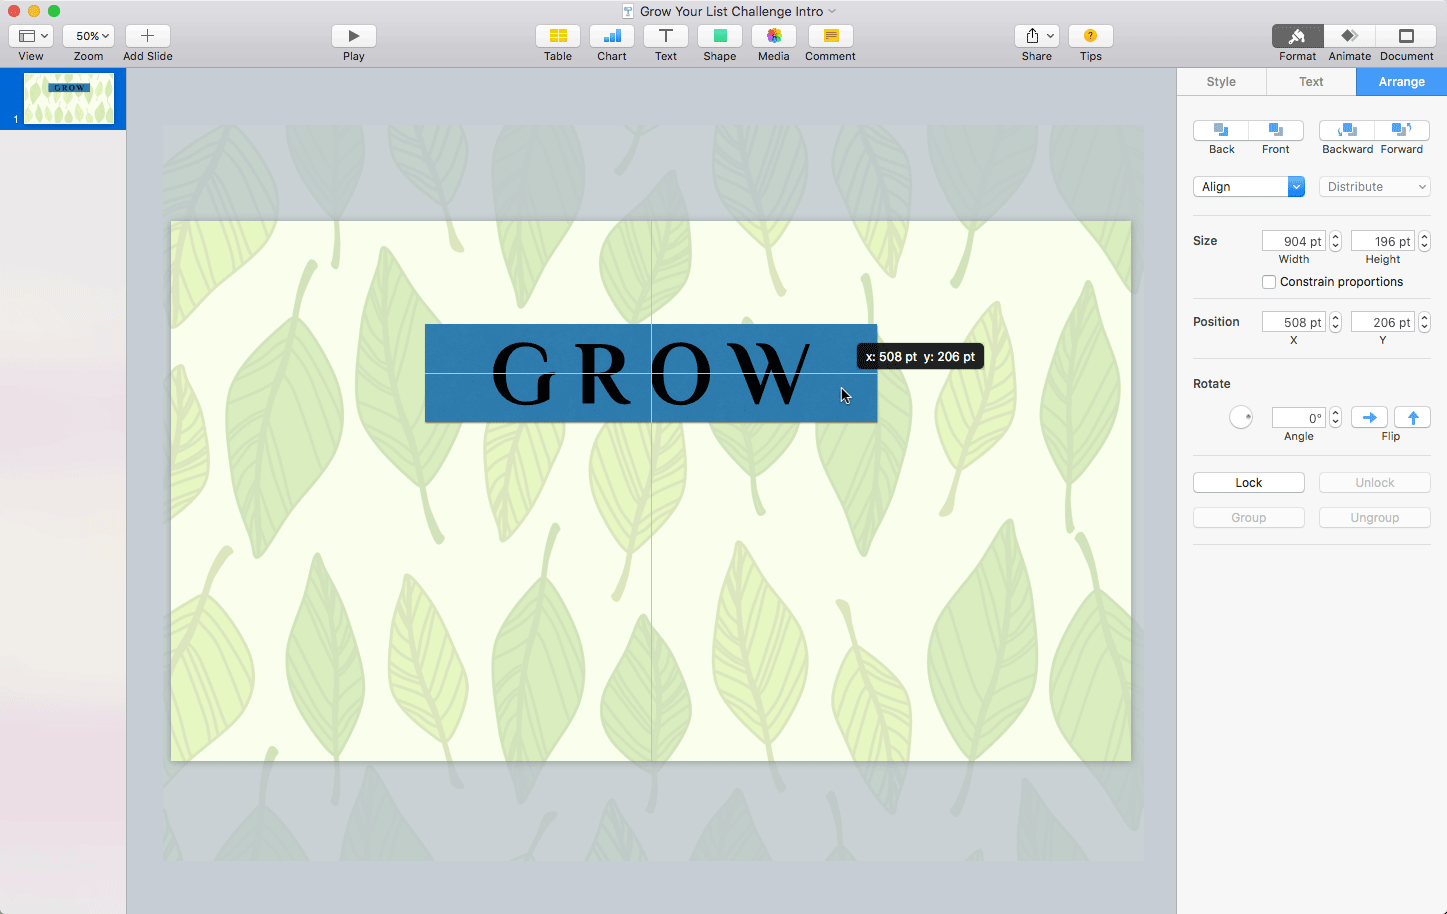
Click the rectangle and drag it above and to the left of the “GROW” text. Then drag the bottom right handle on the rectangle to stretch it so that it sits comfortably around the text. You can then click and drag the rectangle to reposition it; when you see the yellow cross appear then the rectangle is centered exactly underneath the text:
Resize the rectangle, then drag it until it’s centred directly underneath the “GROW” text. - Make it pretty.
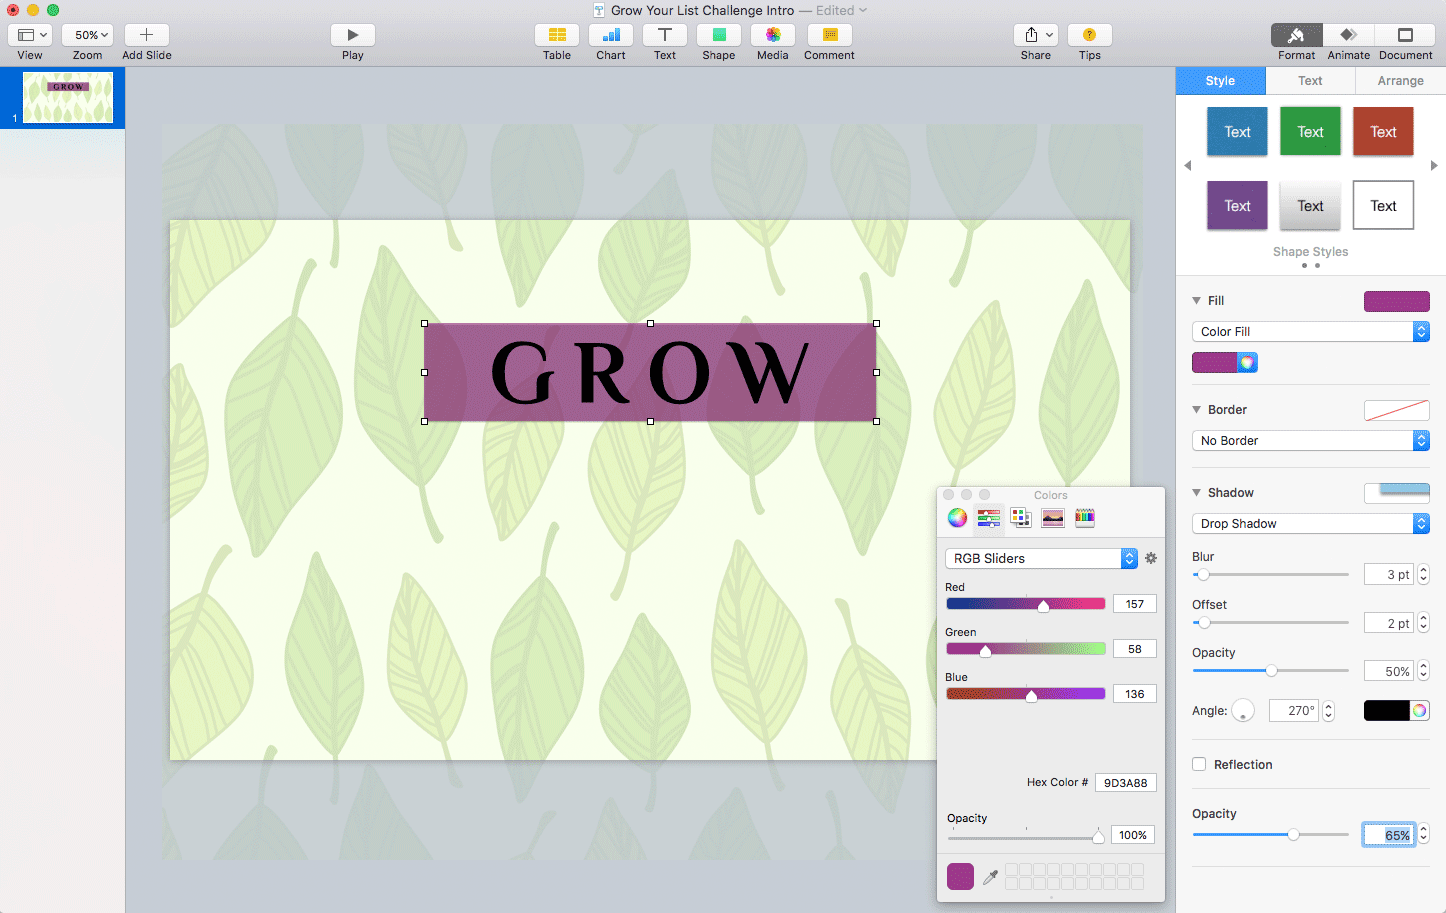
With the rectangle still selected, click the Style tab in the right-hand Format panel. In the Fill section near the top of the Style panel, choose Color Fill from the menu, then click the rainbow icon to the right of the coloured box below the menu to bring up the colour picker. Choose a nice colour for your box (I used a hex value of #9D3A88, or RGB 195, 151, 26.) Finally, change the Opacity setting at the bottom of the Style panel from 100% to 65% to make the box semi-transparent: - Make the text white.
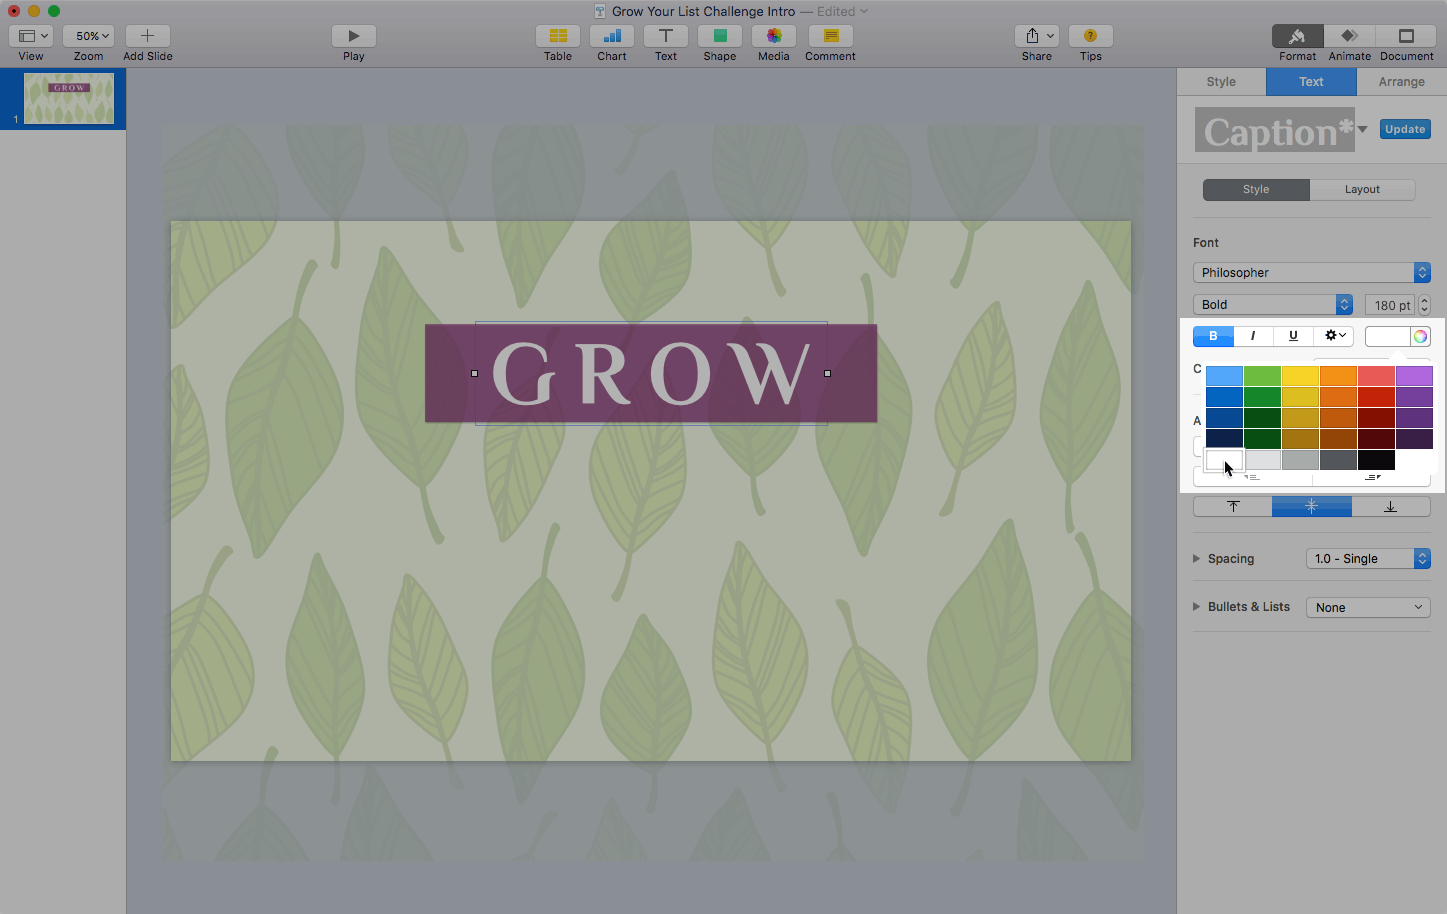
Lookin’ good! All you need to do now is make the text white. Click it, choose the Text tab in the Format panel, and click the coloured box to the left of the rainbow icon in the panel. Click the bottom-left white box to turn the text white:
Add the “your mailing list” text
Now we’ll add the next line of text: “your mailing list”. This is pretty easy now that you know the basics of adding text. Just do these steps:
- Create a new text box.
Choose Insert > Text Box again. Click the text box and type the text that you want to use (your mailing list). Press Command-Return to finish. - Style the text.
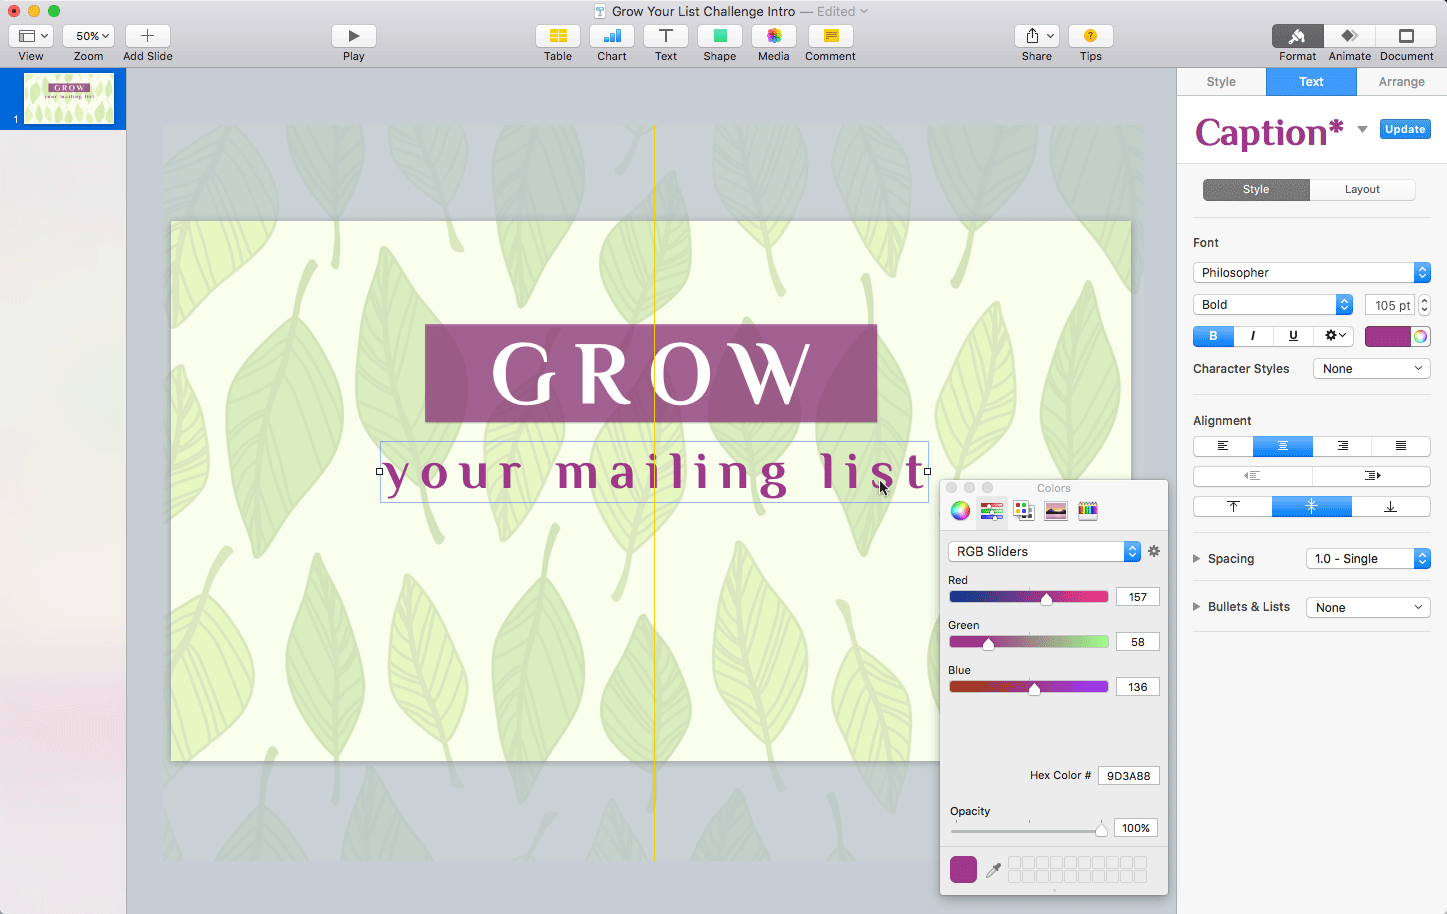
In the Format panel, click the Text tab to bring up the text options panel. As before, choose the Philosopher font, make it bold, and set its character spacing to 20%. Set the font size to 105 pt. Click the rainbow icon to bring up the colour picker, and choose the same purple colour as before. - Position the text box.
Drag the text box until it’s just about in the middle of the frame. Use the yellow guides to align it horizontally with the centre of the frame.
Add the orange “Challenge!” text
Hey, you’re off to a great start!
So far our text has all been horizontal. Let’s spice things up a bit for the “Challenge!” text by rotating it so that it stands out. We’ll also use the Muli font for contrast, and add an orange background.
Follow these steps:
- Create a new text box.
Choose Insert > Text Box. Click the text box and type Challenge!. Press Command-Return to finish. - Style the text.
In the Format panel, click the Text tab to bring up the text options panel. Choose the Muli font, and click the I button to make it italic. Set its character spacing to 10%, and its font size to 80 pt. - Add the orange background.
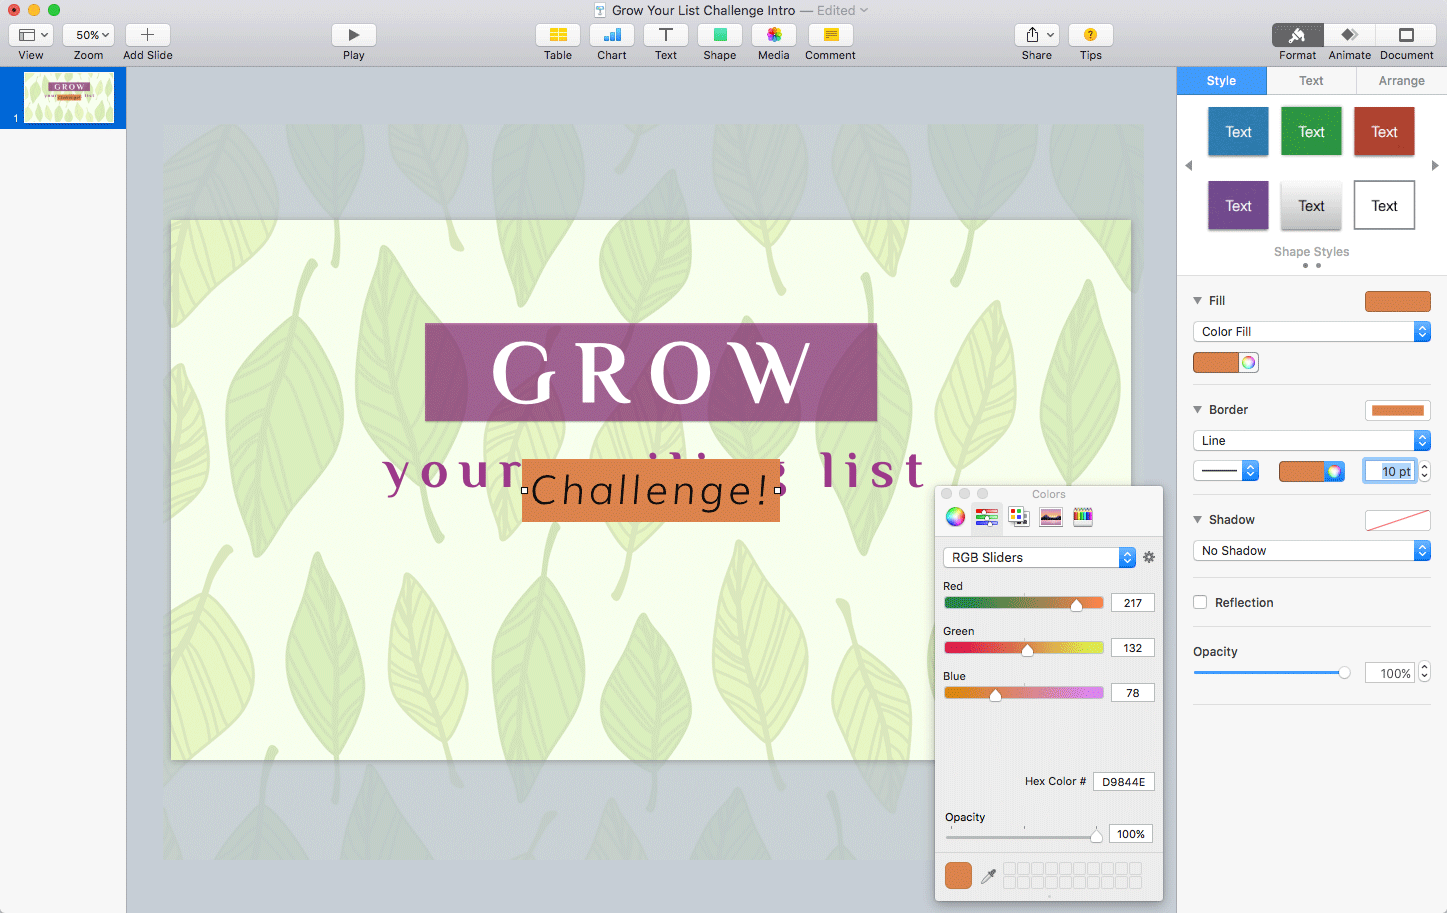
In the Format panel, click the Style tab to bring up the style options panel. In the Fill section, click the menu and change No Fill to Color Fill. Click the rainbow icon below the menu and pick an orange colour (I used the hex value #D9844E, or RGB 217, 132, 78). - Add an orange border.
The background fill is nice, but it would be good if it was a bit bigger. We can’t change the fill size, but we can get the same result by adding a thick orange border. In the Border section, change No Border to Line, and pick the same orange colour by clicking the rainbow icon that appears in the box below the pull-down menu. Set the line width to 10 pt:
Adding a thick border to a text box is a nice trick if you want to make the box’s background larger. - Add a drop shadow.
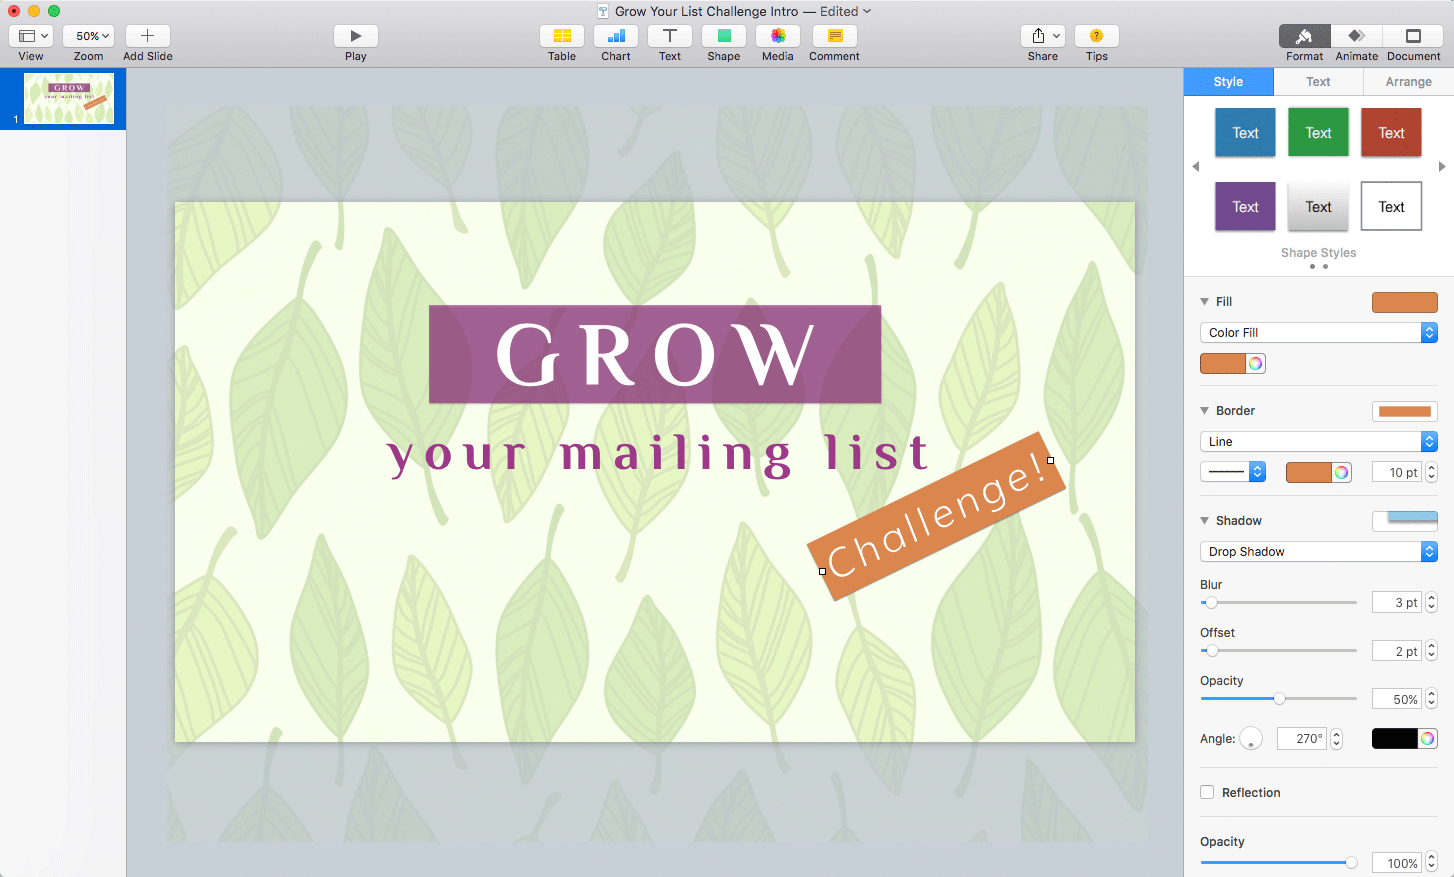
Let’s add a drop shadow to the orange box to match the drop shadow that Keynote added to the top purple box. In the Shadow section of the Style tab, change No Shadow to Drop Shadow. Leave the values for Blur, Offset, Opacity and Colour set to their defaults. - Change the text to white.
Head back over to the Text tab in the Format panel and click the coloured box to the left of the rainbow icon in the panel. Click the bottom-left white box to make the text white. - Position and rotate the text box.
Drag the text box to where you want it in the frame. Then, holding down the Command key on your keyboard, click and drag one of the two little white squares at either end of the text box to rotate the box to a nice angle:
Once you’ve styled your “Challenge!” text, use the mouse to position and rotate it.
Add the bottom wavy shape
The last bit of content we need to add is the wavy purple shape along the bottom of the slide, containing the “Part 1…” text.
First, follow these steps to add the wavy shape:
- Start drawing with the Pen.
Choose Insert > Line > Draw with Pen. Click just outside the left edge of the frame, and an inch or so above the bottom of the frame, to add the first straight point: - Add the first curved point.
Move the mouse cursor to the right until it’s about a third of the way across the frame. Move it up so it’s slightly higher than the previous straight point. Now click and drag to the right to add a curved point: - Add the second curved point.
Move the cursor to the right again, so it’s about two-thirds of the way across the frame. Move it down so it’s slightly lower than the first straight point. Click and drag again to add a second curved point: - Add the right-hand straight point.
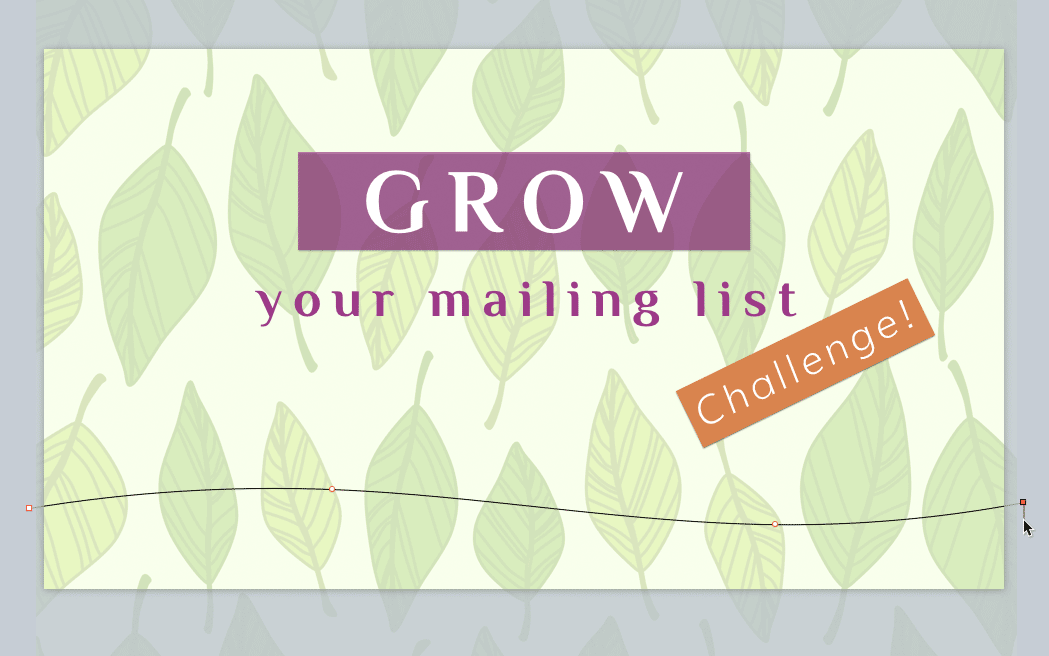
Move the cursor just outside the right edge of the frame, an inch or so up from the bottom. Click to add another straight point. This finishes the top curve of the shape: - Close the shape.
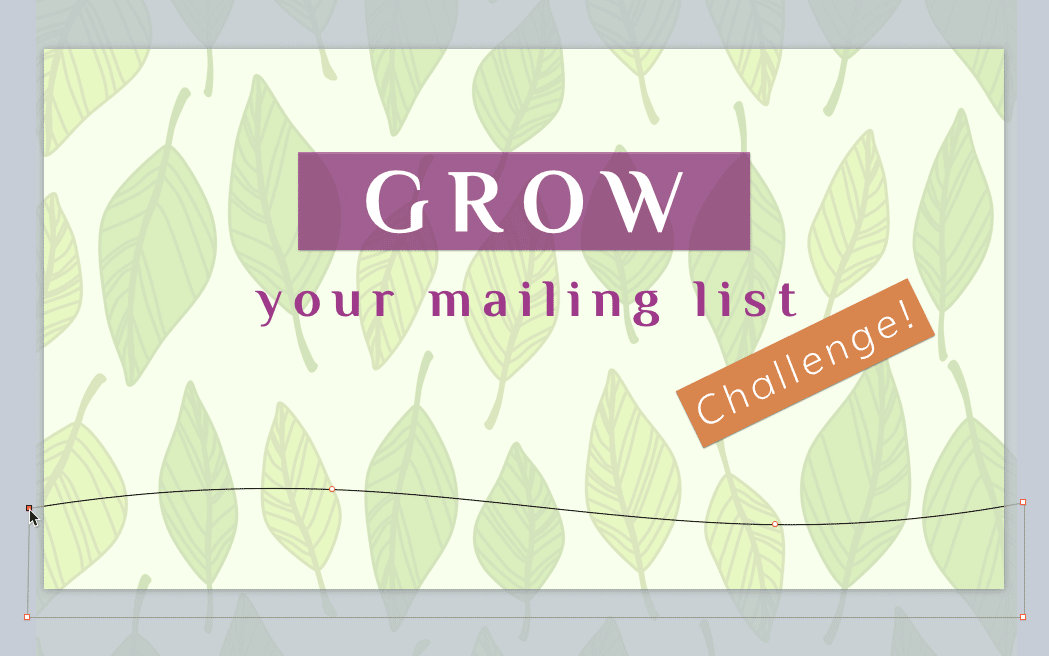
To finish off the wavy shape, click outside the bottom right corner of the frame, then click outside the bottom left corner of the frame, to add the bottom two straight points of the shape. Finally, move the cursor over the very first straight point until the cursor changes to a pen symbol with a little ‘o’ next to it. Click to close the shape and finish it off:
Add the other straight points, then click the very first point to close the shape. - Style the shape.
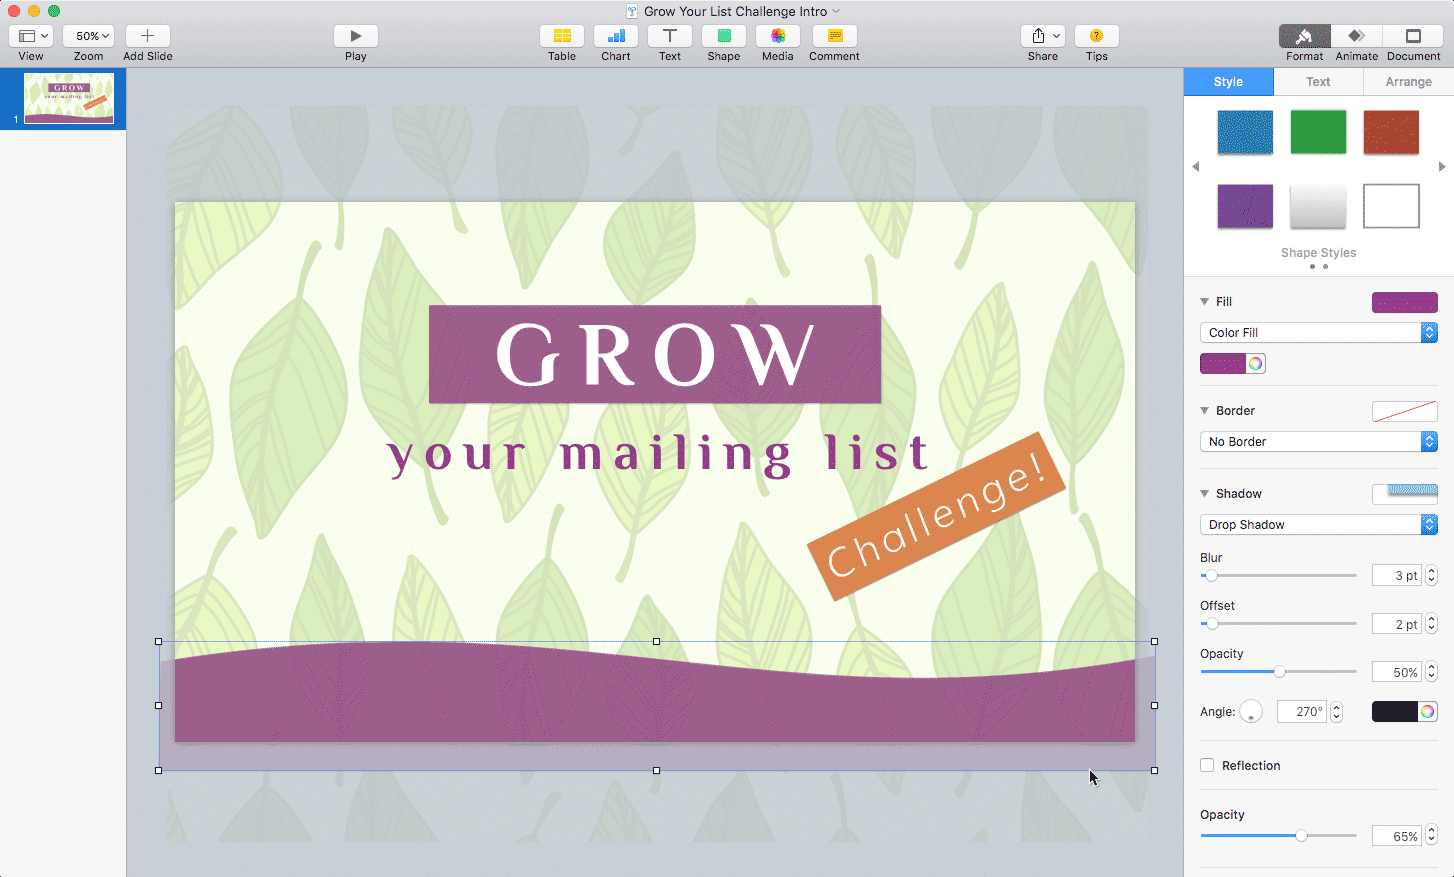
Let’s give the shape the same see-through purple style as the first rectangle we created (the one that the GROW text sits on). Click that rectangle to select it and choose Format > Copy Style. Now click any edge of your new wavy shape to select it, and choose Format > Paste Style:
To style the shape, use the Copy Style and Paste Style menu options to copy the style from the purple rectangle.
Add the bottom text
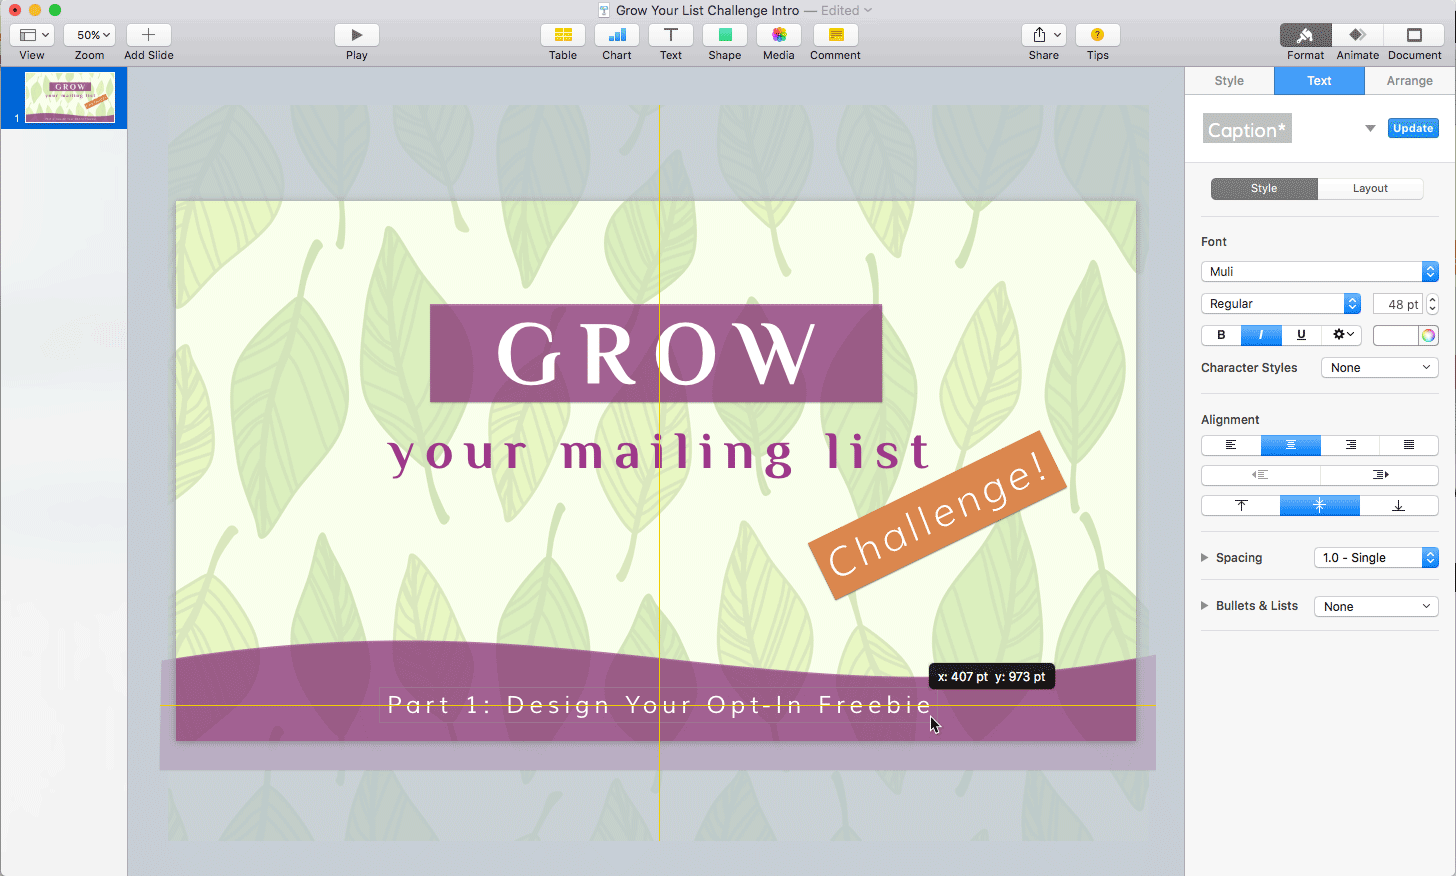
Once you’ve added the wavy shape, add the “Part 1: Design Your Opt-In Freebie” text box in the same way that you did with the other pieces of text. Use the Muli Regular font at 48 pt. Set the character spacing to 20%, and make the text white:
Get it all movin’ and shakin’!
Your Keynote slide is looking awesome! Now comes the really fun part, where you get to animate all those elements you added.
Keynote calls animations build effects. There are three types of build effects:
- Build In (where you move an object onto a slide)
- Build Out (where you move an object off a slide), and
- Action builds (where you move an object around on the slide).
For our intro, we’ll use only Build In effects.
Let’s start by making that leafy background gradually come into focus during the intro. Follow these steps:
- Select the background image.
Click the background image to select it. You’ll see the little white resize handles appear around the image. - Add the blur effect.
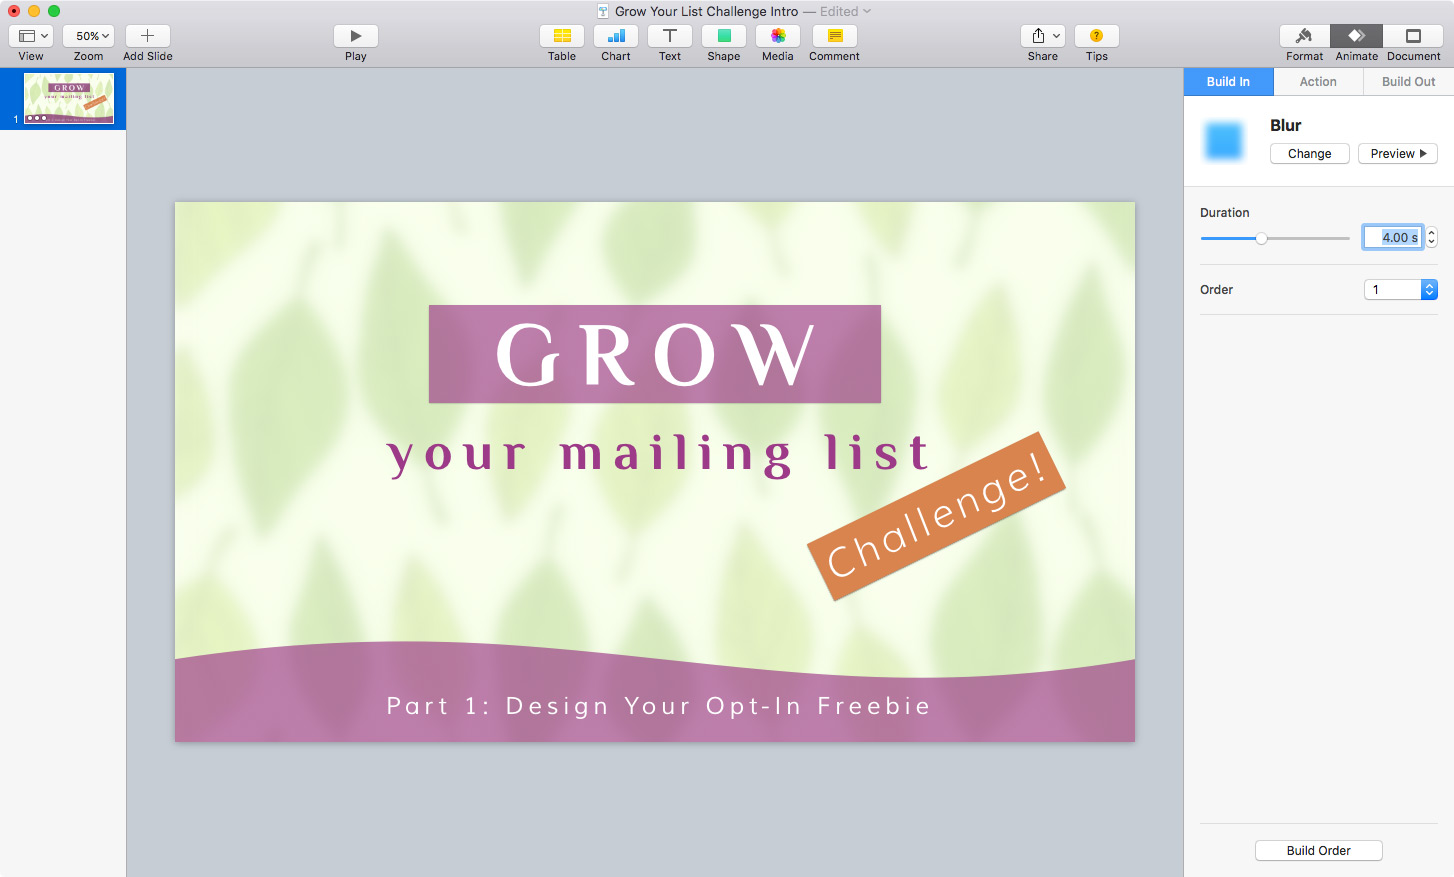
Click the Animate button in the top-right corner of the app, then click the Build In tab below the Format/Animate/Document buttons. Click the big Add an Effect button in the right-hand panel, and in the pop-up menu that appears, click Blur under the Appear & Move section. Double-click the Duration box and type 4 to make the blur effect 4 seconds long: - Make the effect happen automatically.
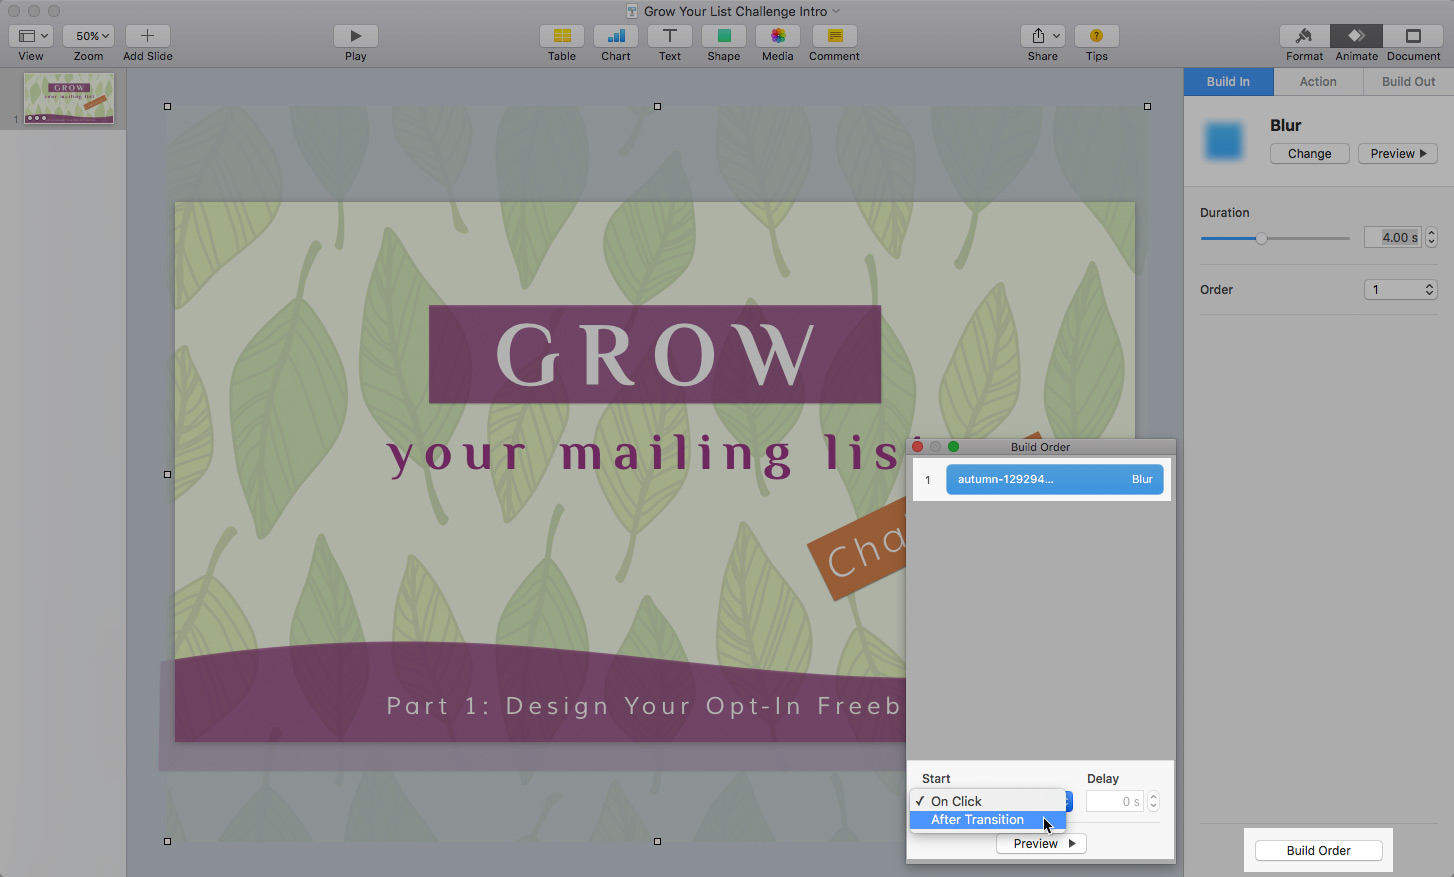
By default, effects only happen when you click the mouse during the presentation, but we want all our animations to happen automatically. To do this, click the Build Order button at the bottom of the right-hand panel to open the Build Order window. Click the blue item in the list at the top of the window (it should be the only one in the list), then change the Start setting from On Click to After Transition:
To make the Blur effect happen automatically, select the effect in the Build Order window and set Start to After Transition.
Try it out! Click the Play button in the top toolbar (or choose Play > Play Slideshow). You should see your leafy background gradually fade in.
Now let’s animate the other objects in the slide. Follow these steps:
- Animate the GROW rectangle.
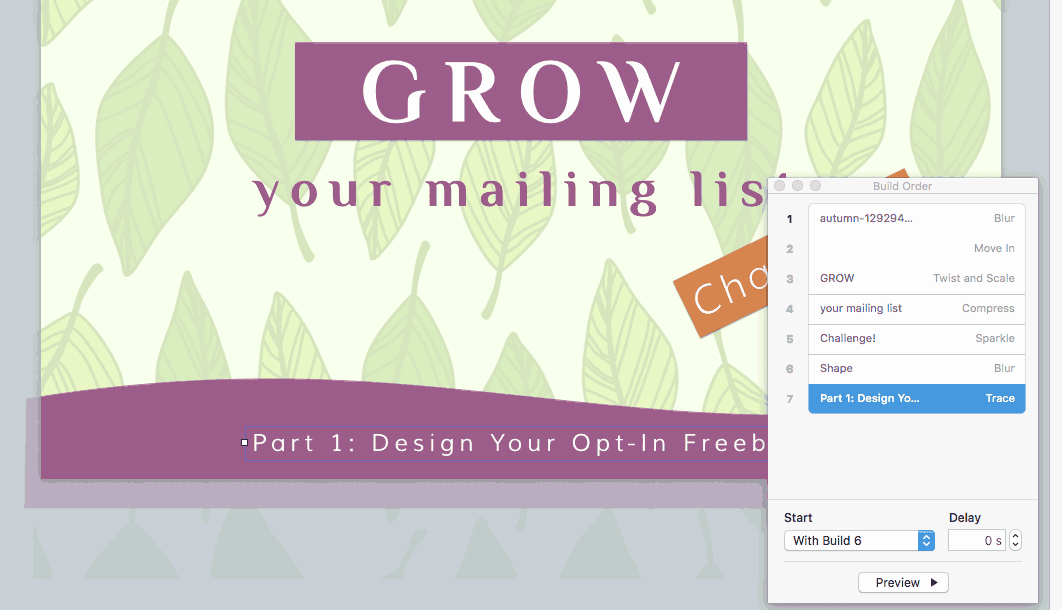
Select the purple rectangle behind the word GROW. In the Build In panel on the right, click Add an Effect, and choose the Move In effect under the Appear & Move section. Click the Build Order button and, in the Build Order window, change Start from On Click to With Build 1. This makes the rectangle animation start at the same time as the background blur. - Animate the “GROW” text.
Select the “GROW” text box. This time, add a Twist and Scale effect — it’s under the Flip, Spin & Scale section. Change the Duration from 2.5 seconds to 1 second, so it’s as quick as the rectangle animation. Again, click Build Order, and change Start from On Click to With Build 1. - Animate the “your mailing list” text.
Select the “your mailing list” text box. Add a Compress effect, under the Appear & Move section. Click Build Order, but this time change Start from On Click to After Build 3. This makes this animation happen after the “GROW” text animation has finished. - Animate the “Challenge!” text.
Let’s make the “Challenge!” text stand out by adding a gorgeous sparkly effect! Select the text box, then add the Sparkle effect under Special Effects. Change the Duration to 1 second and, in the Build Order menu, change Start from On Click to After Build 4. - Animate the wavy shape.
We’ll fade the wavy shape into focus like we did with the background image. Click the shape to select it, then add the Blur effect under the Appear & Move section. In the Build Order window, change Start from On Click to After Build 5. - Animate the bottom text.
Finally, let’s add a Trace effect to the bottom text to end with a nice flourish. Select the “Part 1: Design Your Opt-In Freebie” text box, then add the Trace effect under Special Effects. In the Build Order window, change Start from On Click to With Build 6 to make it kick in at the same time as the curvy box blur effect.
Phew! That was quite a lot of steps. But it’s all worth it, because you now have a gorgeous finished intro animation! Your Build Order window should now look like this:
Click the Play button in Keynote’s top toolbar to see it in all its full-screen glory.
Turn it into a movie file
Now you’ve made your intro animation, you need to turn it into a movie file so you can drag it into iMovie. This step is super-easy!
Choose File > Export To > QuickTime. Set Playback to Self-Playing, and set Format to 1080p. (You can ignore the other settings.) Click Next. Choose where to save your movie file, and click Export.

Wait a few seconds, and you’re done!
Edit the video in iMovie and add music
Open up iMovie and go to your Projects window (choose Window > Go to Projects). Now choose File > New Movie.
Open up Finder and find the intro movie file that you exported in the last step. Drag it into the bottom timeline window in iMovie:
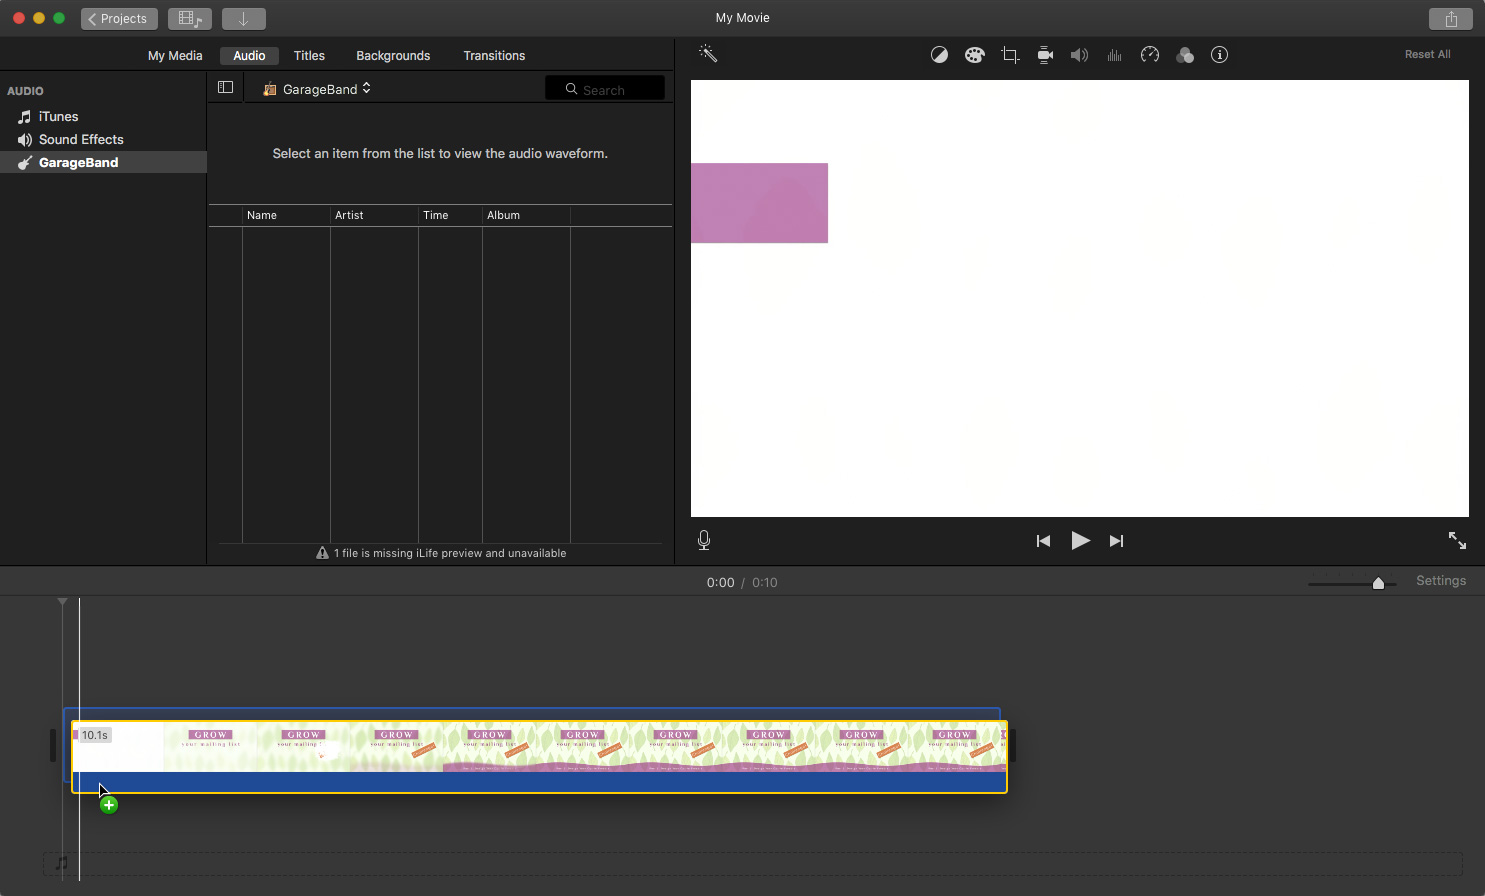
Now find the music file that you downloaded, and drag it into iMovie, just below the movie file in the timeline:
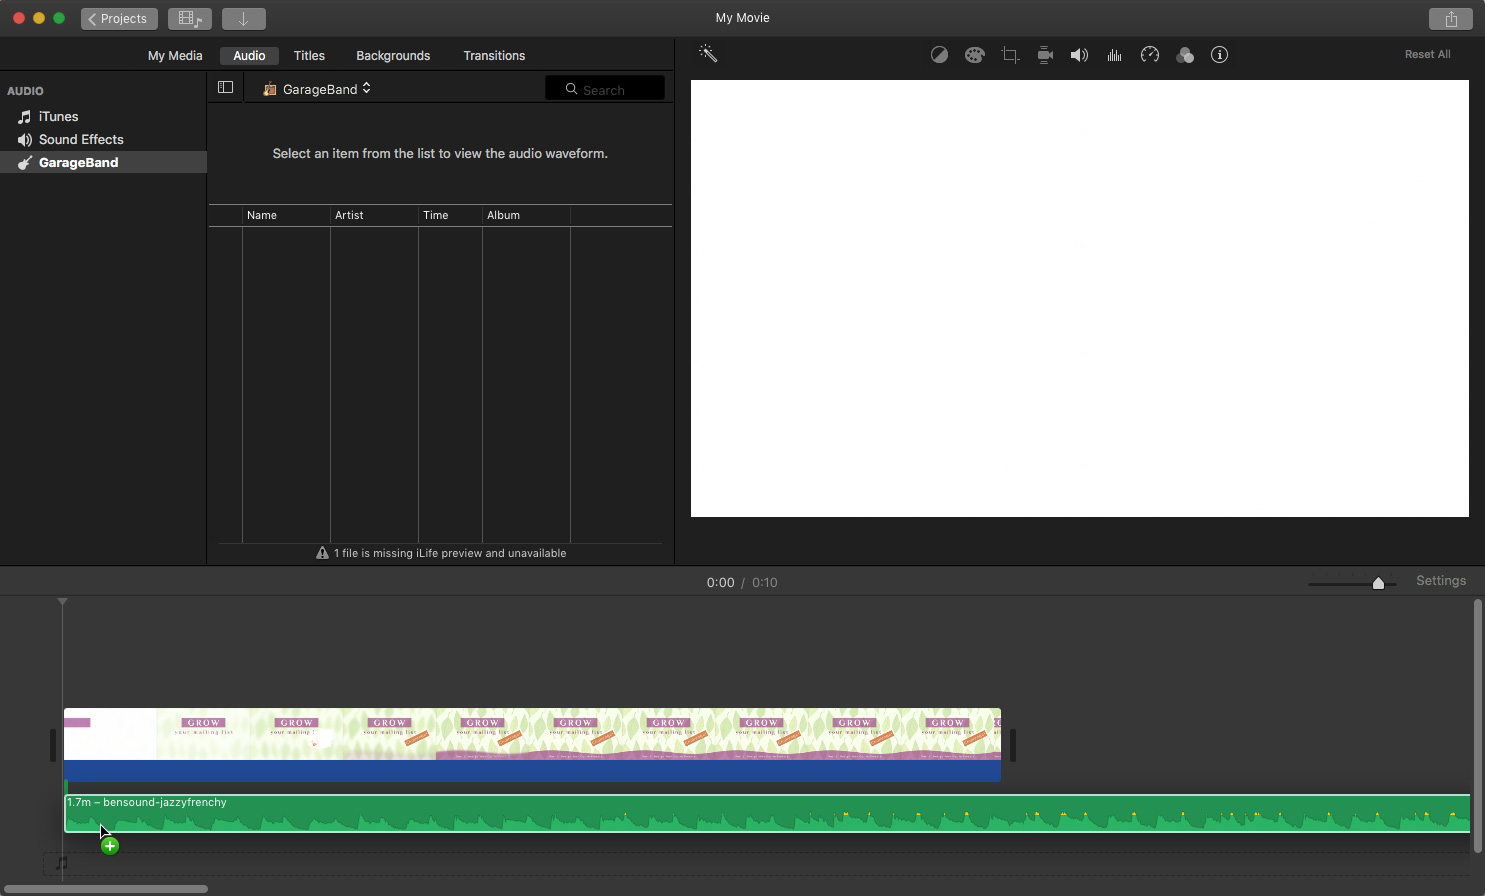
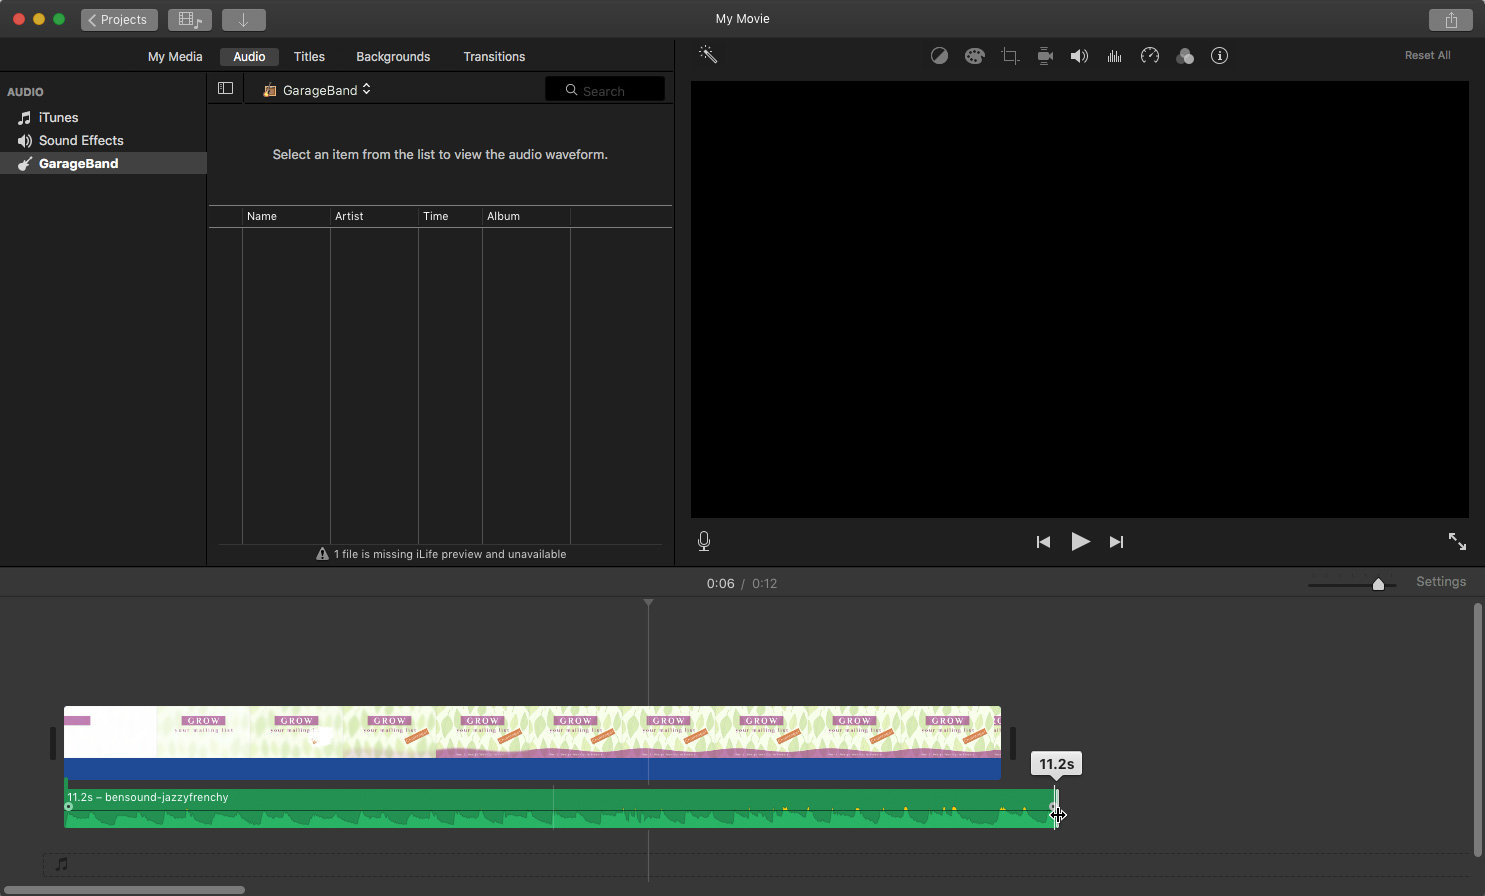
You’ll probably want to shorten the music track to make it the same length as your intro. To do this, scroll to the end of the music track, then click on the end of the track and drag to the left to shorten:
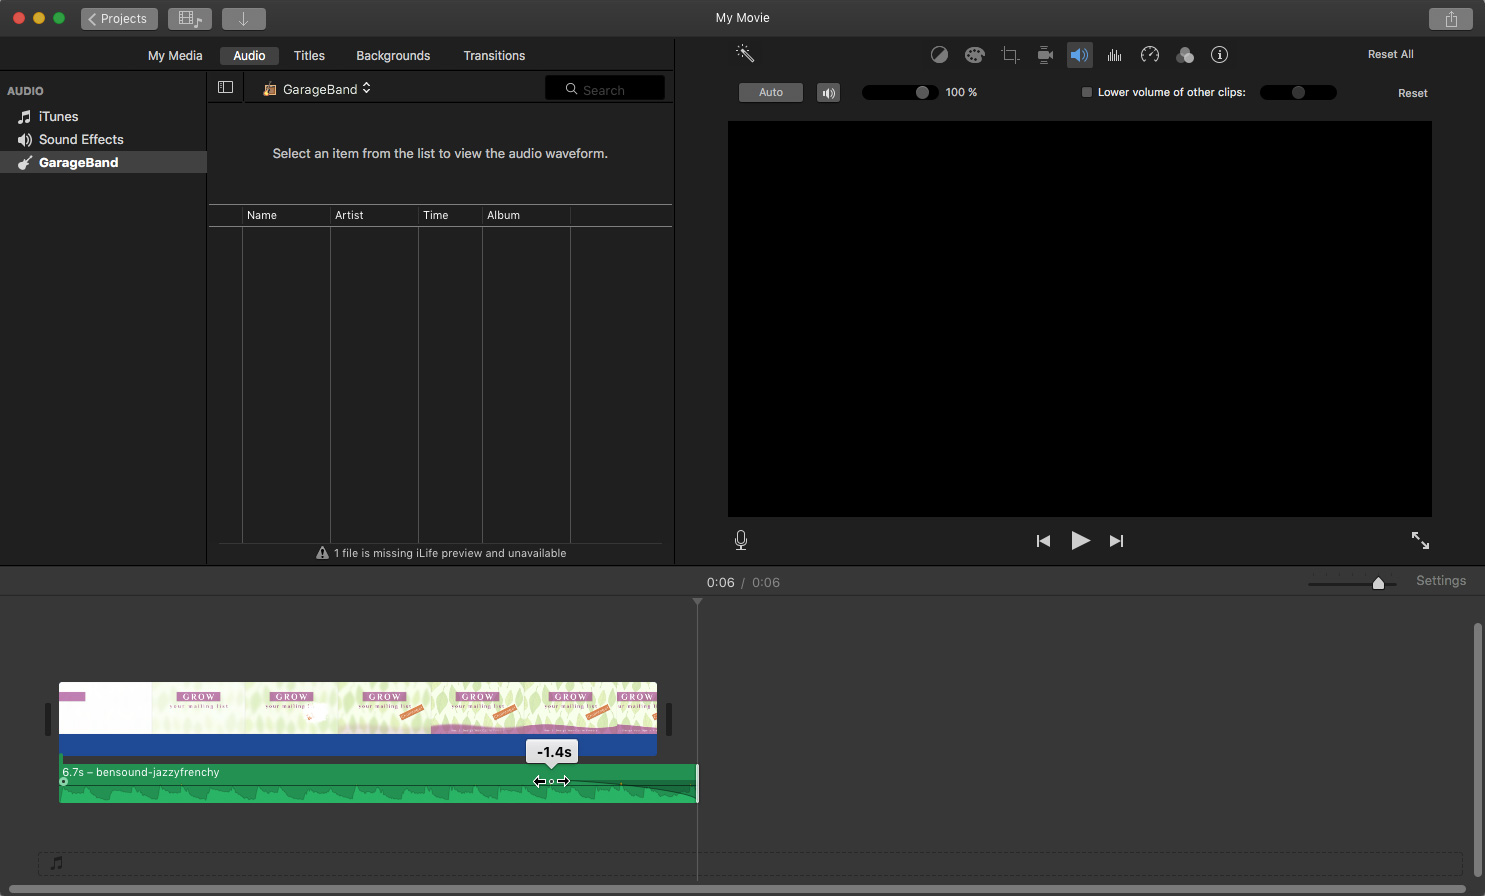
You can also fade out the music track by dragging the little black and grey circle to the left:
That’s pretty much it! Now you can drag your actual video to the right of the intro in the timeline, and choose a transition (such as Cross Dissolve) to fade smoothly from the intro into your video.
When you’re happy with the result, choose File > Share > File in iMovie, and export your video at 1080p resolution and High quality. Choose Better Quality for the Compress option:
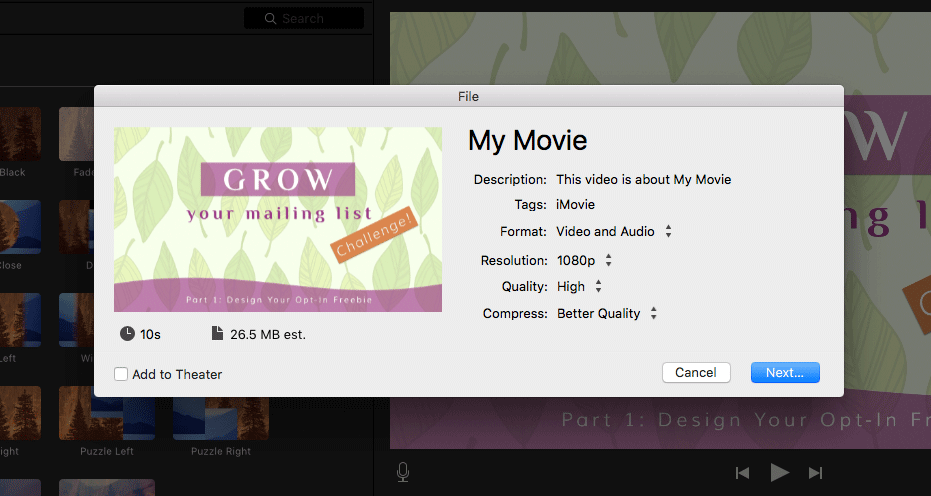
Click Next to export your video to a movie file. You can then upload your movie to YouTube, Vimeo, or social media, and embed it in your website. Good job!
Grab the files and make your beautiful video intro today!
As you’ve seen in this article, making gorgeous intros for your videos is really easy. All you need are Keynote and iMovie, some images and fonts, some catchy background music, and a little bit of time.
To give yourself a head start with your intro, don’t forget to download the files used in this tutorial!
You can easily take what you’ve learned here and adapt it to make your own unique intros for your videos. Try adding your business logo (and animating it using one of the Build In animations). You can also experiment with different fonts, as well as adding and animating some icons and other clip art.
So why not give it a go today? It’s a lot of fun, and you’ll have your very own video intro in no time!
Any questions on the tutorial? Are you getting stuck at any point? Feel free to post your questions in the comments below and I’ll be happy to point you in the right direction! 🙂
[Image credits: Phone by freestocks.org (CC0), cropped, edited]




Your tutorial worked wonderfully, but I have a question about what to do after the final step that you describe. What if you want to add the intro to a Keynote slide presentation so that both run together seamlessly? Do you create the slide presentation piecemeal on Keynote and then upload to iMovie and then add to the intro and then export the entire thing? Or do you, instead, add the movie intro that you created to the keynote presentation? Also, Keynote allows you add audio files before exporting the whole thing to whole thing to Quicktime. Why even use iMovie? Maybe the answer has something to do with the quality of the audio recording. I just tried doing what I described and the audio part sounds inferior, although visually it came out as good or even better than the one I created on iMovie. The iMovie file cropped the slides and removed some of the slide’s text.
Thanks Oscar! I think it would be fine to join them together in either Keynote or iMovie. Of course if you’re making a movie using other software, or involving live action, then you’d want to bring everything into iMovie. Personally I prefer editing in iMovie as it gives me more control.
Regarding the iMovie cropping, make sure your Keynote presentation uses a 16:9 aspect ratio, and that iMovie isn’t cropping the frame (click the little ‘crop’ icon above the preview window in iMovie).