Have you ever wanted to create an image that depicts two separate images fading into each other?
This is a nice professional effect that’s easy to create using Photoshop’s Layer Masks. This tutorial shows you how it’s done.
Open the two images in Photoshop
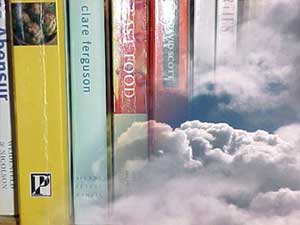
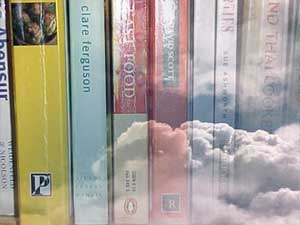
We’re going to use the following two images in this tutorial:
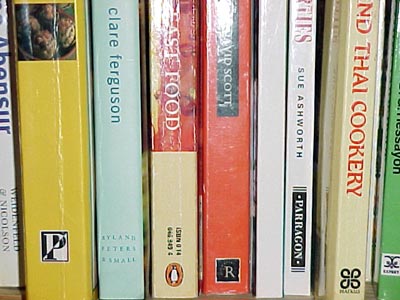
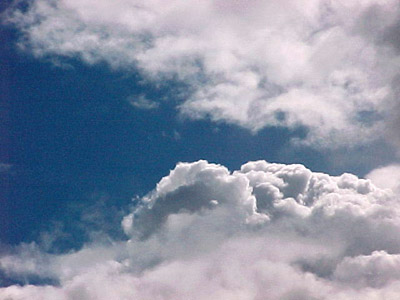
Open these two images in Photoshop. They’ll appear as two separate documents.
Put the images into one document
So that we can do the fade between the images, we’ll need them both in the same document. The easiest way to do this is to Shift+click on the “Background” layer in the “books” document, and drag the layer on top of the “clouds” document:
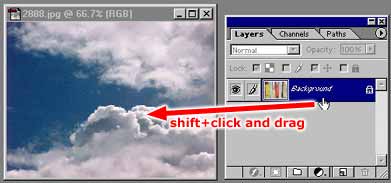
(Holding down the Shift key ensures that the “books” image will appear in the centre of the “clouds” document.)
You should then have both your image layers in the “clouds” document, as follows:
Add a layer mask
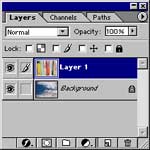
We’ll now create a layer mask on the “books” layer. A layer mask behaves just like a regular mask, but it is attached to a specific layer. As with a normal mask, dark areas of the mask hide the underlying layer, while light areas of the mask reveal the underlying layer.
To create the layer mask, make sure the “books” layer (“Layer 1”) is selected in the Layers palette, then select Layer > Add Layer Mask > Reveal All:

You can see that the layer now has a layer mask attached to it (the white thumbnail to the right of the layer thumbnail). Also, note that the mask is highlighted with a white rectangle around it – this means that you are now working on the mask, rather than the layer image. (You can click on the layer thumbnail and mask thumbnail to switch between the two.)
Fill the layer mask with a gradient
We’re now going to fill the layer mask with a gradient fill, going from white in the top left corner to black in the bottom right corner. Remember that white areas allow the layer to show through, and black areas hide the layer, making the underlying layer visible. This is how we will achieve our fade effect!
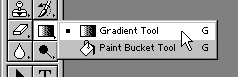
With Layer 1’s layer mask still selected in the Layers palette, select the Gradient tool:
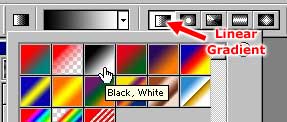
Select the “Linear” gradient type and, from the drop-down colour box, choose the “Black, White” swatch:
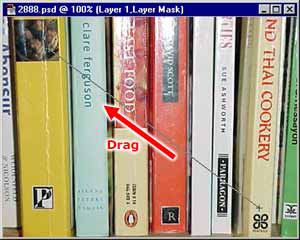
Now, click and drag in the document window from the bottom right of the image to the top left, to create the gradient fill:
You should now see the finished effect, with one image smoothly fading into the other!
Tweaking the fade effect
If you’re not happy with the fade effect, you can play with the layer mask to achieve the desired result. Remember that the layer mask can be edited and drawn upon, just like a regular bitmap image!
For example, to produce a sharper transition, increase the contrast of the layer mask (Image > Adjust > Brightness/Contrast…):
You might also like to try playing with the various blending modes for Layer 1, or applying different filters to the layer mask, until you get the effect you’re after.
Enjoy! 🙂
I WANT TO FADE A PICTURE TO ANOTHER
And have you not learnt to read yet??