In this tutorial, I’m going to look at Paint Shop Pro’s Cutout effect, and show how you can use it to produce some nice cutout text. The text will be used as a template to “cut out” part of an image.
Our starting point
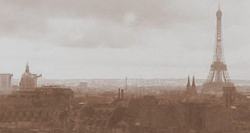
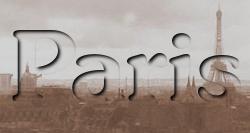
Open a nice image that you’d like to use for the cutout – in this case we’ve chosen a shot of the Paris skyline. It’s a good idea to choose a medium-brightness, low-contrast image such as this one, in order to highlight the cutout effect:
Creating the text
The next stage is to produce the text template that we can then use for the cutout effect. To do this, we need to create the text in the form of a selection.
Click on the Text tool and click in your image to open the Text dialog. Choose your favourite font and a large point size (e.g. 72pt) and type some text in. Click the Selection radio button in the “Create as” area to make sure you create the text as a selection, then click OK:
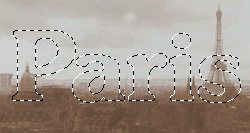
You should then see your text appear on top of your image as a selection (with marching ants):
If you want to reposition your text, click the Move tool (or press the V key) and then click on your text selection with the right mouse button and drag it around.
Saving the selection
This selection is the template that we’re going to use for our cutout effect. It’s always a good idea to save your selections, so you can recall them later on. Save this selection by clicking Selections > Save To Alpha Channel. Select New Channel in the dialog box and press OK. When asked to name the channel, call it something you’ll remember, like “Text”.
Let the fun begin!
Let’s do some cutting out! Create a new layer for the cutout effect (Layers > New Raster Layer… or the New Layer icon in the Layers palette) and press OK in the dialog that pops up. You should now have a new layer called something like “Layer1”, above your background layer in the Layers palette. Make sure this layer is selected (if in doubt, click on it in the Layers palette).
Now let’s add the Cutout effect. With your selection (marching ants) still active, go to Effects > 3D Effects > Cutout…. Make sure the Shadow color: is black, and the Fill interior with color: option is un-checked. Experiment with different offsets and blur settings until you get a nice clear cutout shadow effect. Here’s what we used:
When you’re happy with the cutout effect, click the OK button. The new layer you created should now contain the cutout shadow (if you like, you can press Shift+Ctrl+M to hide the marquee; the selection will still be active):
Enhancing the effect
This looks pretty good, but we can enhance the cutout effect further by adding a white highlight. Create another new layer and select Effects > 3D Effects > Drop Shadow…. We can actually use the Drop Shadow effect to make a highlight by selecting a white colour for the shadow, as follows:

Click OK and your white highlight should then be created on your new layer:

That’s looking great now! The cutout effect is a bit intense though. Luckily, because the cutout and highlight are on separate layers, we can tweak their opacities individually to get a more pleasing effect. I chose to knock the highlight layer down from 100% to 90% opacity, and the cutout layer down to 80% opacity:

These settings produced a more “laid-back” cutout effect that’s easier on the eye:

And that’s how you create cutout text! Try using the Cutout effect on different objects such as geometric and freehand shapes. You can get some really cool looking graphics this way!
Leave a Reply