This tutorial covers the basics of uploading your website using GlobalSCAPE’s CuteFTP for Windows. It was written using CuteFTP 4, but the tutorial should also be useful for users of later versions.
Connecting to your Web server
The first thing you need to do is connect to your Web server. The quickest way to do this for now is to use CuteFTP’s “Quick Connect” feature. (Once you become well versed in CuteFTP, you can use its “Bookmarks” and “Site Manager” feature to store settings for your different web servers.)
To connect to your server, first click on the Quick Connect button:
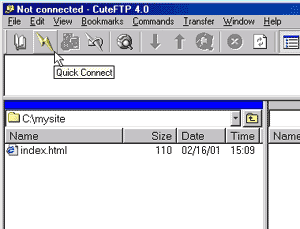
This will bring up the “Quick Connect” bar, which lets you enter your web server’s name (called URL by CuteFTP), your login name (User Name), and your login password (Password). Enter these details as shown below, then press the Connect button to connect to your server:
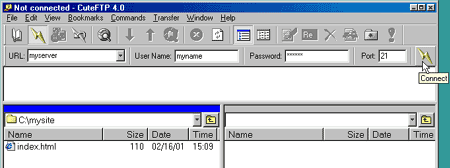
You may be behind a proxy server or firewall, especially if you’re trying this from work. If so, you will need to get your firewall details from your IT support people. Read the CuteFTP help for instructions on setting up CuteFTP to work through a firewall.
Your home directory
Once logged in, you will be taken to your home directory on your Web server. This directory will contain (amongst other things) your website directory, which is where you need to upload all your files:
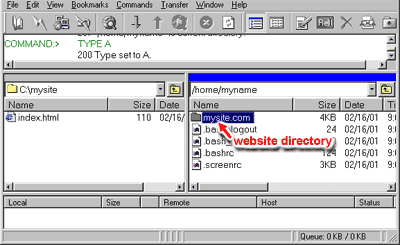
Double-click on this directory in CuteFTP to browse its contents.
Your document root
The top of your website is often called the document root. This is where you will place your first website files. The document root is often called “htdocs” or “public_html”, and may be in a folder inside your home directory.
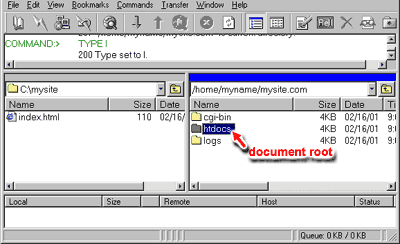
Double-click on your document root folder to browse its contents.
Uploading a Web page
Once you’ve found your document root, you’re now ready to upload your website. Here, we’re going to upload our first page, index.html, which should be the name of the main page of your website.
To do this in CuteFTP, we simply drag the file from the left hand pane to the right hand pane:
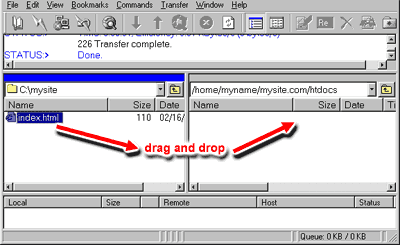
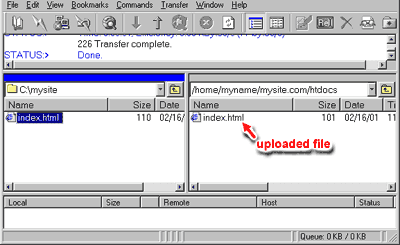
CuteFTP will ask you if you want to upload your selected file – click Yes. CuteFTP will now upload the file to our Web server for us. When it is finished you should see a copy of your file in the pane on the right. Congratulations – you’ve just uploaded your Web page!
If you now open up a Web browser and go to your website’s URL, you should see your Web page on the Internet. Well done! 🙂
Other stuff
Downloading
If you need to download a Web page from your site again (for example, you lost the original on your PC), simply drag and drop your page the other way, from the right-hand pane to the left-hand pane.
Disconnecting
After you’ve finished uploading stuff, you can click on the Disconnect button (3rd from the left in the button bar at the top) to disconnect from your web server. Or simply close down CuteFTP.
Deleting files
To delete a file that you have uploaded to your server, click on the file name in the right-hand pane and press the Delete key on your keyboard.
Doing other stuff to files
Right-click on a file on your Web server and you will see all sorts of things you can do to it, such as renaming it and editing it. To learn about these features, select the Help > Contents menu option to bring up CuteFTP’s Help system.
Leave a Reply