
17 May 2019: This article and the code were updated for PHP7 compatibility.
In my tutorial Build a CMS in an Afternoon with PHP and MySQL, I showed how to build a simple but useful content management system with PHP and MySQL. I also showed how to extend the CMS to allow article categories.
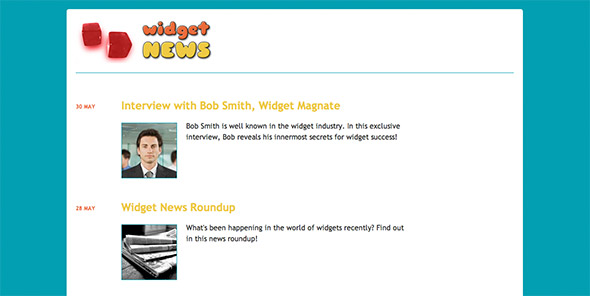
In this tutorial, you’ll look at another way to extend the CMS. You’ll take the original CMS code, and modify it so that the administrator can upload an image for each article. Then, when a visitor views an article page, the CMS will display the image at the start of the article. In addition, our CMS will generate a smaller thumbnail version of each article image, and display this thumbnail next to each article headline in the homepage and article archive pages.
You can see the finished result by clicking the View Demo link above. Notice the thumbnail images next to each article headline. Click a headline or thumbnail to view the corresponding article, along with the full-size article image.
The plan
We’ll start with the original CMS code from Build a CMS in an Afternoon with PHP and MySQL, and modify it to include the image upload feature. Here are the steps we’ll need to carry out:
- Create a couple of folders to store the article images
- Alter various image-related settings to the CMS config file
- Modify the database to store the image filename extensions
- Modify the
Articleclass to handle images - Modify
admin.phpto handle image upload and deletion - Modify the front-end templates to display the article images and thumbnails
- Modify the back-end article edit form to let the administrator upload an image, view the article image, and delete the article image
- Tweak the CMS stylesheet to style the article images and the new elements in the article edit form
Ready? Let’s get started!
Step 1: Create the image folders
The first thing to do is create a couple of folders in your website to store the full-size and thumbnail article images.
Open up the existing cms folder and you’ll see an images folder containing the sample logo.jpg image. Inside this images folder, create an articles folder. Then, inside the articles folder, create two more folders:
fullsizeto store the full-size article imagesthumbto store the smaller thumbnail versions of the article images
Next you need to give your web server user permission to create files in these two folders. Typically on a Linux or Mac system, you need to change the permissions to 777, like this:
$ cd images/articles/
$ chmod 777 fullsize
$ chmod 777 thumb
If your CMS is on a remote web server then you can usually set these permissions using your FTP software.
Step 2: Edit the config file
The next step is to add some image-related constants to the CMS config file. Open up the config.php file in the top-level cms folder, and add the new lines highlighted in the code below:
<?php
ini_set( "display_errors", true );
date_default_timezone_set( "Australia/Sydney" );  // http://www.php.net/manual/en/timezones.php
define( "DB_DSN", "mysql:host=localhost;dbname=cms" );
define( "DB_USERNAME", "username" );
define( "DB_PASSWORD", "password" );
define( "CLASS_PATH", "classes" );
define( "TEMPLATE_PATH", "templates" );
define( "HOMEPAGE_NUM_ARTICLES", 5 );
define( "ADMIN_USERNAME", "admin" );
define( "ADMIN_PASSWORD", "mypass" );
define( "ARTICLE_IMAGE_PATH", "images/articles" );
define( "IMG_TYPE_FULLSIZE", "fullsize" );
define( "IMG_TYPE_THUMB", "thumb" );
define( "ARTICLE_THUMB_WIDTH", 120 );
define( "JPEG_QUALITY", 85 );
require( CLASS_PATH . "/Article.php" );

function handleException( $exception ) {
  echo "Sorry, a problem occurred. Please try later.";
  error_log( $exception->getMessage() );
}

set_exception_handler( 'handleException' );
?>
You’ve added the following constants:
ARTICLE_IMAGE_PATHdefines the path to the article images folder, relative to the top-level CMS folder. (If you want to store your article images somewhere else, change this constant accordingly.)IMG_TYPE_FULLSIZEdefines a constant to represent the “full-size” image type. We’ll use this in the code whenever we want to indicate a full-size image. This value ("fullsize") is also used to locate the full-size images folder (images/articles/fullsize), so if you use a different folder name, you’ll want to update this constant too.IMG_TYPE_THUMBdoes a similar job toIMG_TYPE_FULLSIZE, but represents the “thumbnail” image type instead.ARTICLE_THUMB_WIDTHdefines the width to use for the article thumbnail images, in pixels. Our image-handling code will use this value when generating the thumbnail versions of article images when they’re uploaded.JPEG_QUALITYdefines the quality level to use when generating thumbnail versions of JPEG images. The value ranges from 0 to 100, where 100 is the best quality (but largest file size). 85 is a good compromise.
Step 3: Modify the database
You need to make one small change to the articles table in the CMS database. Open up the tables.sql file from the original CMS, and add the line highlighted in the code below:
DROP TABLE IF EXISTS articles;
CREATE TABLE articles
(
  id              smallint unsigned NOT NULL auto_increment,
  publicationDate date NOT NULL,                              # When the article was published
  title           varchar(255) NOT NULL,                      # Full title of the article
  summary         text NOT NULL,                              # A short summary of the article
  content         mediumtext NOT NULL,                        # The HTML content of the article
  imageExtension  varchar(255) NOT NULL,                      # The filename extension of the article's full-size and thumbnail images

  PRIMARY KEY     (id)
);
This line adds a new field called imageExtension to the articles table. This field stores the filename extension of each article’s uploaded image. For example, if the administrator uploads a PNG image then we’ll store the value ".png" in the imageExtension field.
What if you already have articles in your CMS?
If you load the above tables.sql file into MySQL then it will delete any existing articles table in your cms database, and recreate the articles table from scratch. This will delete any articles already in your CMS, which is obviously not what you want.
So if you already have articles in your CMS database, you want to modify the articles table while retaining the existing data in the table. To do this, change your tables.sql file to the following:
ALTER TABLE articles ADD imageExtension varchar(255) NOT NULL AFTER content;
Applying the changes
To actually create your articles table (or add the new imageExtension field to your existing articles table, as appropriate), you need to load the tables.sql file into MySQL. To do this, follow the procedure described in Applying the changes in my last tutorial.
To check that your changes have been made, first login to MySQL:
mysql -u username -p cms
Then use the SHOW TABLES and EXPLAIN commands to check your table schemas in MySQL:
mysql> show tables;
+---------------+
| Tables_in_cms |
+---------------+
| articles      |
+---------------+
1 row in set (0.00 sec)


mysql> explain articles;
+-----------------+----------------------+------+-----+---------+----------------+
| Field           | Type                 | Null | Key | Default | Extra          |
+-----------------+----------------------+------+-----+---------+----------------+
| id              | smallint(5) unsigned | NO   | PRI | NULL    | auto_increment |
| publicationDate | date                 | NO   |     | NULL    |                |
| title           | varchar(255)         | NO   |     | NULL    |                |
| summary         | text                 | NO   |     | NULL    |                |
| content         | mediumtext           | NO   |     | NULL    |                |
| imageExtension  | varchar(255)         | NO   |     | NULL    |                |
+-----------------+----------------------+------+-----+---------+----------------+
6 rows in set (0.00 sec)

mysql>
Notice the new imageExtension field inside the articles table.
You’ve set up your CMS database so that it’s ready to handle image uploads. Now you can start modifying the CMS code.
Step 4: Modify the Article class
Next, we need to modify the Article class to handle article images. Here’s the updated Article.php class file. I’ve highlighted the lines of code so you can see what’s been added and changed. Replace the code in your existing cms/classes/Article.php file with this new code:
<?php

/**
 * Class to handle articles
 */

class Article
{
  // Properties

  /**
  * @var int The article ID from the database
  */
  public $id = null;

  /**
  * @var int When the article is to be / was first published
  */
  public $publicationDate = null;

  /**
  * @var string Full title of the article
  */
  public $title = null;

  /**
  * @var string A short summary of the article
  */
  public $summary = null;

  /**
  * @var string The HTML content of the article
  */
  public $content = null;

  /**
  * @var string The filename extension of the article's full-size and thumbnail images (empty string means the article has no image)
  */
  public $imageExtension = "";


  /**
  * Sets the object's properties using the values in the supplied array
  *
  * @param assoc The property values
  */

  public function __construct( $data=array() ) {
    if ( isset( $data['id'] ) ) $this->id = (int) $data['id'];
    if ( isset( $data['publicationDate'] ) ) $this->publicationDate = (int) $data['publicationDate'];
    if ( isset( $data['title'] ) ) $this->title = preg_replace ( "/[^\.\,\-\_\'\"\@\?\!\:\$ a-zA-Z0-9()]/", "", $data['title'] );
    if ( isset( $data['summary'] ) ) $this->summary = preg_replace ( "/[^\.\,\-\_\'\"\@\?\!\:\$ a-zA-Z0-9()]/", "", $data['summary'] );
    if ( isset( $data['content'] ) ) $this->content = $data['content'];
    if ( isset( $data['imageExtension'] ) ) $this->imageExtension = preg_replace ( "/[^\.\,\-\_\'\"\@\?\!\$ a-zA-Z0-9()]/", "", $data['imageExtension'] );
  }


  /**
  * Sets the object's properties using the edit form post values in the supplied array
  *
  * @param assoc The form post values
  */

  public function storeFormValues( $params ) {

    // Store all the parameters
    $this->__construct( $params );

    // Parse and store the publication date
    if ( isset($params['publicationDate']) ) {
      $publicationDate = explode ( '-', $params['publicationDate'] );

      if ( count($publicationDate) == 3 ) {
        list ( $y, $m, $d ) = $publicationDate;
        $this->publicationDate = mktime ( 0, 0, 0, $m, $d, $y );
      }
    }
  }


  /**
  * Stores any image uploaded from the edit form
  *
  * @param assoc The 'image' element from the $_FILES array containing the file upload data
  */

  public function storeUploadedImage( $image ) {

    if ( $image['error'] == UPLOAD_ERR_OK )
    {
      // Does the Article object have an ID?
      if ( is_null( $this->id ) ) trigger_error( "Article::storeUploadedImage(): Attempt to upload an image for an Article object that does not have its ID property set.", E_USER_ERROR );

      // Delete any previous image(s) for this article
      $this->deleteImages();

      // Get and store the image filename extension
      $this->imageExtension = strtolower( strrchr( $image['name'], '.' ) );

      // Store the image

      $tempFilename = trim( $image['tmp_name'] );

      if ( is_uploaded_file ( $tempFilename ) ) {
        if ( !( move_uploaded_file( $tempFilename, $this->getImagePath() ) ) ) trigger_error( "Article::storeUploadedImage(): Couldn't move uploaded file.", E_USER_ERROR );
        if ( !( chmod( $this->getImagePath(), 0666 ) ) ) trigger_error( "Article::storeUploadedImage(): Couldn't set permissions on uploaded file.", E_USER_ERROR );
      }

      // Get the image size and type
      $attrs = getimagesize ( $this->getImagePath() );
      $imageWidth = $attrs[0];
      $imageHeight = $attrs[1];
      $imageType = $attrs[2];

      // Load the image into memory
      switch ( $imageType ) {
        case IMAGETYPE_GIF:
          $imageResource = imagecreatefromgif ( $this->getImagePath() );
          break;
        case IMAGETYPE_JPEG:
          $imageResource = imagecreatefromjpeg ( $this->getImagePath() );
          break;
        case IMAGETYPE_PNG:
          $imageResource = imagecreatefrompng ( $this->getImagePath() );
          break;
        default:
          trigger_error ( "Article::storeUploadedImage(): Unhandled or unknown image type ($imageType)", E_USER_ERROR );
      }

      // Copy and resize the image to create the thumbnail
      $thumbHeight = intval ( $imageHeight / $imageWidth * ARTICLE_THUMB_WIDTH );
      $thumbResource = imagecreatetruecolor ( ARTICLE_THUMB_WIDTH, $thumbHeight );
      imagecopyresampled( $thumbResource, $imageResource, 0, 0, 0, 0, ARTICLE_THUMB_WIDTH, $thumbHeight, $imageWidth, $imageHeight );

      // Save the thumbnail
      switch ( $imageType ) {
        case IMAGETYPE_GIF:
          imagegif ( $thumbResource, $this->getImagePath( IMG_TYPE_THUMB ) );
          break;
        case IMAGETYPE_JPEG:
          imagejpeg ( $thumbResource, $this->getImagePath( IMG_TYPE_THUMB ), JPEG_QUALITY );
          break;
        case IMAGETYPE_PNG:
          imagepng ( $thumbResource, $this->getImagePath( IMG_TYPE_THUMB ) );
          break;
        default:
          trigger_error ( "Article::storeUploadedImage(): Unhandled or unknown image type ($imageType)", E_USER_ERROR );
      }

      $this->update();
    }
  }


  /**
  * Deletes any images and/or thumbnails associated with the article
  */

  public function deleteImages() {

    // Delete all fullsize images for this article
    foreach (glob( ARTICLE_IMAGE_PATH . "/" . IMG_TYPE_FULLSIZE . "/" . $this->id . ".*") as $filename) {
      if ( !unlink( $filename ) ) trigger_error( "Article::deleteImages(): Couldn't delete image file.", E_USER_ERROR );
    }

    // Delete all thumbnail images for this article
    foreach (glob( ARTICLE_IMAGE_PATH . "/" . IMG_TYPE_THUMB . "/" . $this->id . ".*") as $filename) {
      if ( !unlink( $filename ) ) trigger_error( "Article::deleteImages(): Couldn't delete thumbnail file.", E_USER_ERROR );
    }

    // Remove the image filename extension from the object
    $this->imageExtension = "";
  }


  /**
  * Returns the relative path to the article's full-size or thumbnail image
  *
  * @param string The type of image path to retrieve (IMG_TYPE_FULLSIZE or IMG_TYPE_THUMB). Defaults to IMG_TYPE_FULLSIZE.
  * @return string|false The image's path, or false if an image hasn't been uploaded
  */

  public function getImagePath( $type=IMG_TYPE_FULLSIZE ) {
    return ( $this->id && $this->imageExtension ) ? ( ARTICLE_IMAGE_PATH . "/$type/" . $this->id . $this->imageExtension ) : false;
  }


  /**
  * Returns an Article object matching the given article ID
  *
  * @param int The article ID
  * @return Article|false The article object, or false if the record was not found or there was a problem
  */

  public static function getById( $id ) {
    $conn = new PDO( DB_DSN, DB_USERNAME, DB_PASSWORD );
    $sql = "SELECT *, UNIX_TIMESTAMP(publicationDate) AS publicationDate FROM articles WHERE id = :id";
    $st = $conn->prepare( $sql );
    $st->bindValue( ":id", $id, PDO::PARAM_INT );
    $st->execute();
    $row = $st->fetch();
    $conn = null;
    if ( $row ) return new Article( $row );
  }


  /**
  * Returns all (or a range of) Article objects in the DB
  *
  * @param int Optional The number of rows to return (default=all)
  * @return Array|false A two-element array : results => array, a list of Article objects; totalRows => Total number of articles
  */

  public static function getList( $numRows=1000000 ) {
    $conn = new PDO( DB_DSN, DB_USERNAME, DB_PASSWORD );
    $sql = "SELECT SQL_CALC_FOUND_ROWS *, UNIX_TIMESTAMP(publicationDate) AS publicationDate FROM articles
            ORDER BY publicationDate DESC LIMIT :numRows";

    $st = $conn->prepare( $sql );
    $st->bindValue( ":numRows", $numRows, PDO::PARAM_INT );
    $st->execute();
    $list = array();

    while ( $row = $st->fetch() ) {
      $article = new Article( $row );
      $list[] = $article;
    }

    // Now get the total number of articles that matched the criteria
    $sql = "SELECT FOUND_ROWS() AS totalRows";
    $totalRows = $conn->query( $sql )->fetch();
    $conn = null;
    return ( array ( "results" => $list, "totalRows" => $totalRows[0] ) );
  }


  /**
  * Inserts the current Article object into the database, and sets its ID property.
  */

  public function insert() {

    // Does the Article object already have an ID?
    if ( !is_null( $this->id ) ) trigger_error ( "Article::insert(): Attempt to insert an Article object that already has its ID property set (to $this->id).", E_USER_ERROR );

    // Insert the Article
    $conn = new PDO( DB_DSN, DB_USERNAME, DB_PASSWORD );
    $sql = "INSERT INTO articles ( publicationDate, title, summary, content, imageExtension ) VALUES ( FROM_UNIXTIME(:publicationDate), :title, :summary, :content, :imageExtension )";
    $st = $conn->prepare ( $sql );
    $st->bindValue( ":publicationDate", $this->publicationDate, PDO::PARAM_INT );
    $st->bindValue( ":title", $this->title, PDO::PARAM_STR );
    $st->bindValue( ":summary", $this->summary, PDO::PARAM_STR );
    $st->bindValue( ":content", $this->content, PDO::PARAM_STR );
    $st->bindValue( ":imageExtension", $this->imageExtension, PDO::PARAM_STR );
    $st->execute();
    $this->id = $conn->lastInsertId();
    $conn = null;
  }


  /**
  * Updates the current Article object in the database.
  */

  public function update() {

    // Does the Article object have an ID?
    if ( is_null( $this->id ) ) trigger_error ( "Article::update(): Attempt to update an Article object that does not have its ID property set.", E_USER_ERROR );

    // Update the Article
    $conn = new PDO( DB_DSN, DB_USERNAME, DB_PASSWORD );
    $sql = "UPDATE articles SET publicationDate=FROM_UNIXTIME(:publicationDate), title=:title, summary=:summary, content=:content, imageExtension=:imageExtension WHERE id = :id";
    $st = $conn->prepare ( $sql );
    $st->bindValue( ":publicationDate", $this->publicationDate, PDO::PARAM_INT );
    $st->bindValue( ":title", $this->title, PDO::PARAM_STR );
    $st->bindValue( ":summary", $this->summary, PDO::PARAM_STR );
    $st->bindValue( ":content", $this->content, PDO::PARAM_STR );
    $st->bindValue( ":imageExtension", $this->imageExtension, PDO::PARAM_STR );
    $st->bindValue( ":id", $this->id, PDO::PARAM_INT );
    $st->execute();
    $conn = null;
  }


  /**
  * Deletes the current Article object from the database.
  */

  public function delete() {

    // Does the Article object have an ID?
    if ( is_null( $this->id ) ) trigger_error ( "Article::delete(): Attempt to delete an Article object that does not have its ID property set.", E_USER_ERROR );

    // Delete the Article
    $conn = new PDO( DB_DSN, DB_USERNAME, DB_PASSWORD );
    $st = $conn->prepare ( "DELETE FROM articles WHERE id = :id LIMIT 1" );
    $st->bindValue( ":id", $this->id, PDO::PARAM_INT );
    $st->execute();
    $conn = null;
  }

}

?>
Here’s a list of the changes we’ve made to the Article class:
A new $imageExtension property
This corresponds to the imageExtension field you added to the articles table in Step 3. This property is used to store the filename extension for the article’s full-size and thumbnail images — for example, ".jpg" or ".png".
We also modified the constructor method, __construct(), to store the new $imageExtension property value in newly-created Article objects.
A new storeUploadedImage() method
We’ll call this method from the admin.php script whenever the user uploads a new article image using the article edit form. Its job is to move the uploaded image to the fullsize images folder we created in Step 1, as well as generate a thumbnail version of the image and store it in the thumb folder.
The method accepts a single $image parameter. This should be the element in the PHP $_FILES superglobal array that contains all the information about the uploaded image file.
Here’s how the storeUploadedImage() method works:
- Check for an upload error
The first thing the method does is check that the'error'element in the$imagearray equals the constantUPLOAD_ERR_OK. This indicates that the user uploaded an image, and that the upload was successful. If the upload went OK then the method starts to process the uploaded image; otherwise it does nothing. - Does the
Articleobject have an ID?
Assuming the file was uploaded OK, the method then makes sure that theArticleobject has an ID; in other words, that it has been saved to the database. This is important, because we’re going to rename the image file using the article’s ID in a moment, so that we can easily associate the image with the article. If the article doesn’t have an ID then the method callstrigger_error()to display an error message and exit. - Delete any previous image(s) for this article
Next the method calls theArticle::deleteImages()method to delete any existing full-size and thumbnail image files associated with the article. (We’ll write this method in a moment.) We do this in order to keep the image folders clean, without any old, unused article images lying about. For example, if the article currently has a.pngimage uploaded, and the user uploads a new.jpgimage, we want to make sure that the now-unused.pngimages are deleted from the folders. - Get and store the image filename extension
As you saw earlier, the$imageExtensionproperty needs to store the filename extension of the article image. Here the method uses thestrrchr()function to extract the filename extension — that is, everything after (and including) the final dot in the filename — and stores the result in$imageExtension, converted to lowercase withstrtolower()for consistency. - Store the image
Now the method moves the actual uploaded image into theimages/articles/fullsizefolder. To do this, it first retrieves the path to the uploaded file from the$_FILES['fieldname']['tmp_name']array element and stores it in$tempFilename. Typically this value is the path to the uploaded file in the server’s temporary folder, such as/tmp/.Then the method calls
is_uploaded_file()to check that the file in the temporary folder is indeed a file uploaded by PHP. This is a good security precaution to prevent sensitive system files accidentally being made public.Finally, the method calls the
move_uploaded_file()function to move the uploaded image from the temporary folder to theimages/articles/fullsizefolder. This function takes two arguments: the path to the file in the temporary folder, and the path to move the file to. It’s a good idea to usemove_uploaded_file()to move uploaded files, since the function performs additional security checks on the file before moving it.Once the file’s in place, the method calls the
chmod()function to set the file’s permissions to 0666. This ensures that the file can be read and written by anyone, including the web server user and any FTP user that may need to change or delete the article images. (As always, if you’re on a shared web server then you might want to use more restrictive permissions than this.) - Get the image size and type
The next job forstoreUploadedImage()is to create the smaller thumbnail version of the uploaded image. First it callsgetimagesize(), paassing in the path to the uploaded image, in order to get the image’s width, height and format (GIF, JPEG or PNG), which it then stores in$imageWidth,$imageHeightand$imageTyperespectively. - Load the image into memory
Now that the method knows the type of image it’s dealing with, it callsimagecreatefromgif(),imagecreatefromjpeg()orimagecreatefrompng()as appropriate to load the image into an image resource variable,$imageResource, for processing. - Copy and resize the image to create the thumbnail
Now it’s time to create the thumbnail image. To do this, the method first computes the thumbnail height,$thumbHeight, based on the full-size image height ($imageHeight), the full-size image width ($imageWidth), and the desired thumbnail width (ARTICLE_THUMB_WIDTH).Next it calls
imagecreatetruecolor()to create a blank image resource for storing the thumbnail image data, passing in the width and height of the image to create. It stores this resource in a$thumbResourcevariable.Finally, it calls
imagecopyresampled()to create the smaller version of the uploaded image and store the result in the$thumbResourcevariable. It passes the following arguments toimagecopyresampled():- The image resource to store the resized image in (
$thumbResource) - The uploaded image resource (
$imageResource) - The (x,y) coordinates of top-left corner of the rectangle in
$thumbResourceto copy the image data to (0,0— that is, the top left corner of the thumbnail) - The (x,y) coordinates of top-left corner of the rectangle in
$imageResourceto copy the image data from (0,0— that is, the top left corner of the uploaded image) - The width and height of the rectangle in
$thumbResourceto copy the image data to (ARTICLE_THUMB_WIDTHand$thumbHeight— that is, the entire width and height of the thumbnail) - The width and height of the rectangle in
$imageResourceto copy the image data from ($imageWidthand$imageHeight— that is, the entire width and height of the uploaded image)
- The image resource to store the resized image in (
- Save the thumbnail
Now that the method has created the thumbnail image data and stored it in$thumbResource, it needs to write the new thumbnail image to disk. To do this, it callsimagegif(),imagejpeg()orimagepng(), depending on the image type. It passes in both$thumbResourceand the path to use for the thumbnail image. To get the path, it calls thegetImagePath()method (which we’ll look at in a moment), passing in ourIMG_TYPE_THUMBconstant to indicate that we want the path to the thumbnail. - Update the article record
Finally, since theArticleobject’s$imageExtensionproperty may well have changed as a result of uploading the image, the method calls$this->update()to update the article record in the database.
A new deleteImages() method
The deleteImages() method is responsible for clearing out any image files associated with the current article. It’s called by storeUploadedImage() before uploading a new image (as you saw in the previous section). In addition, it’s called if the administrator specifically asks to delete the article’s image and thumbnail via the Edit Article form. Finally, deleteImages() is also called when the article itself needs to be deleted.
deleteImages() calls PHP’s glob() function to retrieve a list of all image files in both the images/articles/fullsize and images/articles/thumb folders that are named after the article’s ID. For example, if the article’s ID is 3, the call to glob() will return any image files called "3.gif", "3.jpg" or "3.png".
For each filename in the array returned by glob(), the method attempts to delete the file by calling PHP’s unlink() function. If there’s a problem deleting the file then it raises an error and exits.
Once all the image files have been deleted, deleteImages() sets the Article object’s $imageExtension property to an empty string ("") to indicate that the article no longer has an uploaded image.
A new getImagePath() method
The last new method we’ve added to the Article class is getImagePath(), which returns the path to one of the two article images.
The method takes a single, optional argument, $type, that indicates whether it should return the path to the full-size image (IMG_TYPE_FULLSIZE, the default), or the thumbnail (IMG_TYPE_THUMB). It then uses the article’s ID, along with the value stored in the article’s $imageExtension property, to compute the path to the image file inside the images/articles/fullsize or images/articles/thumb folder.
For example, if getImagePath() is passed IMG_TYPE_THUMB as an argument, the article’s ID is 3, and its $imageExtension property contains ".jpg", then the method will return the value "images/articles/thumb/3.jpg".
Changes to the insert() and update() methods
The final modifications to Article.php are inside the insert() and update() methods toward the end of the file. As you can see, we’ve modified the SQL INSERT and UPDATE statements to accommodate the new $imageExtension property so that the image extension is stored in the articles table. We’ve also added extra bindValue() calls to pass the property’s value to the SQL statements.
Step 5: Modify the admin.php script
We now need to make some changes to admin.php, the back-end admin script, so that it can handle image uploads. Fortunately, we’ve already done most of the hard work in our Article class, so there aren’t many changes that we need to make to this script.
Here’s the modified admin.php file with the changes highlighted. Replace the code in your existing cms/admin.php file with this code:
<?php

require( "config.php" );
session_start();
$action = isset( $_GET['action'] ) ? $_GET['action'] : "";
$username = isset( $_SESSION['username'] ) ? $_SESSION['username'] : "";

if ( $action != "login" && $action != "logout" && !$username ) {
  login();
  exit;
}

switch ( $action ) {
  case 'login':
    login();
    break;
  case 'logout':
    logout();
    break;
  case 'newArticle':
    newArticle();
    break;
  case 'editArticle':
    editArticle();
    break;
  case 'deleteArticle':
    deleteArticle();
    break;
  default:
    listArticles();
}


function login() {

  $results = array();
  $results['pageTitle'] = "Admin Login | Widget News";

  if ( isset( $_POST['login'] ) ) {

    // User has posted the login form: attempt to log the user in

    if ( $_POST['username'] == ADMIN_USERNAME && $_POST['password'] == ADMIN_PASSWORD ) {

      // Login successful: Create a session and redirect to the admin homepage
      $_SESSION['username'] = ADMIN_USERNAME;
      header( "Location: admin.php" );

    } else {

      // Login failed: display an error message to the user
      $results['errorMessage'] = "Incorrect username or password. Please try again.";
      require( TEMPLATE_PATH . "/admin/loginForm.php" );
    }

  } else {

    // User has not posted the login form yet: display the form
    require( TEMPLATE_PATH . "/admin/loginForm.php" );
  }

}


function logout() {
  unset( $_SESSION['username'] );
  header( "Location: admin.php" );
}


function newArticle() {

  $results = array();
  $results['pageTitle'] = "New Article";
  $results['formAction'] = "newArticle";

  if ( isset( $_POST['saveChanges'] ) ) {

    // User has posted the article edit form: save the new article
    $article = new Article;
    $article->storeFormValues( $_POST );
    $article->insert();
    if ( isset( $_FILES['image'] ) ) $article->storeUploadedImage( $_FILES['image'] );
    header( "Location: admin.php?status=changesSaved" );

  } elseif ( isset( $_POST['cancel'] ) ) {

    // User has cancelled their edits: return to the article list
    header( "Location: admin.php" );
  } else {

    // User has not posted the article edit form yet: display the form
    $results['article'] = new Article;
    require( TEMPLATE_PATH . "/admin/editArticle.php" );
  }

}


function editArticle() {

  $results = array();
  $results['pageTitle'] = "Edit Article";
  $results['formAction'] = "editArticle";

  if ( isset( $_POST['saveChanges'] ) ) {

    // User has posted the article edit form: save the article changes

    if ( !$article = Article::getById( (int)$_POST['articleId'] ) ) {
      header( "Location: admin.php?error=articleNotFound" );
      return;
    }

    $article->storeFormValues( $_POST );
    if ( isset($_POST['deleteImage']) && $_POST['deleteImage'] == "yes" ) $article->deleteImages();
    $article->update();
    if ( isset( $_FILES['image'] ) ) $article->storeUploadedImage( $_FILES['image'] );
    header( "Location: admin.php?status=changesSaved" );

  } elseif ( isset( $_POST['cancel'] ) ) {

    // User has cancelled their edits: return to the article list
    header( "Location: admin.php" );
  } else {

    // User has not posted the article edit form yet: display the form
    $results['article'] = Article::getById( (int)$_GET['articleId'] );
    require( TEMPLATE_PATH . "/admin/editArticle.php" );
  }

}


function deleteArticle() {

  if ( !$article = Article::getById( (int)$_GET['articleId'] ) ) {
    header( "Location: admin.php?error=articleNotFound" );
    return;
  }

  $article->deleteImages();
  $article->delete();
  header( "Location: admin.php?status=articleDeleted" );
}


function listArticles() {
  $results = array();
  $data = Article::getList();
  $results['articles'] = $data['results'];
  $results['totalRows'] = $data['totalRows'];
  $results['pageTitle'] = "All Articles";

  if ( isset( $_GET['error'] ) ) {
    if ( $_GET['error'] == "articleNotFound" ) $results['errorMessage'] = "Error: Article not found.";
  }

  if ( isset( $_GET['status'] ) ) {
    if ( $_GET['status'] == "changesSaved" ) $results['statusMessage'] = "Your changes have been saved.";
    if ( $_GET['status'] == "articleDeleted" ) $results['statusMessage'] = "Article deleted.";
  }

  require( TEMPLATE_PATH . "/admin/listArticles.php" );
}

?>
Let’s work through these changes to admin.php:
- Changes to
newArticle()
We’ve added a single line of code to thenewArticle()function to handle image uploads. It checks that the'image'element exists in the$_FILESarray and, if it does exist, it calls theArticleobject’sstoreUploadedImage()method, passing in the$_FILES['image']element, to store the image and create the thumbnail. - Changes to
editArticle()
As withnewArticle(), we’ve added a line of code that checks for an uploaded image and calls$article->storeUploadedImage()to store it and create the thumbnail. We’ve also added a line of code that checks if the user selected the “delete image” checkbox in the Edit Article form. If they did then we call$article->deleteImages()to delete any existing images associated with the article. - Changes to
deleteArticle()
Finally, we’ve added a single line of code to thedeleteArticle()function that calls$article->deleteImages(). This ensures that any images associated with the article also get deleted.
Step 6: Modify the front-end templates
Our database and PHP code can now handle article images, but we need to make some changes both to the front-end templates that visitors see, and the back-end admin templates.
Let’s start by altering the front-end templates to display the article images.
1. homepage.php
The homepage.php template displays the site’s home page, including a list of recent articles. We’ll modify this template to display each article’s thumbnail next to the article in the list.
Here’s the modified file with the new lines highlighted — replace your old cms/templates/homepage.php file with this code:
<?php include "templates/include/header.php" ?>
<ul id="headlines">
<?php foreach ( $results['articles'] as $article ) { ?>
<li>
<h2>
<span class="pubDate"><?php echo date('j F', $article->publicationDate)?></span><a href=".?action=viewArticle&articleId=<?php echo $article->id?>"><?php echo htmlspecialchars( $article->title )?></a>
</h2>
<p class="summary">
<?php if ( $imagePath = $article->getImagePath( IMG_TYPE_THUMB ) ) { ?>
<a href=".?action=viewArticle&articleId=<?php echo $article->id?>"><img class="articleImageThumb" src="<?php echo $imagePath?>" alt="Article Thumbnail" /></a>
<?php } ?>
<?php echo htmlspecialchars( $article->summary )?>
</p>
</li>
<?php } ?>
</ul>
<p><a href="./?action=archive">Article Archive</a></p>
<?php include "templates/include/footer.php" ?>
Here we’ve added some code inside the “summary” paragraph for each article. The code calls the article’s getImagePath() method, passing in IMG_TYPE_THUMB to indicate that we want the path to the article’s thumbnail. It then stores the path in the $imagePath variable. If this path is a non-false value then the article has a thumbnail image, so the code then constructs a link to view the article, wrapped around an img element that contains the thumbnail’s path. We’ve added an articleImageThumb class to the thumbnail image so that we can style it in the stylesheet.
If $imagePath‘s value is false then the article doesn’t have a thumbnail, so no markup is constructed.
2. archive.php
archive.php displays the article archive page — that is, a list of all the articles in the database. We need to modify it in the same way as homepage.php, so that it displays thumbnails next to the article summaries.
Here’s the modified archive.php file — replace your old cms/templates/archive.php file with this one:
<?php include "templates/include/header.php" ?>
<h1>Article Archive</h1>
<ul id="headlines" class="archive">
<?php foreach ( $results['articles'] as $article ) { ?>
<li>
<h2>
<span class="pubDate"><?php echo date('j F Y', $article->publicationDate)?></span><a href=".?action=viewArticle&articleId=<?php echo $article->id?>"><?php echo htmlspecialchars( $article->title )?></a>
</h2>
<p class="summary">
<?php if ( $imagePath = $article->getImagePath( IMG_TYPE_THUMB ) ) { ?>
<a href=".?action=viewArticle&articleId=<?php echo $article->id?>"><img class="articleImageThumb" src="<?php echo $imagePath?>" alt="Article Thumbnail" /></a>
<?php } ?>
<?php echo htmlspecialchars( $article->summary )?>
</p>
</li>
<?php } ?>
</ul>
<p><?php echo $results['totalRows']?> article<?php echo ( $results['totalRows'] != 1 ) ? 's' : '' ?> in total.</p>
<p><a href="./">Return to Homepage</a></p>
<?php include "templates/include/footer.php" ?>
As you can see, this is the same change that we made to homepage.php. If an article has an image, its thumbnail will now appear next to the article summary in the archive page.
3. viewArticle.php
The viewArticle.php template displays an individual article page, containing the article’s headline, summary and content. Just as we modified homepage.php and archive.php to display thumbnails next to the article summaries, we also need to enhance viewArticle.php so that it displays the full-size article images in the article pages.
Here’s the changed template. As always, I’ve highlighted the new code. Save this code over your old cms/templates/viewArticle.php file:
<?php include "templates/include/header.php" ?>

      <h1 style="width: 75%;"><?php echo htmlspecialchars( $results['article']->title )?></h1>
      <div style="width: 75%; font-style: italic;"><?php echo htmlspecialchars( $results['article']->summary )?></div>
      <div style="width: 75%; min-height: 300px;">
      <?php if ( $imagePath = $results['article']->getImagePath() ) { ?>
        <img id="articleImageFullsize" src="<?php echo $imagePath?>" alt="Article Image" />
      <?php } ?>
      <?php echo $results['article']->content?>
      </div>
      <p class="pubDate">Published on <?php echo date('j F Y', $results['article']->publicationDate)?></p>

      <p><a href="./">Return to Homepage</a></p>

<?php include "templates/include/footer.php" ?>
This new code works in essentially the same way as the code added to the homepage and archive templates. It calls the article’s getImagePath() method to get the path to the full-size article image. If the path isn’t false then the article has an image, and the code inserts the appropriate img element into the markup. The img element is given an id of articleImageFullsize so that we can style it using CSS.
Step 7: Modify the back-end templates
There’s actually only one back-end admin template that we need to change, and that’s the editArticle.php article edit form. Here’s the new template with changes highlighted — save it over your existing cms/templates/admin/editArticle.php file:
<?php include "templates/include/header.php" ?>
<script>
// Prevents file upload hangs in Mac Safari
// Inspired by http://airbladesoftware.com/notes/note-to-self-prevent-uploads-hanging-in-safari
function closeKeepAlive() {
if ( /AppleWebKit|MSIE/.test( navigator.userAgent) ) {
var xhr = new XMLHttpRequest();
xhr.open( "GET", "/ping/close", false );
xhr.send();
}
}
</script>
<div id="adminHeader">
<h2>Widget News Admin</h2>
<p>You are logged in as <b><?php echo htmlspecialchars( $_SESSION['username']) ?></b>. <a href="admin.php?action=logout"?>Log out</a></p>
</div>
<h1><?php echo $results['pageTitle']?></h1>
<form action="admin.php?action=<?php echo $results['formAction']?>" method="post" enctype="multipart/form-data" onsubmit="closeKeepAlive()">
<input type="hidden" name="articleId" value="<?php echo $results['article']->id ?>"/>
<?php if ( isset( $results['errorMessage'] ) ) { ?>
<div class="errorMessage"><?php echo $results['errorMessage'] ?></div>
<?php } ?>
<ul>
<li>
<label for="title">Article Title</label>
<input type="text" name="title" id="title" placeholder="Name of the article" required autofocus maxlength="255" value="<?php echo htmlspecialchars( $results['article']->title )?>" />
</li>
<li>
<label for="summary">Article Summary</label>
<textarea name="summary" id="summary" placeholder="Brief description of the article" required maxlength="1000" style="height: 5em;"><?php echo htmlspecialchars( $results['article']->summary )?></textarea>
</li>
<li>
<label for="content">Article Content</label>
<textarea name="content" id="content" placeholder="The HTML content of the article" required maxlength="100000" style="height: 30em;"><?php echo htmlspecialchars( $results['article']->content )?></textarea>
</li>
<li>
<label for="publicationDate">Publication Date</label>
<input type="date" name="publicationDate" id="publicationDate" placeholder="YYYY-MM-DD" required maxlength="10" value="<?php echo $results['article']->publicationDate ? date( "Y-m-d", $results['article']->publicationDate ) : "" ?>" />
</li>
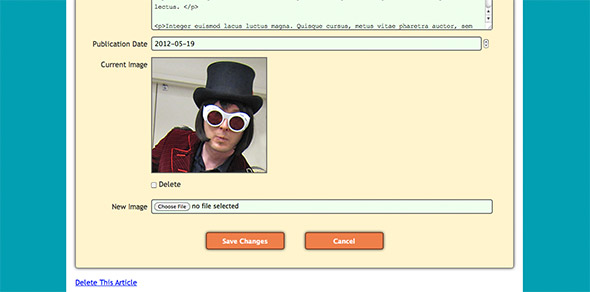
<?php if ( $results['article'] && $imagePath = $results['article']->getImagePath() ) { ?>
<li>
<label>Current Image</label>
<img id="articleImage" src="<?php echo $imagePath ?>" alt="Article Image" />
</li>
<li>
<label></label>
<input type="checkbox" name="deleteImage" id="deleteImage" value="yes"/ > <label for="deleteImage">Delete</label>
</li>
<?php } ?>
<li>
<label for="image">New Image</label>
<input type="file" name="image" id="image" placeholder="Choose an image to upload" maxlength="255" />
</li>
</ul>
<div class="buttons">
<input type="submit" name="saveChanges" value="Save Changes" />
<input type="submit" formnovalidate name="cancel" value="Cancel" />
</div>
</form>
<?php if ( $results['article']->id ) { ?>
<p><a href="admin.php?action=deleteArticle&articleId=<?php echo $results['article']->id ?>" onclick="return confirm('Delete This Article?')">Delete This Article</a></p>
<?php } ?>
<?php include "templates/include/footer.php" ?>
Let’s take a look at each of these changes in turn:
- The
closeKeepAlive()JavaScript function
For some reason, Safari on the Mac has suffered from a long-standing issue whereby file uploads hang occasionally. (Find out more about this issue here and here.) Since this is quite annoying if you use Safari (as I do), I’ve added this little function that makes an Ajax request to a non-existent URL on the server, forcing Safari to close its connection to the server. This seems to fix the problem. My function is similar to this script, except that my function doesn’t require the Prototype.js library. - Changes to the
<form>tag
We’ve added the attributeenctype="multipart/form-data"to theformelement. This attribute is required whenever you create a form containing a file upload field. It lets the browser know that it needs to encode the form data as a multipart MIME stream containing different media types (in this case, text and image data).We’ve also attached the
closeKeepAlive()function as asubmitevent handler to the form, so that the function runs when the form is submitted. - The article image and “delete” checkbox
The next addition to the form displays the full-size image currently associated with the article (if any). As with the front-end templates, the PHP code calls the article’sgetImagePath()method to retrieve the image’s path. If an image path was returned, we add anlielement to the page containing a field label (“Current Image”), along with animgelement linking to the image. We also include anotherlielement containing adeleteImagecheckbox. This lets the administrator delete any image(s) currently associated with the article. - The image upload field
Last, but by no means least, we add the<input type="file">upload field that allows the administrator to upload an image for this article. We give it anameattribute of"image", which means that we’re able to access the uploaded file from our PHP code using$_FILES['image'](see Step 4 earlier in the tutorial).
Step 8: Modify the stylesheet
Next we’ll make some additions and changes to our CMS’s stylesheet, style.css, in order to style the article images and thumbnails on the front end, as well as the new elements in the Edit Article form.
Here’s the new style.css file with the changes highlighted. Replace your existing style.css file in your cms folder with this file:
/* Style the body and outer container */

body {
  margin: 0;
  color: #333;
  background-color: #00a0b0;
  font-family: "Trebuchet MS", Arial, Helvetica, sans-serif;
  line-height: 1.5em;
}

#container {
  width: 960px;
  background: #fff;
  margin: 20px auto;
  padding: 20px;
  -moz-border-radius: 5px;
  -webkit-border-radius: 5px;
  border-radius: 5px;
}


/* The logo and footer */

#logo {
  display: block;
  width: 300px;
  padding: 0 660px 20px 0;
  border: none;
  border-bottom: 1px solid #00a0b0;
  margin-bottom: 40px;
}

#footer {
  border-top: 1px solid #00a0b0;
  margin-top: 40px;
  padding: 20px 0 0 0;
  font-size: .8em;
}


/* Headings */

h1 {
  color: #eb6841;
  margin-bottom: 30px;
  line-height: 1.2em;
}

h2, h2 a {
  color: #edc951;
}

h2 a {
  text-decoration: none;
}


/* Article headlines */

#headlines {
  list-style: none;
  padding-left: 0;
  width: 75%;
}

#headlines li {
  margin-bottom: 2em;
  overflow: hidden;
}

.pubDate {
  font-size: .8em;
  color: #eb6841;
  text-transform: uppercase;
}

#headlines .pubDate {
  display: inline-block;
  width: 100px;
  font-size: .5em;
  vertical-align: middle;
}

#headlines.archive .pubDate {
  width: 130px;
}

#headlines .articleImageThumb {
  width: 120px;
  float: left;
  margin: 4px 20px 0 0;
  border: 1px solid #00a0b0;
}

.summary {
  padding-left: 100px;
}

#headlines.archive .summary {
  padding-left: 130px;
}


/* Article pages */

#articleImageFullsize {
  width: 250px;
  float: left;
  margin: 4px 20px 10px 0;
  border: 1px solid #00a0b0;
}


/* "You are logged in..." header on admin pages */

#adminHeader {
  width: 940px;
  padding: 0 10px;
  border-bottom: 1px solid #00a0b0;
  margin: -30px 0 40px 0;
  font-size: 0.8em;
}


/* Style the form with a coloured background, along with curved corners and a drop shadow */

form {
  margin: 20px auto;
  padding: 40px 20px;
  overflow: auto;
  background: #fff4cf;
  border: 1px solid #666;
  -moz-border-radius: 5px;
  -webkit-border-radius: 5px;
  border-radius: 5px;
  -moz-box-shadow: 0 0 .5em rgba(0, 0, 0, .8);
  -webkit-box-shadow: 0 0 .5em rgba(0, 0, 0, .8);
  box-shadow: 0 0 .5em rgba(0, 0, 0, .8);
}


/* Give form elements consistent margin, padding and line height */

form ul {
  list-style: none;
  margin: 0;
  padding: 0;
  overflow: hidden;
}

form ul li {
  margin: .9em 0 0 0;
  padding: 0;
}

form * {
  line-height: 1em;
}


/* The field labels */

label {
  display: block;
  float: left;
  clear: left;
  text-align: right;
  width: 15%;
  padding: .4em 0 0 0;
  margin: .15em .5em 0 0;
}


/* The fields */

input, select, textarea {
  display: block;
  margin: 0;
  padding: .4em;
  width: 80%;
}

input, textarea, .date {
  border: 2px solid #666;
  -moz-border-radius: 5px;
  -webkit-border-radius: 5px;
  border-radius: 5px;
  background: #fff;
}

input {
  font-size: .9em;
}

input[type="checkbox"] {
  display: inline-block;
  padding: 0;
  margin: 0 0 .8em 0;
  width: auto;
}

select {
  padding: 0;
  margin-bottom: 2.5em;
  position: relative;
  top: .7em;
}

textarea {
  font-family: "Trebuchet MS", Arial, Helvetica, sans-serif;
  font-size: .9em;
  height: 5em;
  line-height: 1.5em;
}

textarea#content {
  font-family: "Courier New", courier, fixed;
}

#articleImage {
  border: 2px solid #666;
}

#deleteImage {
  clear: both;
}

label[for="deleteImage"] {
  float: none;
  display: inline;
}

input[type="file"] {
  float: left;
}


/* Place a border around focused fields */

form *:focus {
  border: 2px solid #7c412b;
  outline: none;
}


/* Display correctly filled-in fields with a green background */

input:valid, textarea:valid {
  background: #efe;
}


/* Submit buttons */

.buttons {
  text-align: center;
  margin: 40px 0 0 0;
}

input[type="submit"] {
  display: inline;
  margin: 0 20px;
  width: 12em;
  padding: 10px;
  border: 2px solid #7c412b;
  -moz-border-radius: 5px;
  -webkit-border-radius: 5px;
  border-radius: 5px;
  -moz-box-shadow: 0 0 .5em rgba(0, 0, 0, .8);
  -webkit-box-shadow: 0 0 .5em rgba(0, 0, 0, .8);
  box-shadow: 0 0 .5em rgba(0, 0, 0, .8);
  color: #fff;
  background: #ef7d50;
  font-weight: bold;
  -webkit-appearance: none;
}

input[type="submit"]:hover, input[type="submit"]:active {
  cursor: pointer;
  background: #fff;
  color: #ef7d50;
}

input[type="submit"]:active {
  background: #eee;
  -moz-box-shadow: 0 0 .5em rgba(0, 0, 0, .8) inset;
  -webkit-box-shadow: 0 0 .5em rgba(0, 0, 0, .8) inset;
  box-shadow: 0 0 .5em rgba(0, 0, 0, .8) inset;
}


/* Tables */

table {
  width: 100%;
  border-collapse: collapse;
}

tr, th, td {
  padding: 10px;
  margin: 0;
  text-align: left;
}

table, th {
  border: 1px solid #00a0b0;
}

th {
  border-left: none;
  border-right: none;
  background: #ef7d50;
  color: #fff;
  cursor: default;
}

tr:nth-child(odd) {
  background: #fff4cf;
}

tr:nth-child(even) {
  background: #fff;
}

tr:hover {
  background: #ddd;
  cursor: pointer;
}


/* Status and error boxes */

.statusMessage, .errorMessage {
  font-size: .8em;
  padding: .5em;
  margin: 2em 0;
  -moz-border-radius: 5px;
  -webkit-border-radius: 5px;
  border-radius: 5px;
  -moz-box-shadow: 0 0 .5em rgba(0, 0, 0, .8);
  -webkit-box-shadow: 0 0 .5em rgba(0, 0, 0, .8);
  -box-shadow: 0 0 .5em rgba(0, 0, 0, .8);
}

.statusMessage {
  background-color: #2b2;
  border: 1px solid #080;
  color: #fff;
}

.errorMessage {
  background-color: #f22;
  border: 1px solid #800;
  color: #fff;
}
As you can see, we’ve added various rulesets to style the thumbnails in the homepage and archive pages; the full-size images in article pages; and the “delete image” checkbox, article image and file upload field inside the “Edit Article” form (which you added in Step 7).
On line 89, we’ve set the thumbnail width to 120 pixels to match the ARTICLE_THUMB_WIDTH setting in config.php. Similarly, on line 107 we’ve set the width of the full-size images in the article pages to 250 pixels. If you want to use different widths for the thumbnails and images then you need to change these two values, as well as the ARTICLE_THUMB_WIDTH setting.
Try it out!
Great stuff! You now have a CMS that can handle image uploads. To test your new CMS, follow these steps:
- Log in
Open your browser and visit the base URL of your CMS — for example,http://localhost/cms/. Click the Site Admin link in the footer, and log in. - Upload some images
Click an article in the All Articles list, or add a new article by clicking the Add a New Article link at the bottom of the page. In the New Article / Edit Article form, click the button next to the New Image label at the bottom of the form. Choose a file to upload, then click Save Changes to save your article edits and upload the image. - View your images
Click the Widget News logo at the top of the page to view the site. You should see thumbnail images next to the articles in the list. If you click the Article Archive link at the bottom of the page then you should also see the thumbnails there. Click a thumbnail (or article headline) to view the full article page, along with the full-size article image. - Changing and deleting images
Just to make sure everything works, try editing an article with an image and uploading a new image. This should then replace the previous article image and thumbnail. (Depending on your server and browser setup, you may need to clear your browser’s cache and reload the page to see the new image.) You can also try clicking the Delete checkbox to remove an existing image from an article.
You can also try out the demo on our server too! The demo is read-only, so you can’t upload or delete images, but you can see how the images look on the front-end, as well as in the back-end article edit form.
Summary
In this tutorial we’ve added an image upload feature to the content management system from my original tutorial. Here’s what we did:
- Created some folders within your CMS to store the article images and thumbnails
- Added some constants to the config file to specify the path to the images folder, the width to use for article thumbnails, and other useful settings
- Modified the MySQL database to add an
imageExtensionfield, which tracks the filename extension of the image uploaded for each article - Modified the
Articleclass to add the$imageExtensionproperty, as well as methods to handle image uploads, image deletion, and retrieving image paths - Extended the
admin.phpadmin script to allow uploading and deleting of article images - Altered the front-end templates,
homepage.php,archive.phpandviewArticle.php, to display the article thumbnails and full-size images as appropriate - Enhanced the article edit form,
editArticle.php, to include the image upload field, as well as the currently-uploaded image and a “delete” image” checkbox, and - Tweaked the stylesheet,
style.css, to style the article images and thumbnails, as well as the article edit form elements.
You can now use your CMS to publish articles illustrated with images. Now all you need to do is create some beautiful images! Enjoy. 🙂
[Flickr photo credits for sample images: Businessman, Cogs, Willy Wonka, Newspapers, Dollars.]
@Thanks Matt.
You are the Number ONE. !!!!!!
Hi Volks Enjoy It.
Let me say, a Comment Sytem Would be Great too.
Thanks Matt.
I used your first CMS tutorial as an base for a CMS and I have added:
a comment section
disabling or enabling comments per article,
an upload facility for some sort of an introduction image
added a sidebar to show some recommended links, an ad and a random article that’s published
changed the date column in SQL to datetime to add more exact listing of new articles
Thank you for your tutorial as it has helped me develop my PHP OOP style programming skills a lot.
Awesome tutorial Matt! 🙂
if you’re going to write any more tutorials for this CMS I’d have to say a archive pagination tutorial or a comment system would be very useful and appreciated. 🙂
@hannz: Any chance you could do a small tutorial on how to implement comments, if you ever have the time?
@matt: Just wondering, any specific reason you chose to do this tutorial using the original CMS instead of the one with Categories? 🙂
@MarcusS: The main reasons were (1) to keep the code size down in the article, and (2) because some people might want to add image uploads without having categories.
Hi Matt,
very nice and clean tutorial about image uploading to CMS.
how do i made it so that this cms can upload multiple image?
I’m doing my own photography website which needs to display lots of photo..
@cydo: It depends what you mean exactly. Multiple images from the same form? Multiple images attached to a single article? Additional images that aren’t associated with an article?
I’m also wondering how to attach multiple images to the same article. I’ve made some changes in the editArticle.php (in the form), so I can add dynamiclly multiple inputs (as many as I want), but I have some trouble to change the storeUploadedImage in Article.php . Maybe you could give me a hint?
Hi Matt can you explain how to upload multiple images? And also if possible how to use that to create a gallery page? Thanks!!
@LightningPL @eddie: If you want an arbitrary number of images per article then you’ll need to create a separate articleImages table with articleId, filename, and so on, so you can associate each uploaded image with the correct article. You’ll then probably want to add an imageIds array to the Article class to store the images associated with the article. Then mod storeUploadedImage() so that it stores all the uploaded images, creates their records in the articleImages table (and ids in the imageIds array), and saves the Article record. Then you’ll need to modify the “view article” code to handle display of multiple images per article.
In short, it’s quite a lot of work!
If there’s enough demand, and many people find it useful to associate more than 1 image per article, I may write a tutorial on it at some point. If you just want to include lots of images within an article’s content then you’re probably better off using FTP and adding the image URLs within the content as img tags.
Hi Matt,
First of all (what I’ve forgot to mention earlier) great tutorials, they a a great source of knowleadge and inspiration.
Also maybe your idea of uploading images through ftp and attaching URLs to the articles is more resonable. What do you think about (I mean if it’s rational):
creating a folder with the title of the article, where all the images for this article would be stored (if the titleis changed, so will bethe folder name too). Then reading all the files from the folder and printing them on the website?
Hi Matt I posted questions in a few different forums’ topics
and I want to thank you for taking the time to answer all of them
I really appreciate, they are all very helpful, and I’m a big fan of your website and the tutorials.
Thanks again.
@matt: yes, i need t to associate more than 1 image per article. can you make the tutorial? thank you in advanced
@Matt: I would really like to thank you for all this amazing work. You’re helping us a lot, many thanks!!!!
I am integrating this amazing cms on a website but:
What if i would like to add another table for some news, or some job descriptions? Should i follow the same style? Note that I will not need to have any photo for this other table.
I mean to add two different tables in database and manage them accordingly:
News: id, title, source(oprional)
Jobs: id, job title, Essential Duties, Essential Skills, Desirable Skills, ApplyTo(email)
I would really appreciate your advice in general terms before starting with the implementation.
Again, Thank a lot for this wonderfull work.
@LightningPL: Yes, that could work, if you mean reading them automatically – though of course you wouldn’t have any control over exactly where each image appears in the article page. Depends what you want to do really. You could also use the article ID instead of the title for the folder name, which might be easier to work with.
@ekaja: Yes, I would probably create separate DB tables and PHP classes for those content types, if they’re sufficiently different from regular articles. You can base them on the original articles table / Article class. For content that is similar to articles, I would instead store them in the articles table and use categories ( http://www.elated.com/articles/add-article-categories-to-your-cms/ ) to distinguish them.
Thanks for the kind words everyone – I really appreciate it. 🙂
matt, first I’d like to thank you for the great tutorials you have given to the community. I have a question relating to the image upload script. I was wondering how to limit the form to except only jpg images and if it will except only the extension jpg or to convert jpeg to jpg. Help on this would be much appreciated as I’ve attempted a few things with no success. It would be nice to be able to notify the admin on submit that the extension used was not an excepted file type and do a header to bring them back to the form to correct it instead of taking them to the list of articles saying your changes have been saved.
How to add a category list too?
Hi, could you PLEASE make a tutorial on how to upload multiple images to an article?
Thank you so much for your great work.
Hi Matt, very great and useful tut. I am wanting to integrate a way to load pages of the CMS data without reloading the page content. Basically I am wondering if it is possible to integrate Ajax calls to avoid reloading of index page on your CMS easily. Thanks in advance!
[Edited by jvt4 on 15-Nov-12 18:58]
@meTony: Depends how strict you want it to be. You could just compare the filename extension (the Article::storeUploadedImage() method shows how to get this) to the string “.jpg” or “.jpeg”. Obviously this could be faked. Or you can use http://php.net/manual/en/function.getimagesize.php to inspect the image data itself.
@lafamosa: See http://www.elated.com/articles/add-article-categories-to-your-cms/
@jonathanzuniga: I’ll see if I have time. Also see my hints earlier in this thread.
@jvt4: You mean on the front end? Certainly possible. jQuery’s Ajax methods – especially load() – should do what you need. More info:
http://www.elated.com/articles/ajax-with-jquery-a-beginners-guide/
Cheers,
Matt
Yes I am trying to integrate front-end ajax. My steps so far are:
1.) Created a new page called “content.php” with a div “#content” called content which is supposed to initially load “homePage.php” inside of it using jQuery Ajax .load;
2.) Edited homePage.php’s article-specific links to “viewArticle.php”
    $('#getArticle').click( function() {
      var data = { articleId=$article };
      $('#content').load( "viewArticle.php", data );
    } );
3.) Edited homePage.php’s bottom link to “viewArchive.php”
    $('#getArchive').click( function() {
      var data = { ???NULL??? };
      $('#content').load( "archive.php", data );
    } );
Is this the right direction? It seems like it could work but seems like there’s an easier way.
[Edited by jvt4 on 23-Nov-12 13:03]
@jvt4: Yes that seems like the right idea to me.
Matt, great job on the tutorials. I must say I have learned an enormous amount of php over the last few months due to using your CMS as a foundation.
However, I am having a bit of an issue when I move everything from my localhost to my mediatemple server. I have fixed a ton of the errors that I had but these two persist.
1) The dates bump one day back every time I add a new post. Also, when I update the post it bumps one day further back. I have changed the timezone to America/Chicago from the php website and have looked at a few of the UNIX time fixes and havent really found anything that worked yet.
2) I am getting an invalid argument error and header error when I try to delete a post. Here is the error that I get from the browser (this is for a church so Article was replaced by Sermon):
Warning: Invalid argument supplied for foreach() in tylercookmedia.com/html/clients/agape/admin/classes/Sermon.php on line 162
Warning: Invalid argument supplied for foreach() in tylercookmedia.com/html/clients/agape/admin/classes/Sermon.php on line 167
Warning: Cannot modify header information – headers already sent by (output started at tylercookmedia.com/html/clients/agape/admin/classes/Sermon.php:162) in tylercookmedia.com/html/clients/agape/admin/add-sermon.php on line 145
Here is the code from all of those lines and I am pretty much stuck as to what the problem is sense it works locally but not on the live server.
line 162
// Delete all fullsize images for this Sermon
    foreach (glob(SERMON_IMAGE_PATH . "/" . IMG_TYPE_FULLSIZE . "/" . $this->id . ".*") as $filename) {
      if ( !unlink( $filename ) ) trigger_error( "Sermon::deleteImages(): Couldn't delete image file.", E_USER_ERROR );
    }
Line 167
    // Delete all thumbnail images for this Sermon
    foreach (glob( SERMON_IMAGE_PATH . "/" . IMG_TYPE_THUMB . "/" . $this->id . ".*") as $filename) {
      if ( !unlink( $filename ) ) trigger_error( "Sermon::deleteImages(): Couldn't delete thumbnail file.", E_USER_ERROR );
    }
Header Error on line 145 (im assuming that once the for each error is resolved this one will work itself out)
function deleteSermon() {

  if ( !$sermon = Sermon::getById( (int)$_GET['sermonId'] ) ) {
    header( "Location: add-sermon.php?error=sermoneNotFound" );
    return;
  }

  $sermon->deleteImages();
  $sermon->delete();
  header( "Location: add-sermon.php?status=sermonDeleted" );
}
Any ideas on what could be causing this would be much appreciated.
@tylercook:
1) Make sure your PHP timezone is the same as the MySQL timezone on the server.
2) The “Cannot modify header information” error is merely a side-effect of the first error being reported.
You’ll want to add some debugging to see what glob(SERMON_IMAGE_PATH . “/” . IMG_TYPE_FULLSIZE . “/” . $this->id . “.*”) is actually returning. It should be an array. If it’s not then you’ll get that “Invalid argument supplied” error. My guess is it’s returning FALSE which means there’s a problem accessing the filesystem (eg permissions problem or file not found).
I used your CMS tutorial and then added the Category tutorial and everything worked great. When I went to add the images tutorial, I received error on the adding new articles page:
Warning: PDOStatement::execute(): SQLSTATE[HY093]: Invalid parameter number: number of bound variables does not match number of tokens in /Applications/MAMP/htdocs/cms/classes/Article.php on line 292
Warning: PDOStatement::execute(): SQLSTATE[HY093]: Invalid parameter number: number of bound variables does not match number of tokens in /Applications/MAMP/htdocs/cms/classes/Article.php on line 292
Warning: Cannot modify header information – headers already sent by (output started at /Applications/MAMP/htdocs/cms/classes/Article.php:292) in /Applications/MAMP/htdocs/cms/admin.php on line 133
I wasn’t sure why this error was popping up. Any solution? They seem to work independently; however, when I use the code from the image uploaded and category, it pops up with errors.
Matt,
Is there any basic solution to help solve the problem I’m having with the above post.
The Category and Image upload don’t seem to work together. I kept receiving errors.
Original Post:
I used your CMS tutorial and then added the Category tutorial and everything worked great. When I went to add the images tutorial, I received error on the adding new articles page:
Warning: PDOStatement::execute(): SQLSTATE[HY093]: Invalid parameter number: number of bound variables does not match number of tokens in /Applications/MAMP/htdocs/cms/classes/Article.php on line 292
Warning: PDOStatement::execute(): SQLSTATE[HY093]: Invalid parameter number: number of bound variables does not match number of tokens in /Applications/MAMP/htdocs/cms/classes/Article.php on line 292
Warning: Cannot modify header information – headers already sent by (output started at /Applications/MAMP/htdocs/cms/classes/Article.php:292) in /Applications/MAMP/htdocs/cms/admin.php on line 133
I wasn’t sure why this error was popping up. Any solution? They seem to work independently; however, when I use the code from the image uploaded and category, it pops up with errors.
how to save title, summary Unicode format now
we can only saving content in Unicode format
thank you for these tutorials they are a good base for people to build upon :p im trying to figure out why this in particular isnt working, some are saying it’s because of the categories here, idk, the images are being uploaded (fullsize and thumbnail) but it isnt being linked with the article, it doesnt show neither on the editing page nor on the article view page
edit: for some reason the .jpg .png .gif etc extensions arent being stored in the database, if i manually store the .jpg on the article i want it at it will work fine hmmm
edit: solved xD my mistake when overwritting stuff, forgot to include the caregoryId part on the sql statement :3 tip to whoever has any issues with this tutorial: follow the white rabbit :3
[Edited by Evan on 15-Aug-13 18:09]
Same problem is here please write in detail. Thanks in advance
Thanks for the cms images tutorial, I got the images to upload to the thumbs and full-size okay but not display, can you tell me where I went wrong? Thanks.
Hello,
I like this script, its great working with CMS in afternoon.
At the moment the images are storred as id.extesion like 1.jpg ore 1.png
Is it possible to store the images with the title, like nice_cms_job.jpg ore nive_cms_job.png ?
I like the images found by searchmachines, so the name of the image is better found by name thene by id.
Thanks,
Greetings
Good article but I get the following error after I’ve chosen the image to upload and tried to save the article, could you tell me where I’m going wrong? I’m a noob
Warning: move_uploaded_file(/images/articles/fullsize/6.png): failed to open stream: No such file or directory in E:xampphtdocstestcmsclassesarticle.php on line 104
Warning: move_uploaded_file(): Unable to move ‘E:xampptmpphpD717.tmp’ to ‘/images/articles/fullsize/6.png’ in E:xampphtdocstestcmsclassesarticle.php on line 104
Fatal error: Article::storeUploadedImage(): Couldn’t move uploaded file. in E:xampphtdocstestcmsclassesarticle.php on line 104
Line 104 is:
if ( !( move_uploaded_file( $tempFilename, $this->getImagePath() ) ) ) trigger_error( “Article::storeUploadedImage(): Couldn’t move uploaded file.”, E_USER_ERROR );
What a great tutorial, just what I was looking for purely for my own home use, in cataloguing my record collection, however I have tried to alter the homepage.php to display as a table but no matter what I do I cant get it to work properly, for some reason the image will not display, its all but there and I am sure its a very simple fix but I can no longer see the error for looking. this is the homepage.php now it works but not correctly, can anyone help at all.
<?php include "templates/include/header.php" ?> <?php foreach ( $results['articles'] as $article ) { ?> <?php if ( $imagePath = $article->getImagePath( IMG_TYPE_THUMB ) ) { ?> <?php //Table headings echo "<table border='1' cellpadding='5' align='center'>"; echo "<tr><th>ID</th><th>Date</th><th>Image</th><th>Title</th><th>Statement</th></tr>"; echo "<tr>"; echo '<td>' . $article->id . '</td>'; echo '<td>' . date('j F', $article->publicationDate) . '</td>'; echo '<td><a href=".?action=viewArticle&articleId= . $article->id ."><img class="articleImageThumb" src=" . $imagePath . " alt="Article Thumbnail" /></a></td>'; //echo '<td>' .action=viewArticle&articleId=echo $article->id . '</td>'; echo '<td>' . htmlspecialchars( $article->title ) . '</td>'; echo '<td>' . htmlspecialchars( $article->summary ) . '</td>'; echo "</tr>"; echo "</table>"; } } ?> <p><a href="./?action=archive">HOME PAGEArticle Archive</a></p> <?php include "templates/include/footer.php" ?>Hello Matt! First of all thanks for the truly beautiful, clear, and practical tutorials. Everything works perfectly! I’m starting to learn php with your own examples. Now, I would simply add to the file: editArticle.php another data field. Also edit the file: classes/Article.php adding the new id of the new field created in editArticle.php. I also create a new field in mysql with the same id. The field should be a more content. If I change all these parameters… load a list of errors appear endless! How can I fix it? I tried searching the forum but have not found an answer! Thanks again for everything you have done and I hope that you will continue to do! Hello;-);-)
hi guys,first of all i wanna thank matt for this awesome tutorial, i’ve modified the original cms to have some amazing features but what i can’t seem to get right is how to implement pagination for the archive page and the list articles page at the admin section.i’ve searched the entire web and i’ve seen many tutorials written in pdo but i can’t seem to implement it into the cms please anyone who has any help should pls reply or i’ll prefer matt to make another tutorial on pagination.pleaaaseeee i need this so my site can go live…pls
Hello all,
please help me !
On a local NAS server i have no problem.
But on a hosting service (OVH),
I’ve a problem while trying to upload the file :
here is the message (it seems the variables can’t be taken into account).
Warning: move_uploaded_file() [function.move-uploaded-file]: Filename cannot be empty in /home/xxx/www/cms/classes/Article.php on line 257
Warning: move_uploaded_file() [function.move-uploaded-file]: Unable to move ‘/tmp/phpTD5F91’ to ” in /home/xxx/www/cms/classes/Article.php on line 257
Fatal error: Article::storeUploadedImage(): Couldn’t move uploaded file. in /home/xxx/www/cms/classes/Article.php on line 257
Check the permissions to the tmp folder.
Thank you chrishirst fro your answer. I can’t check it as I’m on a shared hosted server and don’t have access to that.
I wanted to change the default tmp folder for one I would have chosen with upload_tmp_dir but it keeps using “tmp” by default.
Which bypass I could use please ?
[Edited by LeonTheOne on 29-Jun-14 14:48]
put a php.ini file in your document root folder with the following in it:
Chris thanks for your help and support.
What I tested before my first post :
I set ini_set(“upload_tmp_dir” , “temp”); in config.php
1)
-> not taken into account, still the same message
-> I read somewhere that “upload_tmp_dir” is part of PHP_INI_SYSTEM which means it can only be set in php.ini or httpd.conf
2)
-> this is the point you tell me and I applied it but still the same error message
-> I read that my hoster doesn’t allow php.ini file to change settings on mutualized servers so it means I can add it on the root folder but not taken into account indeed
I would definitely like to make it work on that sort of server. It’s possible to run strong known CMS with same functiunalities on mutualized server so I think it’s possible to do it with Matt’s incredible CMS.
P.S. I there a beautiful view from the tower today ? 😉
Congratulations! Wonderful work!
I saw that you already answered many times about the possibility of creating a multiupload to associate multiple images (2-3-4-5 etc …) to an article. Saying it was a long process … but if I wanted to upload three images for each item? It would also be a long and difficult, or maybe there’s a simpler way to do it?
Thanks in advance for your reply and keep it up! The web improves mainly thanks to you!
I guess, you can get some info on http://www.webbuildersguide.com website. There are some lessons and reviews on different CMSs. I am learning web design from there now. I guess, those tutorials are nice
Thanks for the advice! But I love this “simple” cms!
I edited all styles using the bootstrap fremwork.
Added 3 fields to insert more data.
Added a search bar.
Create an initial password to be able to see the blog …
What I miss is just give the possibility to add 3 images for every article …
Any ideas?
Thanks in advance to all community!
Regards
Hi Emanuele, I saw your reply to the topic, would you send me the address of your cms when you’re done so I can see it? I love working with bootstrap framework and read on the reply what you have done with it, thanks.
This is great news widget. Please can you help me. How do get the articles to display three in a row? Also How can you specify which article displays on which page?
[Edited by AllyD on 19-Mar-15 07:21]
Good afternoon! There is a problem downloading files larger than 2MB, and I can not understand what the problem is. Help me please. (CMS on the localhost)
Check the maximum upload size in php.ini
Thank, chrishirst!
I insert a new columns in the article’s table in the database, for language proposals… Called publicationDate_fin, title_eng, content_eng, summary_eng. So, the insert function is now like this:
 public function insert() {

    // Does the Article object already have an ID?
    if ( !is_null( $this->id ) ) trigger_error ( "Article::insert(): Attempt to insert an Article object that already has its ID property set (to $this->id).", E_USER_ERROR );

    // Insert the Article
    $conn = new PDO( DB_DSN, DB_USERNAME, DB_PASSWORD );
    $sql = "INSERT INTO articles ( publicationDate, publicationDate_fin, title, title_eng, summary, summary_eng, content, content_eng, imageExtension ) VALUES ( FROM_UNIXTIME(:publicationDate), FROM_UNIXTIME(:publicationDate_fin), :title, :title_eng, :summary, :summary_eng, :content, :content_eng, :imageExtension )";
    $st = $conn->prepare ( $sql );
    $st->bindValue( ":publicationDate", $this->publicationDate, PDO::PARAM_INT );
    $st->bindValue( ":publicationDate_fin", $this->publicationDate_fin, PDO::PARAM_INT );
    $st->bindValue( ":title", $this->title, PDO::PARAM_STR );
    $st->bindValue( ":title_eng", $this->title_eng, PDO::PARAM_STR );
    $st->bindValue( ":summary", $this->summary, PDO::PARAM_STR );
    $st->bindValue( ":summary_eng", $this->summary_eng, PDO::PARAM_STR );
    $st->bindValue( ":content", $this->content, PDO::PARAM_STR );
    $st->bindValue( ":content_eng", $this->content_eng, PDO::PARAM_STR );
    $st->bindValue( ":imageExtension", $this->imageExtension, PDO::PARAM_STR );
    $st->execute();
    $this->id = $conn->lastInsertId();
    $conn = null;
  }
But… When i’m going to upload a new event with all the content and the image, it shows me forever this error:
It’s only happen’s in the insert function, because if i want to edit an existent article, it’s working fine. So the update function is this:
 public function update() {

    // Does the Article object have an ID?
    if ( is_null( $this->id ) ) trigger_error ( "Article::update(): Attempt to update an Article object that does not have its ID property set.", E_USER_ERROR );

    // Update the Article
    $conn = new PDO( DB_DSN, DB_USERNAME, DB_PASSWORD );
    $sql = "UPDATE articles SET publicationDate=FROM_UNIXTIME(:publicationDate), publicationDate_fin=FROM_UNIXTIME(:publicationDate_fin), title=:title, title_eng=:title_eng, summary=:summary, summary_eng=:summary_eng, content=:content, content_eng=:content_eng, imageExtension=:imageExtension WHERE id = :id";
    $st = $conn->prepare ( $sql );
    $st->bindValue( ":publicationDate", $this->publicationDate, PDO::PARAM_INT );
    $st->bindValue( ":publicationDate_fin", $this->publicationDate_fin, PDO::PARAM_INT );
    $st->bindValue( ":title", $this->title, PDO::PARAM_STR );
    $st->bindValue( ":title_eng", $this->title_eng, PDO::PARAM_STR );
    $st->bindValue( ":summary", $this->summary, PDO::PARAM_STR );
    $st->bindValue( ":summary_eng", $this->summary_eng, PDO::PARAM_STR );
    $st->bindValue( ":content", $this->content, PDO::PARAM_STR );
    $st->bindValue( ":content_eng", $this->content_eng, PDO::PARAM_STR );
    $st->bindValue( ":imageExtension", $this->imageExtension, PDO::PARAM_STR );
    $st->bindValue( ":id", $this->id, PDO::PARAM_INT );
    $st->execute();
    $conn = null;
  }
If I add the original insert function, it’s published fine, but i want to use this function because I added new rows to the articles table (publicationDate_fin, title_eng, summary_eng and content_eng).
I was trying to fix this about three days but I can’t… What happen?
Thanks a lot!!!
(The admin .php editarticle is changed to get the new forms for each new row in the table, it’s all correct).
This:
“Warning: move_uploaded_file(): Filename cannot be empty”
Says you haven’t selected a file to upload.
Hi Chris!!
Thanks for the reply.
But it’s not correct, because I choosed an image to upload, so I don’t know why this error occurs…
If i do a var_dump in $tempFilename it shows: string(14) “/tmp/phpGuXkGs”
If i do a var_dump in $this->getImagePath() it shows: bool(false)
If i do a var_dump in $this->imageExtension it shows: string(4) “.jpg”
If you want I can pass the .zip code to mail and the admin address to check it.
Thanks so much.
[Edited by Dreagnout on 03-Sep-15 08:25]
Any idea how to preserve transparancy when a png (maybe even GIF) with transparant background is uploaded? Or just turning it white instead of black would be an improvement too.
I tried a few Stack Overflow solutions but can’t seem to get it fixed. Thanks in advance.
EDIT: fixed, edit the following code in the storeUploadedImage-function (see the classes-folder), I’ve copied the first and last line so you can see where it should go.
$thumbResource = imagecreatetruecolor(LINK_THUMB_WIDTH, $thumbHeight);

switch ($imageType) {
    case IMAGETYPE_PNG:
        // integer representation of the color black (rgb: 0,0,0)
        $background = imagecolorallocate($thumbResource, 0, 0, 0);
        // removing the black from the placeholder
        imagecolortransparent($thumbResource, $background);

        // turning off alpha blending (to ensure alpha channel information
        // is preserved, rather than removed (blending with the rest of the
        // image in the form of black))
        imagealphablending($thumbResource, false);

        // turning on alpha channel information saving (to ensure the full range
        // of transparency is preserved)
        imagesavealpha($thumbResource, true);

        break;
    case IMAGETYPE_GIF:
        // integer representation of the color black (rgb: 0,0,0)
        $background = imagecolorallocate($thumbResource, 0, 0, 0);
        // removing the black from the placeholder
        imagecolortransparent($thumbResource, $background);

        break;
}

imagecopyresampled($thumbResource, $imageResource, 0, 0, 0, 0, LINK_THUMB_WIDTH, $thumbHeight, $imageWidth, $imageHeight);
[Edited by tjorim on 14-Nov-15 16:43]
Hey this is rily great,
I am new to programing language, I am wondering how i can pick one article and its image displayed separately in my div tag. such that it may not be a rondom pick on my home page,
something like
$result = mysql_query("SELECT * FROM articles WHERE id =1",and how do i add the image path to crespond my article. Thank you.
In case I want users to login to my system to comment and i want them to be able to upload their profile picture, would you recommend saving the profile picture as part of, let’s say, a USERS table? Also would you recommend saving the admin login as part of the USERS table, with a is_admin field to indicate if it’s an admin user, instead of keeping it as part of config.php? I’d like to know which is more secure way to handle these.
[Edited by bentotdecruz on 02-Mar-16 21:23]
“Also would you recommend saving the admin login as part of the USERS table, ”
Not really, You STILL have to have a username and password in config.php so that the “admin” login details CAN be retrieved from the database.
Provided you have changed the password to something that is difficult to ‘break’, and here longer, (ten characters minimum) passwords are better than using a shorter ‘complex’ password of letters and numbers. Having the password in a text file is reasonably secure, as you can block config.php from being requested externally using .htaccess directives and even if someone were to access it, the resulting page would be blank, as PHP only serves content to the user agent that is echo()ed or print()ed to the output stream for the browser to display. So any thing between <?php …. …. and ?> is ‘invisible’ to the outside world.
Hi,
I have this working perfectly locally but not when on a server. I’m getting “Call to undefined function imagecreatefromjpeg” . I am using php 5.1.6 on the server and am stuck with that. Is there a way I can rewrite the method to make it work with the old version of PHP I have to use?
Thanks
Probably nothing to do with the version of PHP as “imagecreatefromjpeg” is actually part of the “GD” (http://php.net/manual/en/book.image.php) library included with PHP but which is often disabled in “shared” hosting configurations.
Check it is on by putting
<?php phpinfo() ?>
in a php document and request that URL in a browser, if the GD section does not appear you will probably need to ask your hosting provider to enable it, or check in whatever control panel you have to enable or disable there.
Thanks got it working…
Now about the multiple image issue.
I was wondering if I could just upload multiple images within the editArticle.php page. They don’t have to be associated with the article. I just need them to go to different directories. Then I can just reference them within the wysiwyg. I can’t ftp.
Thanks
Given that the edit article page is for associating the image with an article, you can’t, well no without a fair bit of reinventing anyway.
The simplest way would be to take a basic PHP upload form and script such as http://www.w3schools.com/php/php_file_upload.asp and make that the default document ( probably index.php) for a subfolder of the website and by including the config.php and login() check function you could integrate it as if it was part of the site.
Just set the redirect header location: of login() to your upload URL instead of admin.php
Then to upload an image you just request
yoursite.tld/uploadfolder/
In a browser and the upload form will be presented.
Probably best not to call it “upload” anything though and of course set the “$target_dir” value to a different location, so if the Internet scrotes find it they can’t do too much damage with uploading ‘fake’ images that actually run scripts.
And never link to that URL so it will not be exposed to any bots that are scraping the site looking for upload forms.
Thanks Chris,
I did do something very similar. I had the image upload as a popup window so the content editor could copy/paste image paths into the wysiwyg editor after they were uploaded. Also you can’t nest forms so that is another reason for the popup. They can upload as many as they want that way.
I think the last issue I have would be publishing the articles. What I mean by that is creating static html files from the output of the articles. I appreciate all the feedback you have given.
Please add pagination to archive page. It is major demand of every one over here, Thanks. If any body have added, please post the code here or mail me.
I will start by saying a very Big thank by sharing this application.this really help me in my PHP learning journey.
Please I have problem with this image upload.I have been following the tutorial,and everything was working fine until I get to.
( ! ) Warning: move_uploaded_file(images/articles/fullSize/9.jpg): failed to open stream: No such file or directory in C:wampwwwNewD9classesArticle.php on line 105
Call Stack
# Time Memory Function Location
1 0.0013 163128 {main}( ) ..admin.php:0
2 0.0058 247456 editArticle( ) ..admin.php:24
3 0.0999 248896 Article->storeUploadedImage( ) ..admin.php:118
4 0.1003 249184 move_uploaded_file ( ) ..Article.php:105
( ! ) Warning: move_uploaded_file(): Unable to move ‘C:wamptmpphp242D.tmp’ to ‘images/articles/fullSize/9.jpg’ in C:wampwwwNewD9classesArticle.php on line 105
Call Stack
# Time Memory Function Location
1 0.0013 163128 {main}( ) ..admin.php:0
2 0.0058 247456 editArticle( ) ..admin.php:24
3 0.0999 248896 Article->storeUploadedImage( ) ..admin.php:118
4 0.1003 249184 move_uploaded_file ( ) ..Article.php:105
( ! ) Fatal error: Article::storeUploadedImage(): Couldn’t move uploaded file. in C:wampwwwNewD9classesArticle.php on line 105
Call Stack
# Time Memory Function Location
1 0.0013 163128 {main}( ) ..admin.php:0
2 0.0058 247456 editArticle( ) ..admin.php:24
3 0.0999 248896 Article->storeUploadedImage( ) ..admin.php:118
4 0.2960 249728 trigger_error ( ) ..Article.php:105
“move_uploaded_file(images/articles/fullSize/9.jpg)”
File or folder does not exist or permissions are incorrect.
Hi,
I have spent hour looking for a script that will do the things this will – namely upload an image with the news article.
This would work for me but I have some concerns of how secure it will be on a shared web hosting.Is there anyway we can make it more secure.
Kind Regards
Chris
It will be just as secure as the permissions are on the server folder structure.
I have concerns about folders being 777 and the password in the config file..
Folders should definitely not be that open, at worst only the image folder may need “world write” permissions to allow for uploading.
Anyone trying to access the config.php file from ‘outside’ should not see the information as it is only setting values and does not write any data to the output stream with echo(), print() etc. Plus you can block the file from access over HTTP using .htaccess directives.
If the image upload folder does require “world write” permissions you should use a folder .htaccess file to block executable scripts and common exploits such as ‘double extension’ files.
A template that I use is at http://chrishirst.co.uk/download/htaccess.txt
Change the necessary details and save the file as .htaccess in the images folder.
Cheers for the reply Chris,
Been having a play around but keep running into the same problem..
Fatal error: Uncaught exception ‘PDOException’ with message ‘SQLSTATE[HY000] [1044] Access denied for user ‘cmsus’@’localhost’ to database ‘CMS” in /home/test/public_html/cms/classes/Article.php:216 Stack trace: #0 /home/test/public_html/cms/classes/Article.php(216): PDO->__construct(‘mysql:host=loca…’, ‘cmsus’, ‘0Etptii8msn6’) #1 /home/test/public_html/cms/index.php(40): Article::getList(5) #2 /home/test/public_html/cms/index.php(14): homepage() #3 {main} thrown in /home/test/public_html/cms/classes/Article.php on line 216
Password is ok just can’t put my finger on whats wrong…
This;
“Access denied for user ‘cmsus’@’localhost’ to database ‘CMS”
Suggests that the MySQL user ‘cmsus’@’localhost’ does not have “SELECT” privilege granted on database ‘CMS”.
Login to mysql in a console session as the ‘root’ user and use;
To display what privileges are granted to that user.
OR
if the cms is NOT public facing on the Internet you can simply grant ALL privileges to that user,
followed by
to reload the privileges
if the cms is public facing, you should only grant the minimum necessary privileges to that user. with;
and the [type of permission] can be a comma separated list of these;
The GRANT OPTION privilege should be used with care if anyone else has access to the machine that the CMS is running on regardless of external access, so do not grant this to ANY user for all databases and tables unless you are granting permissions for an secondary ‘root’ user.
Have it working now, it did not like the auto generated password.
My next question is.
I need to be able to insert paragraph mark-up tags when enter on the key board is hit, in the new article “Article Content” form. As this form I’m typing in now does.
Chris
I did not make myself very clear in the above post, I think sleep was needed.
When the user enters new lines, the new lines don’t appear when they are outputted. Is there any way to make the line breaks stay. How do preserve the line breaks as I’m getting just one long text no formatting. I have tried <pre></pre>but this just mess’s with the page style .
Chris
[Edited by Big Chris on 19-Apr-17 12:29]
You need to convert ‘newline’ characters (ASCII 10) and ‘carriage return’ characters ASCII 13 to HTML line breaks (BR) as the document is being processed server side when it is requested.
http://php.net/manual/en/function.nl2br.php
[Edited by chrishirst on 20-Apr-17 07:03]
I have been reading up on this, https://goo.gl/HRryJG , but it’s all above my skill level. I would not know where to start…Which is a shame as everything else about this CMS works for me…
Chris
“but it’s all above my skill level.”
That’s actually the purpose of the tutorial, it is here for you to improve your coding skills while creating something useful.
The intention of publishing it was not for anyone to use ‘as is’ but as a learning tool.
That’s fine and I do understand that.
But, when the example is trowing up an error and ones understanding of php is not great, a little help is needed.
Gives a (T_STRING) error ….
so what does YOUR code for calling that function ‘look’ like, because showing the example from the PHP manual is of no help in diagnosing where you may have gone awry.
However; a T_STRING error generally means that the PHP interpreter encountered a string of characters where one not expected.
This could be caused by some text that is not wrapped in quote marks ( ” or ‘) or a variable name that is missing a ‘$’ sign,
eg. variable instead of $variable.
So, just in case you have done what I think you may have done,
The call to nl2br() at it’s simplest should be.
Think I just call it a day and look for something of the shelve. I’m just going around in circles and not getting very far…
Thanks for all the help..
Hey Matt and Chris please help me with modrewrite of this cms,for much pretty urls
Hi Matt
Just thought I’d let you know how much I appreciated this series. I’ve been writing procedural code in my own way for a long time, knowing that as the years pass I should be much more structured in my approach and that the code should be more reusable and understandable. I’ve never stopped to put in the time/effort needed to change, until now.
Your code and explanations are great and I’m re-building one of my important systems on the back of it.
Really great. Thank you!
Thanks Neil 🙂
Hi! Soooooo like a bonehead I dropped my tables.sql in phpmyadmin and imported the new one. I only lost one article.
However, now the cms will not populate new articles!! HELP!!
Jason
I see many requests for a comments system to work with this cms but if you wrote a tutorial for it, I have not been able to find it. In my opinion that would make this cms a real winner. If you have not written one yet, please consider doing so. Thanks for the tutorials you have generated so far and look forward to many more.
I agree a comments section tutorial would be awesome! Thanks so much for all this! Do you accept Bitcoin donations (via lightning network)?
Hi,
I have moved from an apache server to a litespeed and I can not get this to work anymore.
[08-May-2021 13:37:09 Europe/London] PHP Warning: mysqli_escape_string() expects parameter 1 to be mysqli, object given in classes/Article.php on line 218
Any ideas?
Cheers
Respected sir
I have mixed the codes of uploading categories and upload images, cms is working fine, image is uploading to folder, but there is nothing updated in imageExtension in database, It is not showing any error. If any combined code is available (uploading categories and upload images) please send on my mail. Or give me the idea, which part i should check, for this problem. both codes are working well separately. thanks.
I have mixed the codes of uploading categories and upload images, cms is working fine, image is uploading to folder, but there is nothing updated in imageExtension in database, It is not showing any error. If any combined code is available (uploading categories and upload images) please send on my mail. Or give me the idea, which part i should check, for this problem. both codes are working well separately. thanks. Further i have seen that if category table removed, then it will save image extension.
Please help
I first did this tutorial in 2013, making two personal websites for myself:
Big Fish Diary
and
Tim Daniels Design
I used the tutorials to teach myself PHP and then I built on what I learnt here to produce the present day versions of the above two websites. Over the years I have maintained the code and recently upgraded to PHP7 on my webhost. Then bored one evening during lock down I Googled this tutorial, and here it is, updated to PHP7 also! Great job mate. I hope to keep my websites going well into the future, and you have helped me gather 9 years of angling data (fish caught, personal best etc).
Great stuff, thanks Tim 🙂
Thank you for the wonderful guide Matt. I have a question regarding the image directory security. As I understand it, the directory requires chmod 777. Setting anything else will not allow images to be uploaded. Is this because php is considered an external user?
Is having these directories set to 777 a security risk? Could somebody not just upload and execute malicious code somehow?
I would really appreciate your thoughts on this. Thanks!
Yes, 777 can be a security risk, depending on your setup. Ideally, you’d set permissions to 755 (which means writable by the user, and only readable by other users). And yes, when 777 is required it’s usually because the web server user is different from the FTP user that created the directory.
However, it really depends on your server setup. Many hosts these days are configured so that the web and FTP users are the same (or at least share the same permissions), in which case you can use 755. Or if you are the only user on the server (eg it’s a VPS or dedicated server) then 777 *might* be OK.
Best bet is to ask your hosting provider for guidance on your specific setup.
Hi Matt great tutorials.
Any plans to update to php8 and any tips for adding registration/sign in and logged in user comments to the cms? Also any tips for adding article search?
Many Thanks
No plans – I don’t have time to
update the blog at the moment unfortunately!