This beginner’s tutorial explains the concept of layers in Photoshop. Layers are a very powerful tool for image editing, and are a fundamental tool in Photoshop for creating complex images.
What are layers?
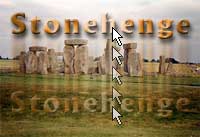
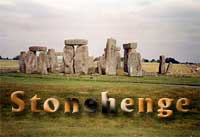
The easiest way to explain layers is with an example. The following image shows a Photoshop document containing two layers, a background layer and a text layer:

If you like, you can download this .psd file so you can play around with it for yourself.
Each layer can be manipulated, drawn on, and moved around independently of any other layer. Imagine that each layer is actually a physical sheet of clear plastic, with the graphic imprinted on the plastic:
Creating a layered document
Layers are controlled through the Layers palette in Photoshop. In this palette, you can see each layer along with a thumbnail showing the contents of the layer.
At the bottom of the palette you’ll see a little “New” icon. Click on this icon to add a layer to your document:
You can now draw on your new layer, and it will not affect the layers below it, just as if it was a separate sheet of plastic on top of the image. Cool, eh?
Before working on a layer, make sure you click on the layer you want to work with in the Layers palette first, so that it becomes active. The currently active layer is shown highlighted in blue above (Layer 1).
Naming layers
“Layer 1” isn’t a very memorable name, but luckily you can change the name of your new layer easily! Double-click on the Layer 1 layer in the Layers palette and you will see the Layer Options dialog appear. You can then enter a new name for your layer in the “Name:” box, and click OK to rename the layer.
Moving layers around
Just like a real sheet of plastic, you can “slide” your layer around on the page. To do this, select the Move tool (the arrow with the crosshair next to it, at the top of the Tools palette), or press the V key. Select the layer you want to work with in the Layers palette (e.g. the “Stonehenge” layer in our example), then you can move the layer around by clicking with the mouse in the document window and dragging:
A nice shortcut is to just hold down the Control key and drag to move your layer around. This has the advantage that you don’t have to switch to the Move tool and back again – the current tool remains active while you move the layer.
You can also move layers above or below other layers in the document. To do this, click on the layer in the Layers palette and drag it so that it’s where you want it to be:
Another quick shortcut here is to use the Control + [ key and Control + ] key to move the current layer down and up respectively.
Showing and hiding layers
Often it’s useful to be able to hide a layer so you can work on the layers underneath it, or hide all other layers so you can concentrate on the current layer. You can do all this using the little “eye” icons next to each layer in the Layers palette:
To hide a layer, click once on the “eye” icon. The eye will disappear and the layer will become invisible.
To show the layer again, click again on the eye icon. The layer will reappear.
To hide all layers except one, Alt+click on the eye icon for the layer you want to keep. Alt+click on the eye again to reveal all the layers.
Copying layers
You’ll often want to duplicate an existing layer so that you can work on a copy of it. To make a copy of a layer, either drag the layer in the Layers palette to the New icon at the bottom of the palette, or select the layer and then select Layer > Duplicate Layer (this method allows you to name the new layer too!).
Deleting layers
If you get carried away with your layers(!) and you want to delete one, find the layer in the Layers palette and drag it down to the little trash can icon. Or select Delete Layer from the Layer menu.
Preserving layer transparency
Often, not every part of a layer will be covered with graphics. For example, with our Stonehenge example, the text layer only has pixels for the word “Stonehenge” at the bottom; the rest of the layer is empty. These empty pixels are transparent.
If you check the Preserve Transparency box in the Layers palette, all the transparent pixels in the currently selected layer will remain transparent, even if you try to paint over them or fill them.
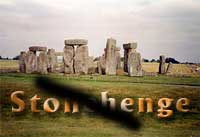
This is often very useful, as it allows you to work with just the stuff in the layer, rather than the whole layer. For example, here we’ve drawn a black like with the Paintbrush tool right through the word “Stonehenge”, both with and without Preserve Transparency checked:
Changing the opacity of layers
You can change how opaque a layer is, in other words, how much of the underlying image shows through the layer, with the Opacity option in the Layers palette:

You can enter a value by clicking on the number in the box and entering a new number, or by clicking on the arrow next to the number and then dragging the slider that pops up. You can also use the keyboard number keys 1, 2, 3, etc to quickly enter values of 10%, 20%, 30% etc, but this only works if you’re using a tool that doesn’t have an opacity option (for example the Marquee tool).
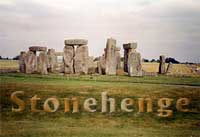
This option allows you to blend layers together subtly, with the topmost layers being slightly transparent, allowing the bottom layers to show through. For example:
Blending options
If you click the Normal drop-down box in the Layers palette, you will see a long list of blending modes that you can choose for the current layer.
The best way to understand these modes is just to play around with them and see what they do! Some of them, such as Overlay and Soft Light, are good for creating realistic light effects, while others such as Difference and Exclusion produce some quite wacky effects!
Thank you for the helpful tips.
@rcohn: You’re welcome – glad they helped 🙂